Putting the C in CSS Crimes

Speaker Introduction and Cohost CSS Crimes: Hijacking Existing Keyframes

Lyra Rubain introduces herself as the creator of CSS Clicker and an x86 CPU emulator written entirely in CSS, tracing her CSS journey back to the social media platform cohost. She explains that while cohost permitted inline styles but not style blocks, users discovered creative workarounds — including hijacking Tailwind's built-in spin keyframes to produce animations — establishing the mischievous spirit of 'CSS crimes' that runs throughout the talk.

Building CSS-Only Games and Interactive Art with Details and Summary Elements

Lyra demonstrates how the HTML details and summary elements act as clickable state triggers, enabling fully interactive CSS-only experiences without JavaScript. She walks through a point-and-click adventure game built from chained details elements with absolutely positioned images, and then shows a pixel art program that cycles colors by exploiting the spatial layout shift that opening nested details elements produces.

2D Games, Advanced Cohost Techniques, and the Case for CSS as a Real Language

Lyra scales the pixel-shifting technique into a directional 2D top-down adventure game and surveys further cohost tricks: element resizing for 3D positioning, CSS counters for live score display, animation-based randomness, and SVG data URIs for embedding style blocks. She then pivots from cohost's inline-style constraints to full CSS crimes via the checkbox hack, and frames the philosophical question — 'Is CSS a real programming language?' — that motivates the rest of the talk.

The CPU Hack: Enabling Iterative Loops in CSS Custom Properties

Lyra introduces the foundational technique that makes a CSS CPU possible: the 'CPU hack' discovered by JN Ory in 2023, which enables repeated iteration of CSS custom properties — something CSS normally prevents. She explains how container style queries can gate animations so that a triangle of variables feeds into each other with a math operation applied each clock cycle, effectively counting upward and demonstrating the minimal loop primitive needed for computation.

Building Memory, Registers, and a Minimal Instruction Set

With the clock mechanism established, Lyra expands the CPU by adding multiple memory variables, a read function that maps integer addresses to stored values, and a write mechanism that conditionally updates the targeted variable. She introduces an instruction pointer that cycles through program memory, implements the first real instructions — MOV and basic arithmetic — and demonstrates hand-compiling a short program into machine code that loads and executes inside CSS.

Adding Control Flow: Flags, Conditional Jumps, and Loops

Lyra adds branching and looping to the CSS CPU by implementing a compare instruction (secretly subtraction) that sets zero and sign flags, and a family of conditional jump instructions (JL, JLE, JE, JGE, JG) that read those flags to redirect the instruction pointer. She walks through translating a ternary expression and a for loop into assembly and shows the CPU successfully executing a three-iteration loop.

Implementing I/O: ASCII Output and On-Screen Keyboard Input

Lyra adds interactive input and output to the CSS CPU. For output, she builds an ASCII integer-to-string lookup table and appends characters to a CSS content-list property displayed via a pseudo-element. For input, she constructs an on-screen keyboard that writes key values into an input register using hover and active pseudo-selectors, then demonstrates a live echo program that waits in a polling loop and prints each keystroke to the screen.

Scaling to x86: Bitwise Operations, the Stack, and the Peculiar Register Layout

Lyra begins adapting the custom CSS CPU to match the real x86 architecture, starting with bitwise AND, OR, XOR, NOT, and shift operations implemented by decomposing values into individual bits and reassembling. She covers the stack — essential for function calls and return addresses — and then walks through x86's famously odd register layout, including the AX/BX/CX/DX split into H and L halves stored in the counterintuitive ACDB encoding order that even Intel's own documentation tends to gloss over.

Decoding Variable-Length x86 Instructions and the ModRM Byte

Lyra tackles x86's most complex feature: variable-length instructions that range from one to five bytes depending on a secondary ModRM byte that encodes operand types, addressing modes, and sometimes even the instruction identity itself. She explains how 'group instructions' sharing the same opcode byte (such as 0x80) require decoding ModRM before the operation can even be identified, and describes implementing the complete ModRM lookup table in CSS to handle every addressing case.

Compiling Real C Code to x86 and Running It in CSS

With the full x86 emulator complete, Lyra demonstrates the payoff: compiling an actual C program — featuring string output, a Pascal's triangle function with nested loops, conditionals, and direct register usage — using a 16-bit GCC toolchain. She shows the compilation, hex dump, and decimal output steps, copies the binary values into CSS memory, and runs the program live in the browser, proving that C code can execute inside a stylesheet.

Q&A: Doom, Speed, Browser Compatibility, and the Origins of the Project

Lyra fields audience questions covering whether the emulator can run Doom (theoretically yes, but she would rather reimplement it in CSS directly), the silliest CSS thing she has built (a DNS-triggered comic-sans injection), how the project started (needing a fresh talk topic after the checkbox hack was deemed too familiar by the organizer), the build time (roughly a week of focused work), why it is Chrome-only (reliance on CSS features not yet available elsewhere), and the emulator's clock speed — approximately 5 Hz, versus the original Intel 8086's 5 MHz.

Without further ado, I would like you to put your hands together for our next speaker, putting the crimes into CSS. It's Lyra Rubain. Best of luck, Lyra.

So, hi everyone. I'm Lyra and I will be giving you a talk about C, which stands for C, the programming language. So who am I? I'm Lyra. You can find stuff on my website, lyra.horse. The slides for this talk are there already up if you need them to like I don't know.

Anyways, what do I do? I started off my CSS journey on this website called cohost. And then I learned some CSS crime stuff from there and took it on with me. So next I made this game called CSS Clicker. Who here has played it? Awesome. Which is a CSS only game.

What else do I do? I blog about CSS. I break browsers. This one was, I think Google messed up on that one. But my latest creation is x 86 CSS, Which is a full on x 86 emulator written in CSS.

And that is That is what this talk is going to be about. But since you all just came from lunch, I think we should start off with something simpler. So let's go back to where I began, the cohost stuff. Some of you maybe have already seen those slides, but they're awesome.

So what is cohost? Cohost is this, what's this, social media website where among other things, you could use HTML in your posts. Now the thing is, you could not use style blocks. But you could use inline styles. And this by itself allows you to do a lot of stuff.

People started using it to make fun little posts, recreations of stuff, and just like funny little things. And these are very basic. Just some fonts and colors and stuff. But people started figuring out some cool tricks. Let's take a look at this one here. This post has animation in it.

How do you do animation in CSS? Well of course you just use keyframes and then you can have an animation. But we can't use a style block. Oh no. How do we have the animation? Well if you poke around on the website, maybe you can find some other keyframes already there. There's the Tailwinds spin keyframes which they use for like a loading thing. But we can use that.

We if we put it in our thing, it starts spinning. And of course, if we add a transform to our element, we can control what it does. So that's a fun way to have animations. Let's take a look at another CSS crime. So this one is cohost 22, I believe.

It's this desktop thing where you can click on stuff, and you get windows opening and stuff happens. Pretty neat. How does that work? Well it uses the details element which you probably are familiar with. You click on it, it opens up and you can start styling it. You make it look like a window, like an icon, position things absolutely. And there you go.

You have an interactive desktop thing. Pretty fun. Okay. But what else can you do with this technique? Well you can make a point and click adventure game like this one from Rykarn. This game has a point and click adventure game that has items, different endings, a lot of stuff.

And the way that works is it just has a chain of details and summary elements like so. So this is a game I made where you can see I'm just opening up the details elements and it plays out the story. But what we can do of course with styles is we can add images. We can position them all absolutely on top of each other. And now when you click on stuff, it opens up the next scene. You can then have the summary elements cover the things you want to be able to click on.

And just like that, you have a full on game. You can see we go ahead and go in the door, pick a door, we lose. We can go in the door, pick a door, we win. Pretty cool. Okay. Let's take a look at another CSS crime from cohost. This one is an art program. You can click on the pixels, and you can have different colors.

Pretty cool, especially like inside of a social media post. And the way this works, if you look at the pixel, is that you can just keep clicking on the pixel and it keeps cycling through colors. How can we do that? Well it uses the same details and summary element technique from before. But it does it in a very very specific way.

It takes the summary elements and it places them in this very specific pattern. If we now take that pattern, we put it inside of a div, and then we have another div that just show a single pixel to the user. What we can do is we can have the summary elements have details of specific sizes in there.

And once you start clicking on them and opening the details, it starts shifting the entire thing around. So if we click on here, everything moves to the right. We get the next color. We keep clicking. Get to the ends. We're back on the first color. And now of course, by clicking on them, we are closing them. So that's how you can have a color changing pixel.

And I guess the only thing to note here is that you need absolute positioning for the summary elements. And then you can just use container percentages to do that. Okay. Let's take a look at another CSS crime. This one is a two d top down adventure game made by Corncicle. Pretty cool. How can we make a game like that?

Well we already have a thing from our pixel thing for moving stuff around. So we can keep clicking in a spot to move to the right. But there is no button to move to the left. But what we can do is instead of using a positive percentage, we can use a negative one. And this shifts around the way the elements are placed so that if we overlay a d pad, going to the right means that there will be a button available on the left.

And this can be done vertically as well, of course. Now this is not a game. This is just moving around. So let's make it into a game. I made this little map here where we need to get the key to open the lock. And the way we can implement this is we just make a copy of the map and we turn it into elements like so.

Now that the elements are on top of the buttons, we can click them. We can't go down because the fence is in the way. Go to the right. We can't go through the lock. Go to the right. And then when we pick up the key, which in reality is just closing a details element, you can see the lock disappears and we can go through the gate.

And then we win. Yeah. If you want the source code it's on Gist. Okay. So that's some Gohost CSS crimes. I'm quickly going to go over some other features we used on Gohost back when that was still around. So we have resizing of elements of course, which you probably already know about. But you can use this for all sorts of things.

For example I used it to control the three d position of yourself in a room to make a three d game where you can move around by just moving your mouse. Yeah. Okay. So another technique is counters. So what you can do is you can use the size of the container to place numbers that move based on the size of the container. So what this means is we can have a number output for how big div is.

So if we resize this now, you can see the number count updates based on the size. And what you can do with that is you can use this, for example, to have a high score. So this is an Ozoclone I made for cohost. And every time you click on one of the circles, it opens up a div that adds one pixel to the container.

And thus it counts up the score. And I learned about this technique from this post which was made before mods was a thing in CSS. So the way this was done back then was like that. Okay. What else? We have randomness.

So randomness is just you animate something and when the user clicks on it, whatever they click on is what gets picked. And I use this in blackjack for example to pick random cards. And last we have SVG backgrounds, where because you can just use a data URI, you can include stuff like style blocks in the SVG. So you can have animations, and you can have media queries.

So for example, you can have a div where if you resize it, it starts playing an animation. Okay. So that's it for the cohost stuff. You can find more stuff there. There is the yellow afterlife's list of cohost CSS crimes. I would recommend taking a look at it. And there is also the CSS Puzzle Box by Blackl, which is really cool. This was cohost stuff.

Cohost was unfortunately shut down, which is quite sad. But anyways, let's move on to CSS crimes that are not limited to just inline styles. Because all of this was just inline styles. So if with Coco CSS Crimes, you had the details element where if you click on it, it does something.

What you have for full on CSS Crimes is the checkbox. You can click on it and it does something. You don't seem to be amazed by that. Wait, I got the email. Let's see. Okay, so it seemed the CCC audience was fouled by the concept of checkbox techniques.

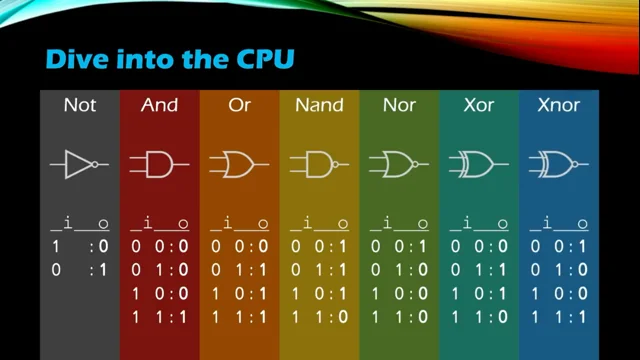
But the CSSD audience is well introduced at CSSD twenty sixteen. You already know about this stuff? Okay, I'm gonna just skip through the slides. Okay, so logic gates. You can do logic gates with checkboxes. You had a session about this last year?

Okay. I guess this means I will have to teach you about something that hopefully none of you know about, which is x, the x 86 architecture. I I have this slide only because I really enjoyed those images.

But okay. What's x 86? X 86 is the is a CPU architecture introduced back in 1978 with the Intel 8,086. And it's the architecture that powers all modern computers. Well, except for Macs and some new Windows computers.

But what this architecture is, is something that pretty much all modern software runs in. So next question. Is C a real programming language? Raise your hand if you think C is a real programming language. Okay, I see a few hands.

Yeah, probably. Is CSS a real programming language? Well we know C is. And C can compile into x86 assembly. So if we can run x86 assembly in CSS. Okay. I'm going to give you all a little warning here.

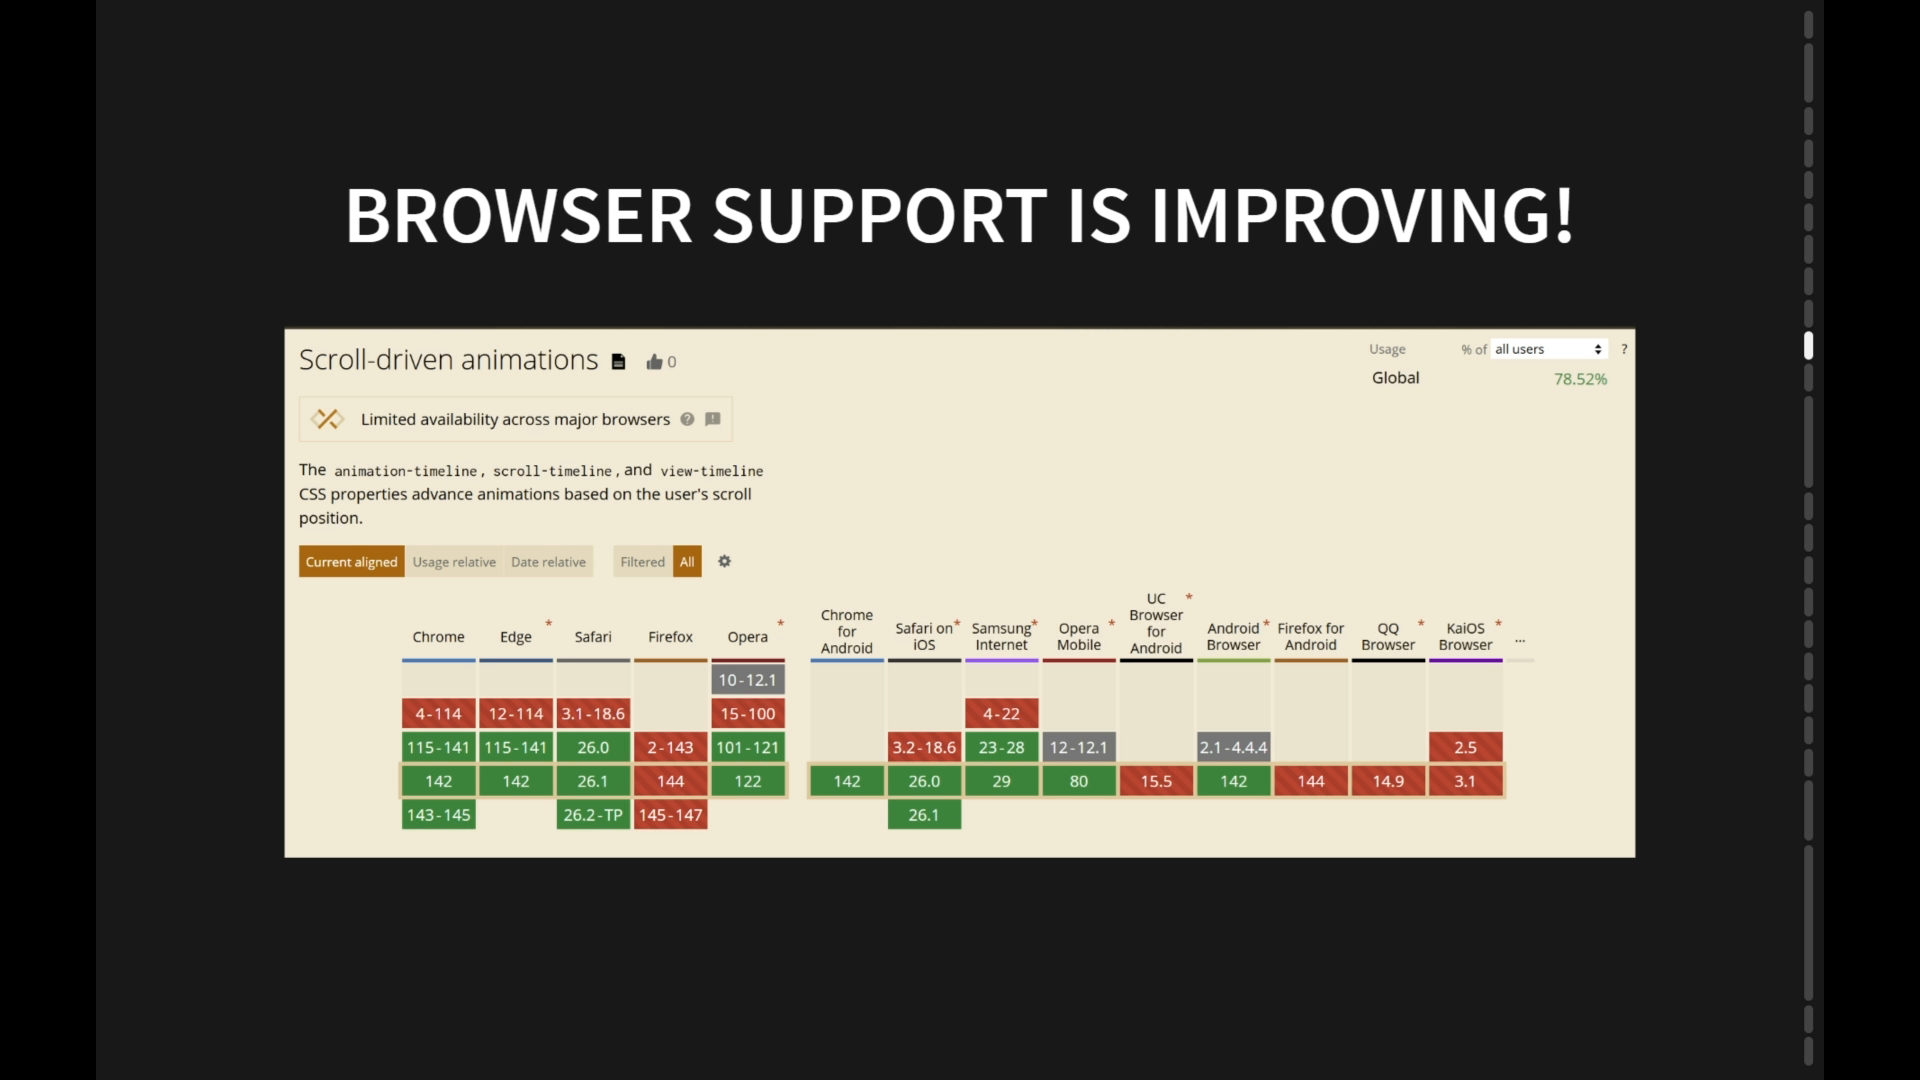
What follows is going to be Chrome only unfortunately. But yeah. What you're about to see, I don't really blame browser vendors for not implementing all of that properly. But Okay, we start off with the CPU hack. The CPU hack is something JN Ory discovered back in 2023.

And it allows the repeated iteration of CSS variables. So if you wanted to implement something like that in CSS, that's easy. But the moment you want to have a loop, something like that, you can't do it. Even if you try to work around it by having one variable feed into each other, it doesn't work. And this is something the CPU hack addresses and allows us to do. And with this post, Chainori put out a really good example of it being in use, which is this Game of Life clone where it can run infinitely.

Which is something that's not really possible unless you can repeatedly iterate upon variable values. So I'm going to show you how I implemented the CPU hack. It's a little bit different from the original one from Chain Ori. But it's like kind of the same concept. So we start off with some key frames to run a clock.

So you can see it goes from zero to three. And what we can do with that is we can now use container style queries. For example, we can change the background color of the text. Now one thing container style queries allow us to do is also control animations. Usually you can't have one animation control another one.

But with style queries that is possible. And what you can do with that is you can have another variable. So here I am setting the clock two to the variable clock, like the origin clock variable. But because I am pausing this animation most of the time and only running it while the clock is one, you can see that the clock two only updates while the clock is one.

And what we can do with that is we can have this triangle of variables where they sort of all feed into each other, while at the same time evaluating a math expression on them. And this means that we can start counting up numbers. It's really useful. To better explain what's going on there, we start off with the variable a being the value zero.

Then the clock will copy the variable a into variable b. That will go from variable b into variable c. And then it will go back into variable a, but this time with the math operation applied. So a is number one now. We repeat that. B becomes one. C becomes one. And then A is two.

And as we keep repeating that, we are running a math operation every clock cycle. So we have a CPU. Unfortunately, our CPU has just one instruction and one register.

Let's fix that. We'll start off with the register. So let's add some more memory to our CPU. Now it doesn't really matter whether it's the registers or the memory in the context of CSS. But how we do that is pretty simple. Since we already have one variable, we can just add more.

But now the next problem is we have memory but we have no way of accessing it. And ideally we would want to have a function to read out memory addresses, and also some way of writing them. And the way we can do that, let's start off with the reading, is we are going to have a function where you give it an integer. And it gives back the according memory address value.

And the way that works is we just have an if statement with every single memory variable in there. For writing, what we do is we have variables where we define what variable we're writing and what the value is going to be. And then every single variable is going to have an if case where it checks whether we are writing into that specific variable.

So this is memory addressing. We can now read and write memory. So what next? Well we want to now be able to read a program from the memory. And for that we're going to need an instruction pointer. So what an instruction pointer is, is it's this special register that points at the memory.

And whatever it's pointing at is the instruction we're currently executing. So what we do from here is we make it read out the memory to find out the instruction. Then we make it cycle through the program, like so.

And that's our instruction pointer. It's reading the instructions. We can use that to apply styles. So here I am applying transparency when it's 10 and an outline when it's 20. And it's working. Though we don't have any real instructions yet. So let's add some. We are going to start off with the MOV instruction.

What this does is it moves a value into a register or a value from a register into a register. And just so it's not confusing, the assembly notation there, the destination is before the source. So that's why it's written as like mov reg one thirteen. But yeah, that's the first instruction.

And then we are going to add some math instructions, just so we can do some math stuff. And that's enough instructions for now. So let's put them all in a nice little table for us. And let's write the program with these instructions. The program I'm going to run is this program here. But we can't translate into assembly directly.

First we need to deconstruct it into parts, like so. Then we can take each line and turn that into the representative assembly. And finally we can take the assembly and turn that into machine code. So what we're doing here is the registers are just going to be negative values. And the instructions are gonna turn into the numbers in our table.

And this is actually what your compiler does. But we are doing it by hand. Now the way you're going to load this program into CSS is by taking these numbers and throwing them into the initial values of the memory. And now we have our sample program loaded. So let's actually execute this program.

To execute this program we need to make a few adjustments. So first off, of course we need to make it read the arguments as well. So our instruction length is going to be three. We are going to read the arguments from memory. And also we want to make sure we can get the value of the memory address in case it's a register.

So we are going to add more variables for that. And now for the MOV instructions, for the math instructions, we need to save the value somewhere. So we are going to put the first argument as the destination. And then the data we are writing is going to be a function. And this function is going to contain all of the instructions.

So we are going to have the mov instruction. We can add the other ones from this table. And now we can implement every single instruction as a CSS function. So to implement these, the mov instruction is just getting the value of the second argument. The rest of them is just basic CSS math stuff. And that's really all we need to run the program.

So let's try running it. You can see it's stepping through. And it's done. You can see your results there. So we finally have a CPU with no logic.

So let's add logic. What we need for logic? First of all, we want to be able to jump around in the code. So we are going to add a jump instruction. Then we are going to add a compare instruction, which secretly is just subtraction. And it sets some flags. It doesn't save its result. It saves flags whether the result is zero or negative.

And then we're going to have jump instructions that can use the result from the comp instruction to make a jump if the condition is true. There's a lot of different jump instructions we can implement. You can see there's like jump less, jump less equal, chump equal, chump greater, chump greater equal, whatever. X86 has more of them, don't worry.

I mean, some of those are duplicates. Anyways, the way this work is that we check the flags. For example, if the zero flag is set, which means we subtracted a number from itself, it means it's equal. And the same for the other ones. So you're using these flags to make these operations happen. So okay. We have these new instructions.

Let's make a program with them. The first example I'm going to show is a program where we have a ternary f. So we can deconstruct it and make it into assembly like so. You can see we have the compare instruction. And right after we have the jump less equal instruction, which is the conditional part. We can also use this to make loops.

So this is a four loop example. You can see we are going through this loop three times. So in the assembly, we are doing a compare at the end. And if the compare is less, then we are jumping back and running the code again. So let's implement it. To implement this stuff, what we need to do is first we need to, of course, add the flags.

Then we need to make sure we can change the instruction pointer around. So we are going to make it writable just like any other register. And then we are going to want to make sure that the right destination is something we can change too. So we are going to have a new function for that. This new function is going to default to the first argument.

But the rest of the functions in there are the special cases. And what the special cases do is, for example, the compare instruction only writes into the flags. The jump instruction writes into the instruction pointer. And the JL instruction only writes into the instruction pointer if the flags are set as required.

Otherwise, it just writes it nowhere. And that's all we need, so let's run it. You can see it gets to the end, goes back, goes back one more time, and then it's done. We have our result. But well we have a CPU and it can do stuff but there's no IO. There's no way for us to interact with our program. So how do we have IO?

Let's start with the output. We want to be able to print ASCII text out from our program. And the way we are going to do it is if we write into a special out register, it's going to print that specific character on the screen. And to do that we are going to need a CSS function that converts integers into ASCII strings.

What would an example program look like with that register? Well if we want to print out the string, we're just going to take every single character and we're going to move it into the out register. And the characters are just going to be numbers. Okay. Let's try running that. So to run that, what we need is we first need to of course add the register.

Or this is not actually a register. This is a property for the output text. And what's special about it is it uses the content list type, which is the same type that the content property uses. Which means we can keep putting strings after it to make it longer. Then we will have the output set to itself, unless it is being written to.

In which case it's going to be itself, plus the extra character we are writing. And now last oh, we also need to, of course, show the text on the screen with a pseudo element. But now last, we need to implement this function here that converts integers into strings. And the way that's going to work is we're just going to have a table like that.

It just has the string for every single case. But now if we run our program, you can see it starts printing out text. Okay. So that's output.

Let's do input two. So for input, we are going to want to have an on screen keyboard where if we press a button, we detect it using the hover and active pseudo selectors. And then we write the output into an input register, or the input into the input register. What we can do then is we can have a piece of code that that constantly checks whether we have input anything.

And if we have, it jumps out of the checking loop and does something. And last, we're going to have a register to hide the keyboard when it's not in use, just to be nice. So what would an example program look for this? Well let's say we want to make it so that if you press a letter, it's just going to print it out.

The way we would implement that is we have a loop that keeps waiting for the input. And once the input appears, it copies the input into the output, then clears the input, and then jumps back into the beginning. The way we are going to implement that is first we are of course going to need the keyboard. You get the CSS for free if you're cool.

Then we are going to need extra registers. And then we are going to make it so that the keyboard is not shown unless the register is set. And last, we need to make it so that every single key, when you hold it down, is writing into that input register. So we're just going to have every single case in the code like that. But Okay, let's try it out.

So I'm running the program. You can see it's showing the keyboard. You can see it. We press a letter. It types it out. Let's try it again. Let's press another letter. And there we go. So this is input and output.

And now do we finally have a CPU? Yes. We do have a CPU that can do everything we want. But it's not x86. So this is going to be a bit painful.

I'm going to try to just run through this now. I'm not going to be showing in-depth examples because x86 is kind of out there. So first I have this bonus slide. I don't know where to put it. But did you know that even if you don't have a custom property, you can throw it through a function that's typed to be able to use style queries on it, even if you use cloak and stuff like that.

I don't know. I just think it's a cool trick. Maybe you'll find it useful. But anyways, first for x86, we need bitwise operations, which we are going to implement like this. Hopefully you can see the text. No? Okay. I'm going to show it with four bits because it's a bit easier to see. So essentially we're just going to take the bits of every value.

We're running math operations with them. And then we're putting it all back together. And the same way we can implement the OR instruction, the XOR instruction, and the not instruction. Though it turns out for not, there's an even better way to implement it. Then for logical shifts, we can do this stuff.

I don't know why, but CSS and everything in the browser kept breaking down with that left shift. So I changed it to that. And then it was fine. But yeah, that's the bitwise operations. I think they are quite nice compared to everything else. So then there's the stack, which I'm not going to go too in-depth with. But essentially the stack allows you to put values into it and pop them out.

And it's used, for example, to do function calls. So when you call a function, it saves the previous instruction pointer address. And then when you return from the function, it knows where to go back to. So it's pretty useful to have that in a CPU natively. But Okay, let's take a at the registers of x86. So the registers in x86 are ax, bx, cx, and tx. Those are the main registers.

Pretty easy to remember right. Well it turns out those x registers split themselves into h and l registers for some reason. And when you thought that that like a b c d order was nice, it's actually a c d b.

Which is which is so absurd that the developers of debugger tools pretend it's not a thing. And even Wikipedia and Intels own manuals pretend it's not a thing. But behind everything, the register encoding is in that order, which is what we're going to have to deal with when we are writing an x86 emulator. Okay.

So those are the main registers. We also have the instruction pointer. That makes sense. We have the stack pointer and some other pointers. I guess that's nice. The We segment registers, which are there to address more than 64 kilobytes of RAM. Luckily, we don't really need to deal with that.

We don't want programs that big in our CSS anyways. And then we come to the flags. So of course, we have the zero and sign flag that we're already familiar with. Then we have the carry flag and the overflow flag, which are pretty much the same thing. I think the difference is that one is signed and the other one is not. And if you thought that was not enough carry flags, there's also the half carry flag when you like to have a carry.

Then we have the parity flag for whether the amount of bits is even or odd. We have the trap and interrupt flags, which are actually kind of useful. We have the text direction flag. And then we have no more flags. They left the rest of them empty. They ran out of ideas, I think. But those are the registers.

So we have to implement all of that. Okay, so what else does x86 have off there? Well, it's a 16 bit architecture. But our memory is eight bit. So remember how we were writing memory addresses like so? Well actually we have to split them up into two and then split the value in half and write half the value in one memory and the other half in the other memory.

Okay but now we come to the worst part which is that x 86 instructions are all like, okay so our instructions that every instruction was three bytes long. Makes sense. X 86, how long are they? Well, they are all different. These instructions are one byte long.

These are two bytes long. These are three bytes long. And then we have a couple that are five bytes long. So that's already a bit annoying. But we can just put all of them in a table. Right? Right? No, because all of those instructions, we don't even know how long they are.

So the reason for that is the ModernM byte. So what is ModernM? Well let's take an instruction that uses ModernM. This is the subtract instruction byte hex 28. Let's take the modern table from Wikipedia. Let's take this another table. And let's try to decode an instruction. We have some bytes there.

We don't know how long this instruction is. The first byte tells us it's the sub instruction. Okay. But then the next byte, the modern byte, we must first decode. And based on that, we take the mod field and the rm field to find out that the first operand where it is writing to is the register b p plus register s I added together. And that's the memory address.

And of course the middle one is the second operand. Okay. But at least we know that this instruction is two bytes long. So that's Okay. But let's take another instruction. This instruction, it's of course the sub instruction. But when we take it apart into the model rem thing and we do the lookup, we get this SI plus TISP 16 thing.

What is the TISP 16? That's not one of the registers. Well it's the next two values. So what this means is once we finish decoding it, this instruction is four bytes long. And to figure that out, we needed to read the second byte and do a lookup into this model rm table. And this table, I mean it makes sense for the most part.

It has like a pattern going except for just like one thing there, one cell. To implement that in CSS, I just had to cover every single case. But yeah. Now where it gets even worse, there are x86 group instructions. I'm going to show you a list of instructions.

So these are various different instructions. But you'll notice that they are all byte 80. What's up with that? Well it turns out that which instruction it is is dependent on that modern m byte. So we first have to decode the modern m to even figure out what the instruction is. But I'm I'm sure they had good intentions.

I'm sure they were running out of space to put instructions in. I guess that's why they added the instruction byte 82, which is exactly the same as byte 80. And it is also why they left half of like, well not half, but they left a lot of the instructions empty. Okay. But we can implement it in CSS.

We just implement all of the instructions And for some of them, we have to do the modern m checks. But it's good. Now we truly, finally have a CPU. And we can run C code in it.

So I wrote this little C program here. You can see it's doing a lot of stuff. We are using our hardware registers here for a function. We have some strings that we're printing out. And we have a function call to the Pascal's triangle, which does a lot of programmer y stuff. It has for loops. It has arithmetic and conditionals and all that.

So Okay. Let's run the C code. How do we do that? Well, we put the C code in a file. We compile it with GCC. This is a special version of GCC that's meant for 16 bit architectures. But otherwise it's kind of the same. And now we have our program file, the binary file.

We can take a look at its hex dump. This is our program. We can even use obg dump to find out what the instructions are. And actually what we want to use is this program called od that will print it out as decimal values. But this is our program. We can just take those numbers from there and copy it into our CSS memory. And now we will finally have an x86 C program that we are going to run inside CSS.

So let's give it a shot. Thank you. I'm just going to keep it running in the background.

If you want to get the slides, those are on my website. If you want to visit my blog, I'm going to do a write up about x86 CSS at some point. It's on my site. If you want to try x 86 CSS for yourself, it's also on the site, you can find everything there, my contact information, so on. But yeah, thank you.

Wow. Wow. Lyra, please join me on the chair of Inquisition. Help yourself to a flower if you want. Okay. Iris said, but can it run Doom?

So this specific emulator, no. I think theoretically you might be able to make it work. But honestly I would just reimplement it in CSS directly. That's a bit more efficient.

There you are Iris. And she continued, I love everything you do. What's the silliest CSS thing you've ever made?

Silliest CSS thing. It has to be some sort of a weird injection attack or hack I've done. I used to have a domain where if you went on shady site to do a DNS lookup on it, it would make the entire page comic sense.

CJ asked, how did you come up with this idea and why?

Well it kind of, I've always wanted to do something like this. But I really got started with it once I wanted to give a talk here. And PPK told me I already know about the checkbox hack, so I had to quickly figure something else out to talk about.

So PPK is the reason why. So blame him. Jesper, or presumably Jesper, said how long from idea to implementation did it take to build the x 86 CPU?

Well, I have been looking at this project on and off for a while. But I think most of the work was just a bit over a week.

Really? I'm asking, why is it Chrome only?

It uses some CSS features that are only available in Chrome. And I'm not sure if the variable key frame thing would work in other browsers too. But first we would need to get the extra features.

Fair enough. Well, Apple rep and Firefox reps, make sure it's in WebKit and Gecko ASAP, please, Vadim. Maybe Looking at

I can have a feature request. I think it would be cool if the Chrome DevTools could debug the CSS without crashing.

Asking for the moon there, honestly. Can I go And Alexis asked, how fast can the CSS x 86 CPU run?

I think it could be optimized. But as it runs currently, the the main demo version of it is running at about five hertz. Now for comparison, the original eighty eighty six ran at five megahertz. So that was a million times faster. But I feel like in a way, this just comes to show how powerful computers are.

Because you can make it do stuff. And you can have menus. You can have it do maths. And when you have a computer with gigahertz, multiple gigahertz, multiple cores, and it takes a few seconds to do something, it really makes you think like, oh maybe maybe we could make something a bit faster. And

did you send the browser or spec bugs for the bitwise problems that you encountered?

No. Half the time, I wasn't sure if it was a problem with me or a problem with the browser. Two:

It's really hard when the DevTools keeps crashing. Who's from Google here? Okay, you want to talk to that person over there. Can you fix it tomorrow? Yeah. Tomorrow. Folks, give it up for Lyra Rebane.

.css-day {
    date: 'June 11 & 12 2026';
    location: 'Amsterdam'
}

Putting the C in CSS Crimes
Lyra Rebane

Sponsors:

  • Google
  • AG Grid
  • IX
  • Polypane
  • 9ELEMENTS

A photo of Lyra Rebane, a person with long hair and bangs, wearing a dark top and a heart-shaped pendant, looking directly at the camera.

A stylized logo spelling "CSS DAY" created from white rectangular blocks on a black background.

Google logo.

AG Grid logo.

IX logo.

Polypane logo.

9ELEMENTS logo.

LYRA RUBAIN

.now {

13:55 | Lyra Rebane

CSS Day logo. Google logo. AG Grid logo. An 'X' icon.

.now {

13:55 | Lyra Rebane

putting the C in css (crimes)

Lyra Rebane

lyra.horse

@rebane2001

@rebane2001@infosec.exchange

An icon with a purple rounded rectangle containing the letter 'C', representing the C programming language, is integrated into the title.

putting the C in css (crimes)

Lyra Rebane

lyra.horse

@rebane2001

@rebane2001@infosec.exchange

A large purple rounded square contains a white letter C. Faint hexadecimal code is visible in the background.

putting the C in CSS (crimes)

Lyra Rebane

lyra.horse

@rebane2001

@rebane2001@infosec.exchange

A stylized purple icon with a white letter 'C' inside, integrated into the presentation title.

putting the C in CSS (crimes)

Lyra Rebane

lyra.horse

@rebane2001

@rebane2001@infosec.exchange

A purple logo shaped like a rounded rectangle with a cutout, containing the letter C, is integrated into the title. Faint hexadecimal code is visible in the background at the top of the slide.

putting the C in CSS (crimes)

Lyra Rebane

lyra.horse

@rebane2001

@rebane2001@infosec.exchange

A purple rounded square logo with a white letter C inside is integrated into the title "putting the C in CSS".

what do i do?

what do i do?

  • nobody has opinions on social media. it's quite right just
  • on these existing platforms have some good ideas, but no one's managed to create new social media with them yet
  • they usually only manage to create something that works, you and me as users, better than existing platforms
  • there is value in being in the same place as everyone
  • for some, but for more people who are escaping to an online, identity, and word of mouth paradise
  • but nobody wants a digital panopticon
  • on current social media, there is an ever-present fear that someone will use your post, your image, and your content in a way that you don't consent to
  • often built to encourage this sort of behavior to drive up engagement, but they don't have
  • metrics are ruining our lives.
  • social media is designed to provide us active feedback into the flaws that
  • trigger all the anxieties of social media, so that we know how to monetize more.
  • the value of social media in the posts
A screenshot of the Cohost social media platform interface. It displays a user post by "lune" which includes an image containing the text "I THINK BOLD TEXT ON COHOST SHOULD ALWAYS BE IN PAPYRUS". The interface also shows navigation elements for Drafts, New Post, Notifications, and DMs.

what do i do?

A screenshot of the cohost social media website. The screenshot shows a user's post about bold text always being in Papyrus font, featuring a pixel art skull image. To the right, there are multiple paragraphs outlining the platform's philosophy and critiques of other social media.

Screenshot of the cohost website

Screenshot of a website interface, likely cohost, featuring navigation links like 'Settings', 'FAQ', 'About', and 'log in'/'sign up' buttons. The main content area displays several section headings and paragraphs discussing social media, alongside a distinct 'MUSIC' list with numbered entries in a sidebar.

Screenshot of the CSS Clicker game interface on Cohost

A screenshot of a dark-themed web application interface. On the left side, there's an 'Upgrade Store' menu with various options and a list of items below. In the center, a large pixel-art style icon depicting a file with two refresh arrows is shown. Below this, a digital counter displays '00188730a' followed by the text 'views on your website'. The right side of the screen displays several paragraphs of text with various headings, resembling articles or blog posts.

what do i do?

Screenshot of a desktop showing two browser windows. The left window displays a simple HTML webpage titled 'My cool CSS website'. The right window displays a web application interface with various elements and a counter showing '00188730 views on your website'.

what do i do?

A slide featuring two screenshots on a light blue background. The left screenshot shows a vintage-style browser window displaying a simple webpage titled "My cool CSS website," with basic navigation, an 'About' section, and technology logos (HTML5, CSS3, W3C) at the bottom. The browser window is superimposed on an outdoor landscape background. The right screenshot shows a social media or blogging platform interface with a user profile or post view, featuring a sidebar menu and a main content area. Below the main content, a digital counter displays "00188730 views on your website" next to a green spinning logo.

what do i do?

A slide displaying three screenshots. The left screenshot shows a retro-style website on a monitor, featuring simple text, links, and various old web badges. The top right screenshot shows a dark-themed social media or blogging platform interface, likely 'cohost', displaying a post. The bottom right screenshot shows a 'CSS Clicker' game interface with a digital view counter and a green stylized icon.

what do i do?

My cool CSS website

CSS Clicker on Cohost

001887706 views on your website

A presentation slide displaying the question "what do i do?" alongside screenshots of two web interfaces. On the left, a retro computer monitor shows a simple website titled "My cool CSS website" with various old-style web banners. On the right, a web browser displays the cohost.org website, featuring an application called "CSS Clicker" with an "Upgrades Store" and a "MUSIC" sidebar. Below the CSS Clicker application, a large pixelated 'E' icon and a digital counter show "001887706 views on your website".

CSS Clicker game on Cohost

Screenshot of the Cohost website, displaying the 'CSS Clicker' game interface with an 'Upgrades Store' section, viewed via the Internet Archive's Wayback Machine.

cohost

Screenshot of the Cohost website, viewed through the Internet Archive's Wayback Machine.

x86 CPU made in CSS

A composite screenshot showing multiple open windows. The central and largest window displays an "x86 CPU made in CSS" application, simulating a console interface with options for Fibonacci sequence, Pascal's triangle, and Horsle, numeric input buttons, CPU register values (including IP: 911), and a visual representation of memory as a pixelated grid. Partially visible on the left is a screenshot of an Ars Technica article with the headline "Google publishes exploit code threatening of Chromium." On the right, another partial screenshot shows elements like a calendar with dates, 'log in' and 'sign up' buttons, and the text 'React'.

Screenshot of Ars Technica article: Google publishes exploit code threatening Chromium

x86 CPU made in CSS by Luna Ruanne

Screenshot showing an Ars Technica article about Google publishing exploit code threatening Chromium. Also shown is a screenshot of a custom x86 CPU emulator, titled 'x86 CPU made in CSS by Luna Ruanne', featuring a purple terminal interface with a menu for demos (Fibonacci sequence, Pascal's triangle, horsle, exit), and a lower panel displaying CPU registers and memory content.

what do i do?

nobody has gotten it quite right yet

we think existing platforms have some good ideas, but no one’s managed to create one without profound flaws. we’re borrowing liberally from other sites, but we want to build cohost into something that works well and serves its users rather than just another clone.

there is value in being in the same place as everyone

on a web without functioning search engines, blogs and friends-only sites may be okay for some, but they leave people who are scraping by on public visibility and word of mouth in the lurch.

...but nobody wants a digital panopticon

on modern social media, there is an ever-present fear that someone will see your post, have their own bad faith interpretation, and decide to ruin your day over it. platforms are often built to encourage this sort of behavior to drive up engagement, but they don’t have to be.

metrics are ruining our lives

modern social media is designed around a vicious feedback loop that keeps users Engaged at the expense of their mental health, all in order to make their executives more money.

the value of social media is its posts

we aren't the ones providing the most important part of cohost – you are. cohost exists

A screenshot of the Cohost social media website, displaying a feed with several posts. The main theme of the posts is a humorous statement: "I think bold text on cohost should always be in papyrus". One prominent post features a black background with a white skull character, resembling Papyrus from Undertale, along with the statement in Papyrus font. The browser address bar shows the URL as https://cohost.org/welcome.

nobody has gotten it quite right yet

we think existing platforms have some good ideas, but no one's managed to create one without profound flaws. we're borrowing liberally from other sites, but we want to build cohost into something that works well and serves its users rather than just another clone.

there is value in being in the same place as everyone

on a web without functioning search engines, blogs and friends-only sites may be okay for some, but they leave people who are scraping by on public visibility and word of mouth in the lurch.

...but nobody wants a digital panopticon

on modern social media, there is an ever-present fear that someone will see your post, have their own bad faith interpretation, and decide to ruin your day over it. platforms are often built to encourage this sort of behavior to drive up engagement, but they don't have to be.

metrics are ruining our lives

modern social media is designed around a vicious feedback loop that keeps users Engaged at the expense of their mental health, all in order to make their executives more money.

Screenshot of the Cohost social media platform, showing a user's feed from the URL https://cohost.org/rc/welcome. The feed displays several posts, including text posts by 'eggbug!' and 'bouba' that read "I think bold text on cohost should always be in papyrus". A subsequent post by 'bradley @soupconsultant' features an image of the Undertale character Papyrus, with the text "I THINK BOLD TEXT ON COHOST SHOULD ALWAYS BE IN PAPYRUS" rendered in a pixelated font.

A Cohost Post Thread

eggbug! @eggbug: I think bold text on cohost should always be in papyrus

bouba @bouba: I think bold text on cohost should always be in papyrus

bradley @soupconsultant: I THINK BOLD TEXT ON COHOST SHOULD ALWAYS BE IN PAPYRUS

#cohost #papyrus #undertale

A screenshot of a social media thread on Cohost showing three posts. The final post by @soupconsultant features a pixel art image of the character Papyrus from Undertale next to text.

Cohost Discussion on Papyrus Font

eggbug! @eggbug: I think bold text on cohost should always be in papyrus

bouba @bouba: I think bold text on cohost should always be in papyrus

bradley @soupconsultant: I THINK BOLD TEXT ON COHOST SHOULD ALWAYS BE IN PAPYRUS

#cohost #papyrus #undertale

Screenshot of a social media thread on Cohost. The first post shows text in a standard sans-serif font. The second post, attributed to bouba, displays the identical text, but rendered visually in the Papyrus font, with a yellow arrow pointing to it. The third post, by bradley, features the text "I THINK BOLD TEXT ON COHOST SHOULD ALWAYS BE IN PAPYRUS" in a bold, all-caps Papyrus-like font, alongside a pixel art illustration of Papyrus, the skeleton character from the game Undertale, on a black background.

Welcome to nginx!

Screenshot of the default Nginx welcome page, framed within a social media post interface.

Siph @Siph 1 yr ago

Welcome to nginx!

If you see this page, the nginx web server is successfully installed and working. Further configuration is required.

For online documentation and support please refer to nginx.org. Commercial support is available at nginx.com.

Thank you for using nginx.

#css crimes #nginx

1 comment

game dev turned creature @ompuco 1 yr ago

@ShugoWah asked:

bites you (appreciatively) bites you (appreciatively) bites you (appreciatively) bites you (appreciatively) bites you (appreciatively) bites you (appreciatively) bites you (appreciatively) bites you (appreciatively) bites you (appreciatively)

thank you so much! thank you aaaaaa! gosh thank you EEEAGGH! wow! okay tysm! AAACK! hey wait i'm feeling a little EEEK! just a little funny right EEEP! right now i'm sure it's just YIIIPPPP!! wow thank you so much!

Jessica @ticky 1 yr ago

gate
girl boss
gas light
keep

#css crimes #css art #css animation #tag yourself I'm "girlkeep" #gas gate girl gas light keep boss light gate girl gas gate keep boss light keep girl gas gate girl boss light keep boss

17 comments

A slide showing three social media-like posts. The first post displays a standard "Welcome to nginx!" web server page. The second post contains a meme repeatedly saying "bites you (appreciatively)" with additional text underneath. The third post features text art arranged as the words "gate girl boss gas light keep" and several related hashtags.

Code Examples and Rendered Output

<h1 style="font: 32px Tahoma, Verdana, Arial, sans-serif">Welcome to nginx!</h1>

Nginx Welcome Page Example

Welcome to nginx!

If you see this page, the nginx web server is successfully installed and working. Further configuration is required.

For online documentation and support please refer to nginx.org.

Commercial support is available at nginx.com.

Thank you for using nginx.

<a href="http://nginx.org/" style="color:#06c">nginx.org</a>

Social Media Post by game dev turned creature

@ompuco

bites you (appreciatively) bites you (appreciatively) bites you (appreciatively) bites you (appreciatively) bites you (appreciatively) bites you

<span style="color:#dd3000">wow</span>

Text excerpt with styled text: EEAGGh! wow! okay tysm ^-^ <3 hey wait i'm feeling a little E-E-K! just a little funny right E-E-E-P! right now i'm sure it's just YII-P!! wow thank you so much!

Social Media Post by Jessica

@ticky

girlboss gaslight gatekeep

  • #css crimes
  • #css art
  • #css animation
  • #tag yourself I'm "girlkeep"
  • #gas gate girl gas light keep boss light gate girl gas gate keep boss light keep gas gate girl boss light keep boss

17 comments

Screenshot of a web page displaying the Nginx welcome message. The slide also features screenshots of two social media posts, one with repetitive text about 'bites' and another with various CSS-related hashtags and the phrase 'girlboss gaslight gatekeep'. Several blue overlays highlight specific HTML code snippets relevant to the displayed content.

Jessica @ticky 1 yr. ago

gas----
gate light
girlkeep
----boss
  • #css crimes
  • #css art
  • #css animation
  • #tag yourself I'm "girlkeep"

#gas gate girl gas light keep boss light gate girl gas gate keep boss light keep girl gas gate girl boss light keep boss

17 comments

A social media post featuring text art. The words "gas", "gate light", "girlkeep", and "boss" are arranged in a staggered pattern to form the text art. Below the text art are hashtags and additional text.

girlygirl

gaskeep

gateboss

girlight

#css crimes #css art #css animation #tag yourself I'm "girlkeep"

#gas gate girl gas light keep boss light gate girl gas gate keep boss light keep girl gas gate girl boss light keep boss

A social media post from "Jessica @tickly" showing four vertically stacked, stylized words: "girlygirl", "gaskeep", "gateboss", and "girlight". Below these words are hashtags including "#css crimes", "#css art", "#css animation", and a long string of words relating to "gas", "gate", "girl", "light", "keep", and "boss". The post indicates "17 comments".
<div>gas</div><div>gate</div><div>...
</div>
<div style="text-align:left;
	animation:5s linear infi...>
<div>light</div><div>keep</div><div>...
</div>
</div>
<style>
@keyframes slide {
	from {
Screenshot of code displaying HTML structure with inline CSS, including an animation property.
<div style="height:3em;overflow:clip">
  <div style="text-align:right;
    animation:5s linear infi...">
    <div>gas</div><div>gate</div><div>...</div>
    <div>gas</div><div>gate</div><div>...</div>
  </div>
  <div style="text-align:left;
    animation:5s linear infi...">
    <div>light</div><div>keep</div><div>...</div>
    <div>light</div><div>keep</div><div>...</div>
Screenshot of a code editor displaying HTML code.
<div style="height:3em;overflow:">
	<div style="text-align:right;
	animation:5s linea">
		<div>gas</div><div>gate</div>
		<div>gas</div><div>gate</div>
	</div>
<div style="text-align:left;
animation:5s linea">
	<div>light</div><div>keep</div>
	<div>light</div><div>keep</div>
Screenshot of HTML code displayed in a code editor interface.
spin); /* spin is linear infinite */
Screenshot of a code editor with a dark theme, displaying a code snippet and a sidebar with file structure and line numbers.

tailwind css

TRANSITIONS & ANIMATION

animation

Utilities for animating elements with CSS animations.

animate-spin
animation: var(--animate-spin); /* spin is linear infinite */
@keyframes spin {
  to {
    transform: rotate(360deg);
  }
}
animate-ping
animation: var(--animate-ping); /* ping 1s cubic-bezier(0, 0, 0.2, 1) infinite */
@keyframes ping {
  75%, 100% {
    transform: scale(2);
  }
}
An icon depicts two arrows forming a circle, indicating a spinning or refresh action. A screenshot of a web browser's developer tools console shows a search for "@keyframes", with various keyframe definitions like "bounce", "slideupright", "spin", and "pulse" highlighted in the results.

HTML and CSS for Text Animation

HTML Structure for Sliding Text

<div style="height:3em;overflow:clip">
    <div style="text-align:right;
            animation:5s linear infinite normal slide">
        <div>gas</div><div>gate</div><div>girl</div>
        <div>gas</div><div>gate</div><div>girl</div>
    </div>
    <div style="text-align:left;
            animation:5s linear infinite reverse slide">
        <div>light</div><div>keep</div><div>boss</div>
        <div>light</div><div>keep</div><div>boss</div>
    </div>
</div>

CSS Keyframes Example

@keyframes spin {
    to {
        transform: rotate(360deg);
    }
}

An animated text display showing words "gas", "light", "gate", "keep", "girl", "boss" cycling horizontally within a limited height. The words "girl keep" and "gate light" are highlighted by a rectangular outline at one point in the animation, illustrating a continuous sliding effect.

CSS Text Animation Example

<div style="height:3em;overflow:clip">
  <div style="text-align:right;transform:translateY(-3em);
    animation:5s linear infinite normal spin">
    <div>gas</div><div>gate</div><div>girl</div>
    <div>gas</div><div>gate</div><div>girl</div>
  </div>
  <div style="text-align:left;transform:translateY(-3em);
    animation:5s linear infinite reverse spin">
    <div>light</div><div>keep</div><div>boss</div>
    <div>light</div><div>keep</div><div>boss</div>
  </div>
</div>
@keyframes spin {
  to {
    transform: rotate(360deg);
  }
}

The animation involves a transformation that results in a rotate(360deg). A translateY(-3em) property transitions to none (0em).

On the left side of the slide, words are displayed in a vertical, continuous scrolling animation, resembling a slot machine reel. The words "gatelight" and "girlkeep" are currently centered and highlighted within a bounding box, while other words like "light", "keep", "gasboss", "gate", and "girl" are partially visible above and below, suggesting a continuous loop. On the right, two code blocks are shown: an HTML snippet that defines the structure for two vertically scrolling text reels using multiple div elements with CSS animations, and a CSS keyframes rule named "spin" that specifies a 360-degree rotation. Below the code, there are annotations explaining the transformation effects: an unspecified property transitions to "rotate(360deg)", and "translateY(-3em)" transitions to "none (0em)".

introducing cohost 22, the hit new operating system taking the computing world by storm!

this new desktop environment is stealing the hearts of thousands and hoarding them away in its lair! what new experiences await with the power of the Cohost 22 operating system? find out for yourself! (desktop only)

some quick notes:

  • animations in details tags seem to be handled differently between chromium (at least edge) and firefox, so firefox users you get the shutdown and repeated start menu animations all to yourselves ;)
  • you cant actually interact with anything that is down and to the right of the window on top, this is a limitation of how the draggable window hack works that i don't think is bypassable
  • ps in case i did a bad job making it obvious you do need to click desktop icons again to close applications
  • demoing things in standalone browser then copying over to cohost and realizing i need several dozen margin:reverts is extremely fun and cool and not soul crushing
  • it's come to my attention since this was posted that window dragging controls are inverted on older versions of firefox for some reason, up to at least version ~102. idk why but i dont think i can fix it so sorry!

anyway enjoy this little thing!

Screenshot of a desktop environment labeled 'ASSC Cohost 22', resembling an older Windows operating system. An open 'System Information' window displays system details including 'ASSC Cohost 22 1.0.0', registration to 'Pat', and hardware specifications: AMD Ryzen Threadripper Pro 5995 WX, NVIDIA GeForce GTX 3090, TOSHIBA NVME SSD 10 TB, and 4 MB RAM. A cartoon pink bug is shown on a monitor within the window. Desktop icons like 'The Internet' and 'fortnite hax.txt' are visible, along with a 'Start' button and a '4:19 PM' clock on the taskbar.

introducing cohost 22, the hit new operating system taking the computing world by storm!

Screenshot of a retro-themed desktop environment named "Cohost 22". It shows multiple open windows: an email client, a "System Information" window displaying system specs and a cartoon bug on a monitor, and an open "Start" menu with options like "Help" and "Shut Down". Desktop icons for "fortnite hax.txt" and "The Internet" are visible.

introducing cohost 22, the hit new operating system taking the computing world by storm!

this new desktop environment is stealing the hearts of thousands and hoarding them away in its lair! what new experiences await with the power of the Cohost 22 operating system? find out for yourself! (desktop only)

some quick notes:

  • animations in details tags seem to be handled differently between chromium (at least edge) and firefox, so firefox users you get the shutdown and repeated start menu animations all to yourselves :)
  • you cant actually interact with anything that is down and to the right of the window on top, this is a limitation of how the draggable window hack works that i don't think is bypassable
  • ps in case i did a bad job making it obvious you do need to click desktop icons again to close applications
  • demoing things in standalone browser then copying over to cohost and realizing i need several dozen margin:reverts is extremely fun and cool and not soul crushing
  • it's come to my attention since this was posted that window dragging controls are inverted on older versions of firefox for some reason, up to at least version ~102. idk why but i dont think i can fix it so sorry!

anyway enjoy this little thing!

Screenshot of a desktop environment named "Cohost 22" styled to resemble an older Windows operating system like Windows 95/98. It features a teal desktop background, a grey taskbar at the bottom with a "Start" button and a clock displaying "4:19 PM". Desktop icons include a text file named "fortnite hax.txt", "The Internet" (represented by a globe), "Michaelsoft Lookout!" (a folder-like icon), and "About Cohost 22" (an application icon).

Two solid color rectangular blocks on a light beige background. The left block is dark blue/teal, and the right block is lighter teal/aqua.
<details>
	<summary style="list-style: none">
		<img height="40px" src="calc.png">
		<div style="font-size:13px">
			Notepad
		</div>
	</summary>
	<p style="position:absolute;top:0;
		padding:22px;background:#0003"></p>
	<div style="
		width: 300px; height: 200px;
		background: #FFF;
		border:2px outset #888;
		position: absolute;
		left: 80px; top: 100px;
	">
		<div style="
			background:#00F; color:#FFF;
		">Untitled - Notepad</div>
		<p>Hi CSS Day!</p>
	</div>
</details>
A screenshot showing an HTML code snippet on the left and its rendered output on the right. The output displays a desktop icon labeled "Notepad" and an open Notepad application window titled "Untitled - Notepad" displaying the text "Hi CSS Day!".
<details>
  <summary style="list-style: none">
    <img height="40px" src="calc.png">
    <div style="font-size:13px">
      Notepad
    </div>
  </summary>
  <p style="position:absolute;top:0;
    padding:22px;background:#0003"></p>
  <div style="
    width: 300px; height: 200px;
    background: #FFF;
    border:2px outset #888;
    position: absolute;
    left: 80px; top: 100px;
    ">
    <div style="
      background: #00F; color:#FFF;
      ">"Untitled - Notepad</div>
    <p>Hi CSS Day!</p>
  </div>
</details>
A screenshot of a simulated desktop interface, showing a Notepad application icon with a calculator image, and an open Notepad window titled "Untitled - Notepad" displaying the text "Hi CSS Day!".

anyone remember that thing where this website would say stuff like First Byte Timeout?

Screenshot of a web page displaying a forum post by Rykarn, featuring an embedded text-based point-and-click adventure game.

rykarn @rykarn 11 mo ago

anyone remember that thing where this website would say stuff üke First Byte Timeout?

like it would tell you to varnish the cache server and stuff. anyone remember? that sure was a doozy huh?

anyways,,,

rykarn @rykarn 11 mo ago

Your phone beeps in the night. A new notification, highest priority:

CRITICAL WARNING: Cache Server Varnish levels low!

Varnish Cache Server!

Startled, you immediately make your way to the Server Hall. You must Varnish the Cache Server before it is too late.

Click to begin.

Screenshot of a point-and-click adventure game interface with a social media-like post section and a dark terminal-style notification screen featuring a hand cursor.

Rykarn's Point-and-Click Adventure Game

Screenshot of Rykarn's point-and-click adventure game, showing a dark corridor with an open doorway. A red button is visible on the wall to the left of the doorway, with a mouse cursor hovering over it. Below the game graphics, the text "You see a Dark Corridor." is displayed, followed by two empty square slots.

Screenshot of a point and click adventure game by Rykarn

A screenshot of a first-person point-and-click adventure game interface. The main view shows a dim hallway with a door at the far end, framed by an open doorway in the foreground. A hand-shaped mouse cursor is visible in the hallway. Below the game view, a black console displays the text "You move the Foreign Object aside." and two empty square frames, likely representing inventory slots.

Point and Click Adventure Game by Rykarn

A flowchart illustrating a point-and-click adventure game by Rykarn. The flowchart displays a sequence of game scenes, including a server room with a server rack and a "Varnish Storage" sign, various corridors, stairwells, and an open drawer containing brushes. White arrows indicate transitions between scenes, and black text boxes present game dialogue and outcomes, often indicating failure to varnish the cache server.
<details>
  <summary>
    enter building
  </summary>
  <details>
    <summary>
      left door
    </summary>
    you lose
  </details>
  <details>
    <summary>
      right door
    </summary>
    you win
  </details>
</details>
enter building
left door

you lose!

right door

you win!

Two panels. The left panel shows HTML code using nested `<details>` and `<summary>` tags. The right panel displays the rendered interactive output of this code, presenting a nested menu for a simple game: 'enter building' reveals options for 'left door' (resulting in 'you lose!') or 'right door' (resulting in 'you win!').
<details>
    <summary>
        <img style="position:absolute;top:0;left:0" src="building.png">
    </summary>
    <img style="position:absolute;top:0;left:0" src="which.png">
    <details>
        <summary style="position:absolute;top:58px;left:12px;
            width:63px;height:100px;background:red">
            left door
        </summary>
        <img style="position:absolute;top:0;left:0;z-index:1" src="lose.png">
    </details>
    <details>
        <summary style="position:absolute;top:56px;left:81px;
            width:63px;height:104px;background:blue">
            right door
        </summary>
        <img style="position:absolute;top:0;left:0;z-index:1" src="win.png">
    </details>
</details>
A split-screen slide showing HTML code on the left and its rendered output on the right. The rendered output displays the text "Which?" above two interactive rectangular doors, labeled "left door" (red) and "right door" (blue).

Which?

<details>
  <summary>
    <img style="position:absolute;top:0;left:0" src="building.png">
  </summary>
  <img style="position:absolute;top:0;left:0" src="which.png">
  <details>
    <summary style="position:absolute;top:58px;left:12px;
               width:63px;height:100px;cursor:pointer;opacity:0">
    </summary>
    <img style="position:absolute;top:0;left:0;z-index:1" src="lose.png">
  </details>
  <details>
    <summary style="position:absolute;top:56px;left:81px;
               width:63px;height:104px;cursor:pointer;opacity:0">
    </summary>
    <img style="position:absolute;top:0;left:0;z-index:1" src="win.png">
  </details>
</details>

A black background with the question "Which?" written in white, above two stylized doors. The left door is outlined in green with a green doorknob, and the right door is outlined in orange with an orange doorknob. A white line forms the ground beneath the doors.

click pixels for great victory

#css crimes #interactive #interactable #cycle #through no fault of my own, the cycling on this one is much better #game boy #really hope this hasn't been done before #there was the online interactable gameboy #which is way cooler #anyway yeah post time #drawing software #computer art assistant progrm #digicomputer-compatible artfully constrained digital pixel art production helper software program powered by hypertext via hypertext markup language version 5 #gameboy

Screenshot of a social media post showing an interactive pixel art program. The display resembles a retro handheld gaming device with "CHONK MATRIX WITH STEREO SOUND" written on its top bezel. The screen shows a green pixelated creature composed of varying shades of green squares.

click pixels for great victory

Screenshot of a social media post from @mehbark. The post features an interactive pixel art program displayed within an interface resembling a retro handheld console labeled "CHONK MATRIX WITH STERENO SOUND". The screen shows dark green pixel art, possibly a frog or blob creature, on a lighter green grid, which users can click to cycle through colors.

click pixels for great victory

Screenshot of a social media post by @mehbark. The post features pixel art, attributed to Artemis (@nine-moonbeams), depicting a green bug-like creature inside a frame that resembles a retro handheld game console screen. The post's title is "click pixels for great victory."
A simple interactive interface showing a green square being hovered over by a hand cursor, indicating it is clickable.
A solid dark green square is centered on a light background, representing an interactive pixel in an art program.
Four colored squares are arranged vertically on the left side, transitioning from a light green at the top to a dark gray-green at the bottom.

+CO

A vertical stack of five colored squares. From top to bottom, the colors are bright green, teal, purple, and blue. The bottom-most square is a dark purplish-gray and contains the white text '+CO'.

elements

Diagram illustrating a pattern of nested, overlapping colored rectangles: green, teal, magenta, blue, and a darker blue. Two white play icons are visible on the blue rectangle, likely representing interactive elements.

HTML Layout Elements

  • <summary> elements
  • inner <div>
A diagram illustrating a layout technique using HTML <summary> and <div> elements. On the left, five white triangular disclosure icons, labeled "<summary> elements", are stacked horizontally. Below and behind these icons are five progressively smaller, overlapping colored rectangles (green, teal, magenta, blue, dark purple), representing the content associated with each summary element. A large blue outline rectangle, labeled "inner <div>", encompasses the colored rectangles and extends further to the right, indicating a container that can accommodate content expansion.

<summary> elements

outer <div>

inner <div>

A diagram illustrating the layout of HTML elements. On the left, a series of five overlapping, colored rectangles (green, pink, blue, gray) with triangular play icons represent <summary> elements. To their right is a green square with a red border, labeled as "outer <div>". Further to the right is a long, empty rectangle with a blue border, labeled as "inner <div>".

<details> elements

  • 80px
  • 20px
  • 20px
  • 20px
  • 20px
A diagram illustrating the layout and interaction of HTML <details> elements. It features a row of five gray blocks labeled with widths: 80px, 20px, 20px, 20px, 20px. Below these are horizontally arranged, overlapping semi-transparent colored rectangles (green, pink, blue, purple), each with a right-pointing white triangle. A blue outline frames these elements, and a hand cursor points to the rightmost green rectangle, which has a red border, indicating an interactive click. A long, empty blue-outlined rectangle extends to the right.
80px 20px 20px 20px 20px
A diagram showing a horizontal arrangement of colored rectangular elements with pixel dimensions. A long, translucent green bar spans across the bottom. On top of it, from left to right, are several smaller, overlapping colored boxes. The leftmost box is light green, labeled '20px', and contains a downward-pointing triangle. To its right, four boxes — light blue, pink, dark green, and light green — each contain a right-pointing triangle. Above these, a grey rectangular bar labeled '80px' spans approximately the width of the light blue and pink boxes. A white hand cursor with a pointing finger is shown over the dark green box, which is highlighted with a red outline, suggesting interaction or selection.
A diagram illustrates interactive layout elements. On the left, a series of four rectangular blocks are horizontally aligned, each labeled "20px" and colored in shades of purple, pink, and green. To their right, three downward-pointing white triangles are visible, followed by a dark blue rectangular block containing a white right-pointing triangle, highlighted with a red border. A hand cursor points to this triangle. Above this section, a gray rectangular block is labeled "80px". Beneath the horizontal sequence of blocks, overlapping translucent rectangles in green, pink, and blue suggest different layers or states, demonstrating how elements might shift or expand.

Component Sizes

  • 80px
  • 20px
  • 20px
  • 20px
  • 20px
A horizontal bar composed of rectangular segments. The first segment is grey and labeled '80px'. It is followed by four smaller segments, each labeled '20px' and colored light blue, pink, light green, and green. The green '20px' segment is highlighted with a red border and contains a white downward arrow. A hand cursor points to this highlighted segment. To the right of the labeled segments, several semi-transparent colored rectangles (blue, pink, green) overlap, some also containing white downward arrows, suggesting expandable sections.
A diagram showing a horizontal segmented bar with various colored sections (blue, green, purple, pink, light blue, light green). A hand cursor points to a purple section, which also features a downward-pointing triangle icon. Labels above some sections indicate sizes, such as "88px" above a blue segment and "29px" repeated above four subsequent segments. The diagram illustrates an interactive UI element that changes or shifts upon user interaction.

Element Dimensions

  • 80px
  • 29px
  • 29px
  • 29px
  • 29px
A diagram illustrating a dynamic UI component with a horizontal track containing five colored segments: green, purple, blue, pink, and green. Above these segments, a grey overlay displays their widths: '80px' for the first segment and '29px' for each of the subsequent four segments. Small white triangular play icons are visible on the first four colored segments. A hand cursor is positioned over the right edge of the last green segment, indicating an interactive or resizing action. An empty rectangular area extends to the right, implying a potential for expansion or further elements.

Measurements: 80px, 20px, 20px, 20px, 20px.

A horizontal diagram illustrating a dynamic layout concept, likely for web elements. At the top, a grey bar displays segment widths: 80px, followed by four 20px segments. Below this, a series of horizontally arranged colored blocks are shown, transitioning through shades of green, pink, blue, purple, and back to green. Small triangular play-like icons are visible within the first few colored blocks. A hand cursor points to the rightmost green block, indicating an interactive element that can be clicked or dragged, suggesting a demonstration of how interacting with one element (e.g., expanding it) shifts the position and size of other elements in the layout.
A horizontal diagram illustrating an interactive UI element, possibly a timeline or a series of toggles. It displays a sequence of colored rectangular segments: green, light blue, purple, gray, pink, and light green. Above a subset of these segments, dimensions are labeled as '30px', '20px', '20px', '20px', '20px'. Within each colored segment, there's a small white triangular icon. A mouse cursor is shown pointing to the rightmost light green segment, suggesting an interaction that can expand or shift elements. The track extends further to the right as an empty rectangle.
89px 28px 28px 28px 28px
A diagram showing a horizontal sequence of five colored segments (green, pink, blue, purple, grey) and a final green segment. Above these segments, a light grey bar indicates their widths: '89px' for the first segment, and '28px' for the subsequent four. Below the main segments are two longer, thinner horizontal bars in light green and light blue. A hand cursor points to the rightmost green segment. To the right of the segments, a long, empty grey outlined box extends horizontally.
  • 80px
  • 20px
  • 20px
  • 20px
  • 20px
A diagram showing a horizontal timeline or bar with five segments. From left to right, the segments are green, magenta, light blue, green, and a final green segment with a mouse cursor pointing at its right edge. Above these segments are labels indicating their widths: '80px', '20px', '20px', '20px', '20px'. Each of the first four colored segments also contains a white triangular play-like icon.
<section class='slide-text'><pre><code data-lang='html'>&lt;div style="width: 20px; height: 20px; overflow: clip"&gt; &lt;div style="display: inline-flex; height: 20px; position: relative; cursor: pointer"&gt; &lt;details&gt; &lt;summary style="background: #01F909; position: absolute; list-style: none; width: calc(20px * 9); height: 20px; left: calc(100% - 160px)"&gt; &lt;/summary&gt;

coquest!

Screenshot of a pixel-art 2D top-down adventure game, showing a character similar to Link in a sandy area surrounded by trees and some small structures. Below the game, a partial image of a gray and black NES-style controller is visible, featuring 'SELECT' and 'START' buttons.

coquest!

A screenshot of a 2D pixel art adventure game, reminiscent of The Legend of Zelda, showing a character similar to Link facing an old man across three fires. Overlayed text within the game screen reads: "IT'S DANGEROUS TO GO ALONE! TAKE THIS." Below the game screenshot is a pixel art representation of a classic Nintendo Entertainment System (NES) controller with a mouse cursor hovering over the directional pad. Additional text on the slide indicates "firefox and chrome only (desktop recommended)".

coquest!

firefox and chrome only (desktop recommended)
A pixel-art style 2D top-down game screen, reminiscent of The Legend of Zelda, showing a forest clearing with green trees, a dirt path, a dark cave entrance, and a blue pool of water. A character resembling Link is visible. Below the game screen is an image of a Nintendo Entertainment System (NES) controller with a mouse cursor hovering over the directional pad.

Coquest!

Corncycle @Corncycle

firefox and chrome only (desktop recommended)

#css crimes #interactive #Zelda #eraserhead #aco

Screenshot of a pixel-art top-down adventure game, reminiscent of The Legend of Zelda, featuring a character in a desert environment with rocks, water, and several chests. Below the game screen is an image of a classic Nintendo Entertainment System (NES) controller.

coquest!

Screenshot of an interactive web-based 2D top-down adventure game titled 'coquest!' by user Corncycle. The game area displays pixel art, showing a character similar to Link in a desert environment with enemy sprites. An overlay message within the game reads: 'This thing is so ridiculously hacked together! I'm surprised it's functional at all!'. Below the game screen, an illustration of an NES controller is shown with the A button highlighted.
left: calc(100% + 180px)

A pixel art character resembling Link from The Legend of Zelda is in the top left corner. Below it, three horizontal rectangular buttons are displayed, colored green, orange, and red, each with a forward arrow icon. The green button is on the left, followed by orange, then red.

left: calc(100% + 180px)

Pixel art sprite of Link from The Legend of Zelda in the top-left corner, holding a shield and sword. At the bottom-center are three horizontal rectangular blocks, colored lime green, orange, and red, each with a black right-pointing triangle on its left side, possibly representing game controls or movement indicators.

left: calc(100% + 180px)
A game-like interface showing a pixel art character resembling Link near a health/item bar in the top-left corner, which consists of a red square, an orange square, and a green square. In the center-right, three colored rectangles (lime green, orange, red) with downward-pointing triangles, possibly representing a D-pad or controls, are shown above the CSS property `left: calc(100% + 180px)`.
left: calc(-200% + 180px)
A pixel art character resembling Link from The Legend of Zelda is in the top left corner. Three interactive square elements, colored red, orange, and lime green, each with a black right-pointing triangle, are arranged horizontally.
left: calc(-200% + 180px)
At the top of the slide, a pixel art character resembling Link from Zelda stands next to a light green square, with three smaller colored squares (red, orange, light green) displayed above. In the main area, three colored squares (red, orange, light green) with downward arrow icons are shown. The light green square is positioned within a larger grey dashed outline shaped like a D-pad. A hand cursor points to the right side of the D-pad outline, suggesting interaction or positioning.
left: calc(-200% + 180px)
A pixel art character resembling Link from The Legend of Zelda stands in the top left. In the center, a roughly outlined gray d-pad shape is visible. To its right, three squares are aligned horizontally: a red square with a black right-pointing triangle, an orange square with a black right-pointing triangle, and a lime green square with a black right-pointing triangle.
<div style="display: inline-flex;
       flex-direction: column;">
</div>
An 8-bit character resembling Link stands next to a code snippet. In the center, a cross-shaped outline, reminiscent of a d-pad, contains a red square with a right-pointing arrow and a green square with a down-pointing arrow. To the right of the cross are an orange square and a lime green square, each with a right-pointing arrow. Below the cross are a teal square and a blue square, each with a down-pointing arrow. The overall image demonstrates layout and movement concepts in a game-like interface.
<div style="display: inline-flex;
	-direction: column;">
</div>
An interface demonstrating a game or interactive layout. At the top left are several colored squares: a red square, an orange square, and a vertical stack of three squares (green, light blue, light blue). Below these is a blurry, brown, pixelated object. At the top right, above a cross-shaped control, are two faded squares (green, light blue) each with a downward-pointing triangle. The central element is a d-pad-like control, formed by four colored squares arranged in a cross: red on the left, orange at the bottom, light blue at the top, and lime green on the right. A grey outline suggests a central square. Each of the four colored squares contains a dark triangle. Hand cursors indicate interactivity on the top, left, and right squares of the d-pad.
A simplified game-like interface featuring a pixel art character resembling Link in the top left. The main area shows a cross-shaped arrangement of squares, representing a d-pad, with a red square containing a right-pointing arrow and a green square containing a down-pointing arrow. Other squares in the cross outline contain up-pointing and left-pointing arrows. Separately arranged on the right and bottom are orange, lime green, turquoise, and blue squares, each containing a right-pointing arrow.
A grid-based game or puzzle interface. In the top-left corner is a small pixel-art sprite of a character, possibly an explorer or knight. The main area features a central cross-shaped path outlined in white. Within this path, there are three colored squares: red, green, and a light blue, each with a small black arrow indicating a direction (red right, green up, light blue down). To the right of the central path are an orange square with a right arrow and a light green square with a left arrow. Below the central path are a light blue square with a down arrow and a darker blue square with a down arrow.

Screenshot of a game map for a key and lock puzzle

A grid-based game interface featuring a central cross-shaped arrangement of four colored blocks (red, green, and two shades of blue) with directional arrows. A small pixel art character is positioned on one of the blocks. Additional colored blocks (orange, green, and two shades of blue) with arrows are arranged to the right and bottom of the central cross. In the top left corner, a small pixel art character and a key icon are displayed.
The slide shows two main areas. The top-left area, outlined in blue, displays pixel art graphics reminiscent of a video game. It features a character resembling Link from The Legend of Zelda holding a sword and shield, brown fences, a yellow padlock, a red key, and a white bone, arranged as if on a small map grid. The character is in the top-left corner, and fences block paths around the padlock (top-middle), key (top-right), and bone (bottom-left). The larger area of the slide shows a conceptual diagram with colored square blocks, each containing a black arrow. In the center, five blocks form a cross shape: the central block and the top, left, and right blocks are light grey, while the bottom block is green. The top block's arrow points up, the left block's arrow points left, the right block's arrow points right, the bottom green block's arrow points down, and the central block's arrow points down. To the right of this cross are two more blocks stacked vertically: an orange block with a right-pointing arrow and a bright green block with a right-pointing arrow. Below the cross are two more blocks stacked vertically: a light blue block with a right-pointing arrow and a darker blue block with a right-pointing arrow. This setup appears to illustrate game elements and control mechanisms.
The top left of the slide shows pixel art game assets within a grid, including a character resembling Link, brown wooden fences, a golden padlock, a golden key, and a white bone. Below this, a diagram features a central cross-shaped arrangement of five colored squares (light blue, red, green), all outlined in light blue, each with a small black triangle pointing towards the center. To the right and below this formation are individual colored squares (orange, light green, teal, blue), each with a black triangle pointing to the right.
The slide presents two distinct graphical areas. The top area displays a simple pixel-art game map featuring a character, several wooden fence segments, a golden lock, a golden key, and a bone. The bottom area shows an arrangement of colored rectangular blocks (light blue, red, yellow, green, dark red) with small black triangular arrows, suggesting a visual programming interface or a representation of game logic and element interaction.
A pixel-art game layout featuring a character resembling Link in the top left. The central area shows game elements including wooden fences, a yellow padlock, and a pink key. In the lower part of the slide, several solid colored blocks (red, orange, green, yellow, brown) with black triangular markers are visible, along with some outlined block shapes, representing interactive game elements or buttons on a map. A white bone icon is in the bottom left.
A pixel art game map showing a character resembling Link, positioned among fences, a golden padlock, a key, and a bone icon. The map also contains a grid of various colored blocks (red, orange, green, yellow, aqua, white, blue) some with black triangular arrows and a number '4' on a grey block, representing interactive elements or a puzzle in the game world.
A pixel-art diagram of an interactive grid-based map or game interface. It features a character resembling Link, a key, a bone, a locked gate, and other fence elements in the upper section. The larger lower section contains various colored blocks (red, orange, yellow, dark red, light green, light blue) and small black triangular markers, alongside light gray outlined paths.
A pixel-art style game map or puzzle layout. The upper-left section features a character resembling Link from The Legend of Zelda, surrounded by light green squares and brown fence objects. Below this section is a bone icon next to the number 3. The lower-left section displays various colored blocks (red, orange, dark red, blue, white) with small black triangle markers, arranged around light yellow paths. A light gray cross-shaped path is visible to the right of the lower-left section. The right side of the overall map is largely empty and light yellow.
A retro-style pixel art game map showing a character resembling Link from The Legend of Zelda standing near a bone with the number '3'. The map features brown wooden fence barriers, a brown L-shaped building, and various colored square tiles (red, light green, light blue, dark green, light blue, dark blue, white, orange, lime green). Some tiles have black triangular markers. A hand cursor icon points to a white square in the center, suggesting interaction. A lock icon is visible near the brown building, which the speaker mentions disappears when a key is picked up.

u win the game!

A pixel art game interface shows a character resembling Link from Zelda, holding a shield, standing next to a bone icon and brown fence structures. An overlayed yellow banner displays the text "u win the game!". The game map features various colored square tiles, including green, red, teal, blue, orange, and grey, with some tiles marked by small black triangles.

u win the game!

Screenshot of a pixel-art style game interface, part of a "CSS crimes" demonstration. A character, appearing as a person holding a bone, stands on a grid-based game board. A speech bubble above the character displays the text "u win the game!", indicating the game's completion. The game board shows various colored blocks and shapes.
https://gist.github.com/jhvanderschee/f852b7b51239ce3600f13a0c78a0cf8f
A QR code.

lightning round

resizing

<div style="width: 20px; height: 20px;"></div>
An empty square icon is displayed. A code snippet shows an HTML `div` element with inline CSS defining its width and height as 20 pixels.
<div style="width: 20px; height: 20px;
  resize: vertical; overflow: auto"></div>
<div styl
Screenshot of a virtual environment or game interface. In the foreground, a partial code editor window displays HTML code. The background shows a textured gray wall with a white analog clock and a pink sticky note, and a small part of a monitor screen.

resizing

<div styl
A diagram on the left shows a vertical rectangular outline with a resize handle at its bottom right corner, illustrating a resizable element. On the right, an illustration depicts a room with a wooden floor, light-textured walls, and a pink ceiling section. The room contains a wooden desk with a computer monitor, a pink bottle, a framed picture, a wall clock, and a hanging ceiling lamp. This setup likely demonstrates an application of element resizing, potentially for interaction within the illustrated 3D space.

resizing

<div style="width: 20px; height: 20px;
    resize: vertical; overflow: auto;"></div>
An outline of a small rectangular box, likely representing the div element or its resize handle, is displayed to the left of the heading.

counters

<div style="position:relative;display:inline-flex">
  <div style="width: 28px; height: 28px;
    resize: vertical; overflow: auto"></div>
  <div style="position:absolute;left:100px;
    top:calc(round(down, mod(100%, 10px) / 1px) * -1lh);">
    <div>0</div><div>1</div><div>2</div><div>3</div><div>4</div>
    <div>5</div><div>6</div><div>7</div><div>8</div><div>9</div>
  </div>
  <div style="position:absolute;left:90px;
    top:calc(round(down, mod(10%, 10px) / 1px) * -1lh);">
    <div>0</div><div>1</div><div>2</div><div>3</div><div>4</div>
    <div>5</div><div>6</div><div>7</div><div>8</div><div>9</div>
  </div>
  <div style="position:absolute;left:80px;
    top:calc(round(down, mod(1%, 10px) / 1px) * -1lh);">
    <div>0</div><div>1</div><div>2</div><div>3</div><div>4</div>
    <div>5</div><div>6</div><div>7</div><div>8</div><div>9</div>
  </div>
  <div style="position:absolute;left:80px;top:0;
    width:30px;height:1lh;outline:2px solid red"></div>
</div>
A presentation slide showing a code example for CSS counters. On the left, a vertical list of numbers (4, 5, 017, 128, 239, 34, 45, 56, 67, 78, 89, 9) is displayed, with the number '128' highlighted by a red rectangular outline, demonstrating the visual output of the counter. On the right, the HTML and inline CSS code that creates and positions these counters is shown.

counters

<div style="position:relative;display:inline-flex">
	<div style="width: 20px; height: 20px;
		resize: vertical; overflow: auto"></div>
	<div style="position:absolute;left:100px;
		top:calc(round(down, mod(100%, 10px) / 1px) * -1lh);">
		<div>0</div><div>1</div><div>2</div><div>3</div><div>4</div>
		<div>5</div><div>6</div><div>7</div><div>8</div><div>9</div>
	</div>
	<div style="position:absolute;left:90px;
		top:calc(round(down, mod(10%, 10px) / 1px) * -1lh);">
		<div>0</div><div>1</div><div>2</div><div>3</div><div>4</div>
		<div>5</div><div>6</div><div>7</div><div>8</div><div>9</div>
	</div>
	<div style="position:absolute;left:80px;
		top:calc(round(down, mod(1%, 10px) / 1px) * -1lh);">
		<div>0</div><div>1</div><div>2</div><div>3</div><div>4</div>
		<div>5</div><div>6</div><div>7</div><div>8</div><div>9</div>
	</div>
	<div style="position:absolute;left:80px;top:0;
		width:30px;height:1lh;outline:2px solid red"></div>
</div>
A live demonstration showing a numerical counter. The numbers 4, 5, 017, 128, 239, 34, 45, 56, 67, 78, 89, and 9 are displayed vertically. The number "128" is highlighted with a red outline. To the left of the numbers is a white vertical bar with a resize handle at its bottom right corner, suggesting it is a resizable element. On the right side of the slide is an HTML code snippet that creates this interactive counter.

counters

  • 0
  • 21
  • 032
  • 143
  • 254
  • 365
  • 476
  • 587
  • 698
  • 7 9
  • 8
  • 9
<div style="position:relative;display:inline-flex">
    <div style="width: 20px; height: 20px;
            resize: vertical; overflow: auto"></div>
    <div style="position:absolute;left:100px;
            top:calc(round(down, mod(100%, 10px) / 1px) * -1lh);">
        <div>0</div><div>1</div><div>2</div><div>3</div><div>4</div>
        <div>5</div><div>6</div><div>7</div><div>8</div><div>9</div>
    </div>
    <div style="position:absolute;left:90px;
            top:calc(round(down, mod(10%, 10px) / 1px) * -1lh);">
        <div>0</div><div>1</div><div>2</div><div>3</div><div>4</div>
        <div>5</div><div>6</div><div>7</div><div>8</div><div>9</div>
    </div>
    <div style="position:absolute;left:80px;
            top:calc(round(down, mod(1%, 10px) / 1px) * -1lh);">
        <div>0</div><div>1</div><div>2</div><div>3</div><div>4</div>
        <div>5</div><div>6</div><div>7</div><div>8</div><div>9</div>
    </div>
    <div style="position:absolute;left:80px;top:0;
            width:30px;height:1lh;outline:2px solid red"></div>
</div>
A code example demonstrates a three-digit counter. On the left, a list of numbers shows various counter values, with '032' highlighted by a red box. To the left of the number list is a small rectangular box with resize handles and up/down arrows, representing a resizable container. The HTML and inline CSS code on the right implements this counter by positioning individual digit divs absolutely, with their 'top' position calculated dynamically using `mod()` based on the parent container's size.

counters

<div style="position:relative;display:inline-flex">
	<div style="width: 20px; height: 20px;
		resize: vertical; overflow: auto"></div>
	<div style="position:absolute;left:100px;
		top:calc(round(down, mod(100%, 10px) / 1px) * -1lh);">
		<div>0</div><div>1</div><div>2</div><div>3</div><div>4</div>
		<div>5</div><div>6</div><div>7</div><div>8</div><div>9</div>
	</div>
	<div style="position:absolute;left:90px;
		top:calc(round(down, mod(10%, 10px) / 1px) * -1lh);">
		<div>0</div><div>1</div><div>2</div><div>3</div><div>4</div>
		<div>5</div><div>6</div><div>7</div><div>8</div><div>9</div>
	</div>
	<div style="position:absolute;left:80px;
		top:calc(round(down, mod(1%, 10px) / 1px) * -1lh);">
		<div>0</div><div>1</div><div>2</div><div>3</div><div>4</div>
		<div>5</div><div>6</div><div>7</div><div>8</div><div>9</div>
	</div>
	<div style="position:absolute;left:80px;top:0;
		width:30px;height:1lh;outline:2px solid red"></div>
</div>
A screenshot demonstrating a dynamic numerical counter effect achieved with CSS. On the left, a vertical scrollable output displays numbers like 06, 118, 229 (outlined in red), 338, 449, and others, which update based on the size of a container. On the right, the HTML and inline CSS code used to implement this counter is displayed.

counters

<div style="position:relative;display:inline-flex">
  <div style="width: 20px; height: 20px;
               resize: vertical; overflow: auto"></div>
  <div style="position:absolute;left:100px;
               top:calc(round(down, mod(100%, 10px) / 1px) * -1lh);">
    <div>0</div><div>1</div><div>2</div><div>3</div><div>4</div>
    <div>5</div><div>6</div><div>7</div><div>8</div><div>9</div>
  </div>
  <div style="position:absolute;left:90px;
               top:calc(round(down, mod(10%, 10px) / 1px) * -1lh);">
    <div>0</div><div>1</div><div>2</div><div>3</div><div>4</div>
    <div>5</div><div>6</div><div>7</div><div>8</div><div>9</div>
  </div>
  <div style="position:absolute;left:80px;
               top:calc(round(down, mod(1%, 10px) / 1px) * -1lh);">
    <div>0</div><div>1</div><div>2</div><div>3</div><div>4</div>
    <div>5</div><div>6</div><div>7</div><div>8</div><div>9</div>
  </div>
  <div style="position:absolute;left:80px;top:0;
               width:30px;height:1lh;outline:2px solid red"></div>
</div>
A screenshot showing a code editor on the right with HTML and inline CSS for creating a dynamic counter. On the left, a vertical list of numbers is displayed, with '256' highlighted by a red box, and a resizable vertical bar next to it, demonstrating the output of the code.

counters

  • 12
  • 23
  • 145
  • 256
  • 367
  • 478
  • 589
  • 69
  • 7
  • 8
  • 9
<div style="position:relative;display:inline-flex">
    	<div style="width: 20px; height: 20px;
    		resize: vertical; overflow: auto"></div>
    	<div style="position:absolute;left:100px;
    		top:calc(round(down, mod(100%, 10px) / 1px) * -1lh);">
    		<div>0</div><div>1</div><div>2</div><div>3</div><div>4</div>
    		<div>5</div><div>6</div><div>7</div><div>8</div><div>9</div>
    	</div>
    	<div style="position:absolute;left:90px;
    		top:calc(round(down, mod(10%, 10px) / 1px) * -1lh);">
    		<div>0</div><div>1</div><div>2</div><div>3</div><div>4</div>
    		<div>5</div><div>6</div><div>7</div><div>8</div><div>9</div>
    	</div>
    	<div style="position:absolute;left:80px;
    		top:calc(round(down, mod(1%, 10px) / 1px) * -1lh);">
    		<div>0</div><div>1</div><div>2</div><div>3</div><div>4</div>
    		<div>5</div><div>6</div><div>7</div><div>8</div><div>9</div>
    	</div>
    	<div style="position:absolute;left:80px;top:0;
    		width:30px;height:1lh;outline:2px solid red"></div>
    </div>
A live demonstration shows a vertical stack of numbers dynamically updating. The number '256' is prominently highlighted by a red outline, representing the current value of a counter, which is controlled by a nearby vertical scrollable area. On the right, HTML code with inline CSS is displayed, outlining the structure and styling that creates this interactive counter using `div` elements and CSS `calc()` functions.

counters

A split-screen demonstration. On the left, a list of numbers next to a vertical scrollbar-like graphic, with the number 256 highlighted. On the right, a web application interface showing a game with four purple numbered circles (1, 2, 3, 4) arranged diagonally, a "Score: 048" display, a small pink bug icon, and a visible HTML snippet `
` and `
` tags.

counters

  • 12
  • 23
  • 145
  • 256
  • 367
  • 478
  • 589
  • 69
  • 7
  • 8
  • 9

<div style="position:relative;display:inline-flex">

Score: 051

</div>

On the left side of the slide, a list of numbers is displayed alongside a visual representation of a vertical scrollbar. On the right, a screenshot of a simple interactive game interface is shown. It features three colored circles, each containing a number: a yellow circle with "1", a light purple circle with "3", and a red circle with "4". In the top right corner, the text "Score: 051" is visible. A small red, bug-like illustration and a horizontal red bar are present at the bottom of the game interface.

Binary to Decimal Explanation

Here's a little explanation for my earlier post (desktop only).

▼ copy of the widget in the post

User Input

cohost disables <input> tags (and using them would be hard anyways since we're limited to inline css), so a lot of css crimes™ posts have turned to using <details> tags:

► hi! I'm the text in the <summary> part of the <details> element

These don't really look like checkboxes though. To fix that, I plopped a <div> into the <summary> element and styled it to look like the checkboxes used by cohost. There's also a coloured <div> inside the <details> element positioned on top of the checkbox to show if it's active.

web.archive.org/web/2024/https://cohost.org/cefqrn/post/457151-binary-to-decimal-ex

width:calc(1% - min(
    min(
        min(
            max(1% - 0px, -1000 * (1% - 0px)),
            max(1% - 1px, -1000 * (1% - 1px))
        ),
    ),
    min(
        min(
            max(1% - 2px, -1000 * (1% - 2px)),
            max(1% - 3px, -1000 * (1% - 3px))
        ),
    ),
    min(
        min(
            max(1% - 4px, -1000 * (1% - 4px)),
            max(1% - 5px, -1000 * (1% - 5px))
        ),
    ),
    min(
        min(
            max(1% - 6px, -1000 * (1% - 6px)),
            max(1% - 7px, -1000 * (1% - 7px))
        ),
    ),
    min(
        min(
            max(1% - 8px, -1000 * (1% - 8px)),
            max(1% - 9px, -1000 * (1% - 9px))
        )
    )
));

A white card with text content on the left, explaining a binary to decimal conversion widget. It shows a visual representation of 8 square input boxes labeled "000" above, and a single square checkbox below. On the right, a dark red code editor pane displays CSS code using complex calc, min, and max functions.

@cefqrm 2 yr. ago

Binary to Decimal Explanation

Here's a little explanation for my earlier post (desktop only).

▼ copy of the widget in the post

User Input

cohost disables <input> tags (and using them would be hard anyways since we're limited to inline css), so a lot of css crimes™ posts have turned to using <details> tags.

  • ▸ hi! I'm the text in the <summary> part of the <details> element

These don't really look like checkboxes though. To fix that, I plopped a <div> into the <summary> element and styled it to look like the checkboxes used by cohost. There's also a coloured div inside the <details> element positioned on top of the checkbox to show if it's active.

☐ Much better

web.archive.org/web/2024/...

https://cohost.org/cefqrm/post/457151-binary-to-decimal-ex


width:calc(1% - min(
	min(
		min(
			max(1% - 0px, -1000 * (1% - 0px)),
			max(1% - 1px, -1000 * (1% - 1px))
		),
		min(
			max(1% - 2px, -1000 * (1% - 2px)),
			max(1% - 3px, -1000 * (1% - 3px))
		)
	),
	min(
		min(
			max(1% - 4px, -1000 * (1% - 4px)),
			max(1% - 5px, -1000 * (1% - 5px))
		),
		min(
			max(1% - 6px, -1000 * (1% - 6px)),
			max(1% - 7px, -1000 * (1% - 7px))
		)
	),
	min(
		min(
			max(1% - 8px, -1000 * (1% - 8px)),
			max(1% - 9px, -1000 * (1% - 9px))
		)
	)
));
A screenshot of a blog post titled "Binary to Decimal Explanation". Below the title, there's an image showing eight small square boxes in a row, with the text "000" to their right. The right side of the slide displays a CSS code snippet.

randomness

<details>
  <summary style="width:72px;height:32px;transform:translateY(160px);
                   animation: 1s steps(5, jump-start) infinite spin">Choice A</summary>
</details>
<details>
  <summary style="width:72px;height:32px;transform:translateY(160px);
                   animation: 1s steps(5, jump-start) infinite spin">Choice B</summary>
</details>
<details>
  <summary style="width:72px;height:32px;transform:translateY(160px);
                   animation: 1s steps(5, jump-start) infinite spin">Choice C</summary>
</details>
<details>
  <summary style="width:72px;height:32px;transform:translateY(160px);
                   animation: 1s steps(5, jump-start) infinite spin">Choice D</summary>
</details>
<details>
  <summary style="width:72px;height:32px;transform:translateY(160px);
                   animation: 1s steps(5, jump-start) infinite spin">Choice E</summary>
</details>
A visual representation of five choices labeled 'a' through 'e', each in a colored rectangular box with a triangular play icon. The boxes are colored red, orange, yellow, green, and light green from top to bottom. Box 'd' is highlighted with a green border, indicating it is selected.

randomness

  • a
  • b
  • c
  • d Choice C
  • e
<details>
<summary style="width: 72px; height: 32px; transform: translateY(160px);"></summary>
choice L
</details>
A screenshot demonstrating randomness, featuring a vertical list of interactive choices (a-e) on the left, with item 'd' highlighted and labeled "Choice C". On the right, a web interface displays a playing card game with a Queen of Clubs card at the top, the text "You won!", three cards (7, 5, 4 of Clubs) at the bottom, and a small cartoon bug illustration. HTML code snippets showing `
` and `` tags are visible at the top and bottom of the right panel.

grounds

<div style="resize:horizontal;overflow:auto;
width:128px;height:128px;
background:url('data:image/svg+xml,<svg
xmlns=%22http://www.w3.org/2000/svg%22
xmlns:xlink=%22http://www.w3.org/1999/xlink%22
viewBox=%220 0 128 128%22><style>@media (width
> 192px) { * { stroke-dasharray: 50 25;
animation: 1s dashes alternate infinite;
stroke: orange; } } @keyframes dashes { from {
stroke-dashoffset: 75 } to { stroke-dashoffset:
150 } }</style><circle fill=%22%232383254F%22
stroke=%22green%22 stroke-width=%2210%22
cx=%2250%22 cy=%2250%22 r=%2240%22 /></svg>')
center / 100% 100%"></div>
A code example demonstrating an HTML div with an embedded SVG background that includes CSS for animation and media queries.

SVG backgrounds

<div style="resize:horizontal;overflow:auto;
width:128px;height:128px;
background:url('data:image/svg+xml,%3Csvg
xmlns=%22http://www.w3.org/2000/svg%22
xmlns:xlink=%22http://www.w3.org/1999/xlink%22
viewBox=%220 0 128 128%22%3E%3Cstyle%3E@media (width
%3E 192px) { * { stroke-dasharray: 50 25;
animation: 1s dashes alternate infinite;
stroke: orange; } } @keyframes dashes { from {
stroke-dashoffset: 75 } to { stroke-dashoffset:
150 } }</style%3E%3Ccircle fill=%22%2383254F%22
stroke=%22green%22 stroke-width=%2210%22
cx=%2250%22 cy=%2250%22 r=%2240%22 /></svg%3E')
center / 100% 100%"></div>
A visual example of an SVG background, showing a square box containing two concentric circles. The outer circle is green with a dashed stroke, and the inner circle is purple.
<section class='slide-text'><h3>SVG backgrounds</h3><pre><code data-lang='html'>&lt;div style="resize:horizontal;overflow:auto; width:128px;height:128px; background:url('data:image/svg+xml, &lt;svg xmlns=%22http://www.w3.org/2000/svg%22 xmlns:xlink=%22http://www.w3.org/1999/xlink%22 viewBox=%220 0 128 128%22&gt;&lt;style&gt;@media (width &gt; 19

SVG backgrounds

<div style="resize:horizontal;overflow:auto;
width:128px;height:128px;
background:url('data:image/svg+xml,<svg
xmlns=%22http://www.w3.org/2000/svg%22
xmlns:xlink=%22http://www.w3.org/1999/xlink%22
viewBox=%220 0 128 128%22><style>@media (width
> 192px) { * { stroke-dasharray: 50 25;
animation: 1s dashes alternate infinite;
stroke: orange; } } @keyframes dashes { from {
...
A partial circular chart with yellow and purple segments on the left. A resize handle is visible at the bottom right corner of a white box.

SVG backgrounds

<div style="resize:horizontal;overflow:auto;
width:128px;height:128px;
background:url('data:image/svg+xml,<svg
xmlns=%22http://www.w3.org/2000/svg%22
xmlns:xlink=%22http://www.w3.org/1999/xlink%22
viewBox=%220 0 128 128%22><style>@media (width
> 192px) { * { stroke-dasharray: 50 25;
animation: 1s dashes alternate infinite;
stroke: orange; } } @keyframes dashes { from {
stroke-dashoffset: 75 } to { stroke-dashoffset:
150 } }</style><circle fill=%22%2383254F%22
stroke=%22green%22 stroke-width=%2210%22
cx=%2250%22 cy=%2250%22 r=%2240%22 /></svg>')
center / 100% 100%"></div>
A square box containing a circle with a dark purple fill and a green stroke. The box has a resize handle, illustrating the output of the adjacent SVG code.

stuff to check out

https://yal.cc/cohost-css-crimes/ https://suricrasia.online/puzzlebox/

stuff to check out

cohast export. Some of the CSS crimes of all times Oct 1, 2024

As cohost goes read only on October 1, I look back at one of the things that I adored about the website: being able to make animated and/or interactive posts with (slightly restricted) CSS and HTML (no JavaScript)

People made a lot of posts utilizing these tricks, and these are some of them

CSS crimes (gold tier)

  1. First byte timeout
  2. Hexagon puzzle
  3. Wheels of fortune
  4. CSS RPG
  5. Pixel art challenge
  6. CSS chess

An image of a light brown box labeled "CSS Puzzle Box" with several sliders and input fields. Two QR codes are displayed on the right, corresponding to the two listed URLs.

stuff to check out

cohost export: Some of the CSS crimes of all times Oct 1, 2024
As cohost goes read only on October 1, I look back at one of the things that I adored about the
website: being able to make animated and/or interactive posts with (slightly restricted) CSS and
HTML (no JavaScript)

People made a lot of posts utilizing these tricks, and these are some of them:

CSS crimes (gold tier)

Some of these are complete games!

  1. First byte timeout
    (behind the scenes)
  2. Hexagon puzzle
  3. Wheel of fortune
  4. Sudoku
https://yal.cc/cohost-css-crimes/
https://suricrasia.online/puzzlebox/

An image labeled "CSS Puzzle Box" depicts a grid-like puzzle with various interactive elements and text "CSS PUZZLE BOX". There are two QR codes, one linking to "yal.cc/cohost-css-crimes" and the other to "suricrasia.online/puzzlebox".

<details>
	<summary>Click</summary>
	Hi!
</details>

► Click

<details>
  <summary>Click</summary>
  Hi!
</details>

☐ Click

<label>
  <input type=checkbox id=click>
  Click
  <div id=hi>Hi!</div>
</label>

<style>
  #hi {
    display: none;
  }

  body:has(#click:checked) #hi {
    display: block;
  }
</style>
The slide compares two methods for creating interactive elements. On the left, a disclosure widget shows "Click" with a triangle icon next to it, which expands to reveal content. On the right, a checkbox labeled "Click" is shown with an empty square icon, which, when checked, would display content controlled by CSS. Below each interactive element is its corresponding HTML and CSS code snippet.

Basic Click-to-Reveal with <details>

On the left, a clickable "Click" element is shown, which, when activated, would reveal "Hi!". In the current state, "Hi!" is not visible.

<details>
	<summary>Click</summary>
	Hi!
</details>

Click-to-Reveal with Checkbox and CSS :has()

On the right, a checked checkbox labeled "Click" is displayed. Below it, the text "Hi!" is visible, indicating that checking the checkbox reveals the text.

<label>
	<input type=checkbox id=click>
	Click
	<div id=hi>Hi!</div>
</label>

<style>
	#hi {
		display: none;
	}

	body:has(#click:checked) #hi {
		display: block;
	}
</style>

The slide displays two side-by-side examples of interactive UI elements with their corresponding code. On the left, a collapsed disclosure widget displays "Click" next to a small arrow icon. On the right, a checked checkbox is labeled "Click" and has the text "Hi!" visible below it, with a mouse cursor hovering over the label. Below each UI example, the relevant HTML and CSS code snippets are provided.

Details element example

► Click

<details>
  <summary>Click</summary>
  Hi!
</details>

Checkbox and CSS :has() example

☐ Click

<label>
  <input type=checkbox id=click>
  Click
  <div id=hi>Hi!</div>
</label>
<style>
  #hi {
    display: none;
  }
  body:has(#click:checked) #hi {
    display: block;
  }
</style>
Screenshot showing two HTML/CSS examples: one using the details element and another using a checkbox with CSS :has() to create interactive UI elements.

Click

<details>
  <summary>Click</summary>
  Hi!
</details>
<label>
  <input type=checkbox id=click>
  Click
  <div id=hi>Hi!</div>
</label>

<style>
  #hi {
    display: none;
  }
  body:has(#click:checked) #hi {
    display: block;
  }
</style>

New e-mail from ppk!

A slide demonstrating two methods for creating interactive "click" effects. The left side shows a code example for an HTML details element, with a rendered interactive element displaying a triangle icon and the text "Click". The right side shows a code example using an HTML checkbox input with CSS, and a rendered interactive element displaying an unchecked checkbox and the text "Click". Below the right code example, a notification box with a bell icon and the text "New e-mail from ppk!" is displayed, demonstrating an outcome triggered by the checkbox interaction.

<details>

Click

<label>

Click

The only change I would recommend is assuming more CSS knowledge in the audience. For instance, you explained the + selector at some point: you don't have to at CSS Day. Also, it seemed that the CCC audience was wowed by the concept of checkbox techniques;

body:has(#click:checked) #hi {
	display: block;
}
</style>

Two UI elements are displayed at the top: a closed disclosure widget labeled "Click", and an unchecked checkbox labeled "Click".

<details>

Click

<label>

The only change I would recommend is assuming more CSS knowledge in the audience. For instance, you explained the + selector at some point: you don't have to at CSS Day. Also, it seemed that the CCC audience was wowed by the concept of checkbox techniques;

body:has(#click:checked) #hi {
	display: block;
}
</style>

A presentation slide featuring HTML elements and CSS code. At the top, there is a section titled '<details>' showing a closed details element labeled 'Click'. Next to it, under the title '<label>', is a checkbox labeled 'Click'. Below these, a text box contains feedback about assuming more CSS knowledge in the audience and the concept of checkbox techniques. The bottom right displays a code snippet in HTML/CSS showing `body:has(#click:checked) #hi { display: block; }` followed by an HTML `</style>` closing tag.

  • <details> Click
  • <label> Click

The only change I would recommend is assuming more CSS knowledge in the audience. For instance, you explained the + selector at some point: you don't have to at CSS Day. Also, it seemed that the CCC audience was wowed by the concept of checkbox techniques; the CSS Day audience is well acquainted with them - in fact the technique was introduced at CSS Day 2016 (https://www.youtube.com/watch?v=efAbKFueSW0).

body:has(#click:checked) #hi {
    display: block;
}
</style>

The slide features two interactive UI examples at the top: a disclosure widget (a triangle) next to the text "Click", with the HTML tag "<details>" above it, and a checkbox next to the text "Click", with the HTML tag "<label>" above it. Below these examples, a text box contains a comment on audience CSS knowledge and checkbox techniques, referencing a YouTube video. In the bottom right, a CSS code snippet is displayed.

On the left, an interactive user interface shows input checkboxes and the resulting output for various logic gates:

  • Input A: Checked
  • Input B: Unchecked
  • not: Output is black
  • and: Output is white
  • or: Output is black
  • xor: Output is white
  • nand: Output is white
  • nor: Output is black
  • xnor: Output is black

The right side displays the CSS code implementing these logic gates:

body {
	--a: 0; --b: 0;
	&:has(#a:checked) { --a: 1; }
	&:has(#b:checked) { --b: 1; }
}

.not { --o: calc(1 - var(--a)); }
.and, .nand { --o: calc(var(--a) * var(--b)); }
.or, .nor { --o: max(var(--a), var(--b)); }
.xor, .xnor { --o: mod(var(--a) + var(--b), 2); }

.gate {
	--out: var(--o);
	&:is(.nand, .nor, .xnor) {
		--out: calc(1 - var(--o));
	}
	background: hsl(0 0 calc(100% * var(--out)));
}
A split-screen slide showing a user interface on the left and CSS code on the right. The left UI features two checkboxes for "Input A" (checked) and "Input B" (unchecked), followed by a list of logic gates (not, and, or, xor, nand, nor, xnor), each with a vertical bar indicating its binary output state as either black or white. The right side displays a CSS code block defining custom properties for inputs and logic gate operations, which determine the background color (black or white) of the output bars in the UI.

Inputs:

The only change I would recommend is assuming more CSS knowledge in the audience. For instance, you explained the + selector at some point: you don't have to at CSS Day. Also, it seemed that the CCC audience was wowed by the concept of checkbox techniques; the CSS Day audience is well acquainted with them - in fact the technique was introduced at CSS Day 2016 (https://www.youtube.com/watch?v=efAbKFueSW0).

body {
	--a: 0; --b: 0;
	&:has(#a:checked) { --a: 1; }
	&:has(#b:checked) { --b: 1; }
}

nor:

xnor:

&.is(.nand, .nor, .xnor) {
	--out: calc(1 - var(--o));
}
background: hsl(0 0 calc(100% * var(--out)));
The slide shows two checkboxes labeled "Input A" and "Input B" which are both checked. A large text box provides feedback about the audience's CSS knowledge. To the right, a CSS code block defines custom properties `--a` and `--b` based on the checked state of `#a` and `#b` elements using the `:has()` selector. Below the text box, partially visible labels "nor:" and "xnor:" are present next to a small grey square that changes based on logic gate output. Further down on the right, another CSS code snippet demonstrates setting a `--out` custom property and a `background` color using `hsl` and `calc` for logical operations like nand, nor, or xnor.

The only change I would recommend is assuming more CSS knowledge in the audience. For instance, you explained the + selector at some point: you don't have to at CSS Day. Also, it seemed that the CCC audience was wowed by the concept of checkbox techniques; the CSS Day audience is well acquainted with them - in fact the technique was introduced at CSS Day 2016 (https://www.youtube.com/watch?v=efAbKFueSW0). Also, last year we had an entire session about building logic gates in CSS.

body {
    --a: 0; --b: 0;
    &:has(#a:checked) { --a: 1; }
    &:has(#b:checked) { --b: 1; }

    &.is(.nand, .nor, .xnor) {
        --out: calc(1 - var(--o));
    }
    background: hsl(0 0 calc(100% * var(--out)));
}

xnor:

A UI showing two checkboxes labeled "Input A" and "Input B", a code editor displaying CSS code, and a text block providing feedback.
  • ☐ Input A
  • ☑ Input B
body {
    --a: 0; --b: 0;
    &:has(#a:checked) { --a: 1; }
    &:has(#b:checked) { --b: 1; }
}

The only change I would recommend is assuming more CSS knowledge in the audience. For instance, you explained the + selector at some point: you don't have to at CSS Day. Also, it seemed that the CCC audience was wowed by the concept of checkbox techniques; the CSS Day audience is well acquainted with them - in fact the technique was introduced at CSS Day 2016 (https://www.youtube.com/watch?v=efAbKFueSW0). Also, last year we had an entire session about building logic gates in CSS.

xnor:

  --out: calc(1 - var(--o));
}
background: hsl(0 calc(100% * var(--out)));
A presentation slide displaying two checkboxes for 'Input A' and 'Input B', a CSS code block defining custom properties based on checkbox states, a textual comment recommending assuming more CSS knowledge, and a snippet of CSS code related to an 'xnor' gate.

Inputs

  • Input A (checked)
  • Input B (unchecked)

CSS Logic

body {
	--a: 0; --b: 0;
	&:has(#a:checked) { --a: 1; }
	&:has(#b:checked) { --b: 1; }
}

The only change I would recommend is assuming more CSS knowledge in the audience. For instance, you explained the + selector at some point: you don't have to at CSS Day. Also, it seemed that the CCC audience was wowed by the concept of checkbox techniques; the CSS Day audience is well acquainted with them - in fact the technique was introduced at CSS Day 2016 (https://www.youtube.com/watch?v=efAbKFueSW0). Also, last year we had an entire session about building logic gates in CSS.

nor:

xnor:

... {
	--out: calc(1 - var(--o));
}
background: hsl(0 0 calc(100% * var(--out)));
A slide featuring two checkbox inputs labeled 'Input A' (checked) and 'Input B' (unchecked) at the top left. To the right is a CSS code snippet demonstrating how `--a` and `--b` variables are set based on the checked state of '#a' and '#b' elements using `&:has()`. Below this is a block of text providing feedback on the presentation, mentioning the `+` selector, checkbox techniques, CSS Day 2016, and building logic gates in CSS, including a YouTube link. In the bottom left, 'nor:' and 'xnor:' are displayed, each followed by a small black square, indicating an output. To the right, another CSS code snippet shows the calculation of a `--out` variable and its use in setting a `background` property with an `hsl()` function.

The x86 architecture

  • INPUT DEVICES
  • OUTPUT DEVICES
  • PORTS
  • MotherBoard
    • ROM
    • Processor (CHIP)
  • BUS
  • RAM
  • Hard Drive
  • CD ROM
  • Floppy Drive
  • Control unit
  • Arithmetic/logic unit
  • Decode
  • Execute
  • Accumulator register
  • Storage
  • Fetch
  • Store
  • ADD NEXT NUMBER TO TOTAL 76 (Program instruction)
  • Data
  • Central processing unit
  • Memory

homepage.cs.uri.edu/faculty/wolfe/book/Readings/Reading04.htm

A slide featuring two diagrams illustrating computer architecture. The left diagram is a block diagram showing major computer components connected by a bus, including input/output devices, ports, motherboard (with ROM and Processor), RAM, Hard Drive, CD ROM, and Floppy Drive. The right diagram illustrates the CPU fetch-decode-execute-store cycle, showing the control unit, arithmetic/logic unit, accumulator register, and storage interacting with memory that contains program instructions and data.

What's x86?

  • CPU architecture
  • Began with the Intel 8086/8088 in 1978
  • Used in all modern computers except all new Macs and some computers
  • Runs all modern software
A vintage Intel 8086/8088 CPU chip from 1978 is shown, with visible markings C8086, 2333A, 02127, and INTEL '78.

What's x86?

  • CPU architecture
  • Began with the Intel 8086/8088 in 1978
  • Used in all modern computers (except all new Macs and some computers)
  • Runs all modern software
An image of an Intel x86 CPU chip, a dual in-line package (DIP) with many pins.

Is C a real programming language?

A tall, light-colored banner or screen is illuminated with a vertical blue light. The lower portion of the banner features a dark, abstract pattern composed of interconnected rectangular shapes.

Is CSS

  • C sur
  • C can

nto x86 assembly

x86 assembly in CSS...

Chrome warning!

Everything from this point onwards is Chromium-only

Illustration of a stylized orange and yellow fox, resembling the Firefox logo, stretched horizontally across the bottom of the slide.

Chrome warning!

Everything from this point onwards is Chromium-only

An illustration of a stylized fox or squirrel with a long, flowing tail, gradient colored from yellow to orange to red, resembling a modified Firefox logo.

The CPU Hack

  • Discovered by Jane Ori in 2023
  • Repeated iteration of variables

From the article "Expert CSS: The CPU Hack" by Jane Ori:

body {
  --input-frame: var(--frame-count, 0);
  --frame-count: calc(var(--input-frame) + 1);
}
Screenshot of a blog post titled "Expert CSS: The CPU Hack" by Jane Ori, displaying a CSS code block.

For example, if cyclic vars didn't automatically fall to invalid (initial) this would continuously increment the value of `--frame-count` here:

body {
  --input-frame: var(--frame-count, 0);
  --frame-count: calc(var(--input-frame) + 1);
}

Spoiler alert: You actually can do this in CSS, without ever touching JS! Here's how!

The 5 Observables

First, let's establish a handful of observations of advanced CSS animation that will make sure the final demonstration isn't entirely unexpected.

Not directly related to "The 5 Observables"

1. Animation State Rules Over All (almost)

The property assignments set by Animation State trump all Selector State assignments.

For example, if cyclic vars didn’t automatically fall to invalid (initial), this would continuously increment the value of --frame-count here:

body {
    --input-frame: var(--frame-count, 0);
    --frame-count: calc(var(--input-frame) + 1);
}

Spoiler alert: You actually can do this in CSS, without ever touching JS, here’s how!

The 5 Observables

First, let’s establish a handful of observations of advanced CSS animations, so the final demonstration isn’t entirely unexpected.

Not directly related to "The 5 Observables"

1. Animation State Rules Over All (almost)

The property assignments set by Animation State trump all Selector State assignments.

  • Discovered by Jane Ori in 2023
  • Repeated iteration of variables
/* css */
--x: var(--y, 2);
--y: calc(var(--x) * 3);

/* doesn't work :c */

Generation: 10

A screenshot of a Conway's Game of Life simulation, displaying various patterns of magenta cells on a black grid background. A mouse cursor is visible in the lower right of the grid area.

Generation: 8

A black grid displays several magenta pixel patterns, representative of Conway's Game of Life simulation.

Game of Life Clone

Screenshot of a Game of Life simulation displaying purple pixelated shapes on a black background, with "Generation: 6" visible.

CPU Hack

<clock>
  <cpu></cpu>
</clock>

<style>
clock {
  animation: cpu-clock 4000ms step-end infinite;
}

@keyframes cpu-clock {
  0% { --clock: 0 }
  25% { --clock: 1 }
  50% { --clock: 2 }
  75% { --clock: 3 }
}
</style>

CPU Hack

<clock>
  <cpu></cpu>
</clock>

<style>
  clock {
    animation: cpu-clock 4000ms step-end infinite;
  }

  @keyframes cpu-clock {
    0% { --clock: 0 }
    25% { --clock: 1 }
    50% { --clock: 2 }
    75% { --clock: 3 }
  }
</style>

--clock: 0

CPU Hack

cpu {
  @container style(--clock: 1) {
    background: khaki;
  }
  @container style(--clock: 2) {
    background: plum;
  }
  @container style(--clock: 3) {
    background: indigo;
  }
}

--clock: 0

CPU Hack

cpu {
	@container style(--clock: 1) {
		background: khaki;
	}
	@container style(--clock: 2) {
		background: plum;
	}
	@container style(--clock: 3) {
		background: indigo;
	}
}

The current value for the custom property is: --clock: 1

Code illustrating CSS container style queries reacting to a custom property.

CPU Hack

cpu {
  @container style(--clock: 1) {
    background: khaki;
  }
  @container style(--clock: 2) {
    background: plum;
  }
  @container style(--clock: 3) {
    background: indigo;
  }
}

--clock: 2

CPU Hack

cpu {
	@container style(--clock: 1) {
		background: khaki;
	}
	@container style(--clock: 2) {
		background: plum;
	}
	@container style(--clock: 3) {
		background: indigo;
	}
}

--clock: 0

CPU Hack

cpu {
  @container style(--clock: 1) {
    background: khaki;
  }
  @container style(--clock: 2) {
    background: plum;
  }
  @container style(--clock: 3) {
    background: indigo;
  }
}
--clock: 1

CPU Hack

cpu {
	@container style(--clock: 1) {
		background: khaki;
	}
	@container style(--clock: 2) {
		background: plum;
	}
	@container style(--clock: 3) {
		background: indigo;
	}
}
--clock: 2

CPU Hack

cpu {
  animation: copy-clock 1ms infinite;
  animation-play-state: paused;
  @container style(--clock: 1) {
    animation-play-state: running;
  }
}

@keyframes copy-clock {
  0%, 100% { --clock2: var(--clock); }
}

--clock: 2
--clock2: 2

A CSS code example is shown on the left, demonstrating animation control with container style queries. The line `animation-play-state: running;` is highlighted with a red rectangle. On the right, current values for CSS custom properties are displayed: `--clock: 2` and `--clock2: 2`.

CPU Hack

@property --var-a {
  syntax: "<integer>";
  initial-value: 0;
  inherits: true;
}

cpu {
  animation: store 1ms infinite, execute 1ms infinite;
  animation-play-state: paused, paused;
  @container style(--clock: 1) {
    animation-play-state: running, paused;
  }
  @container style(--clock: 3) {
    animation-play-state: paused, running;
  }
  --var-a: calc(var(--var-c) + 1);
}

@keyframes store { 0%, 100% { --var-c: var(--var-b) } }
@keyframes execute { 0%, 100% { --var-b: var(--var-a) } }

--clock: 1

--var-a: 15

--var-b: 14

--var-c: 14

A red rectangular highlight box surrounds the line of code '--var-a: calc(var(--var-c) + 1);'.

Variable State and Cyclic Calculation

Current Variable Values:

  • --clock: 3
  • --var-a: 0
  • --var-b: 0
  • --var-c: -1

Variable Assignments:

  • --var-a: calc(var(--var-c) + 1)
  • --var-b: var(--var-a)
  • --var-c: var(--var-b)
A diagram illustrates a cyclic dependency and data flow between three variables, represented by rounded rectangles: "--var-a", "--var-b", and "--var-c". Arrows indicate assignments and calculations. An arrow from "--var-c" points to "--var-a", labeled "--var-a: calc(var(--var-c) + 1)". An arrow from "--var-a" points to "--var-b", labeled "--var-b: var(--var-a)". This arrow has a prominent yellow overlay, indicating an active flow. An arrow from "--var-b" points to "--var-c", labeled "--var-c: var(--var-b)". This arrow also has a prominent yellow overlay, indicating an active flow. The yellow highlights suggest the current execution path or data propagation.
  • --clock: 1
  • --var-a: 1
  • --var-b: 0
  • --var-c: 0

--var-a: calc(var(--var-c) + 1)

--var-c: var(--var-b)

--var-b: var(--var-a)

A diagram illustrating data flow and calculations between three variables: var-a, var-b, and var-c. The variables form a cycle. An arrow from var-c points to var-a with the calculation --var-a: calc(var(--var-c) + 1). An arrow from var-a points to var-b with the assignment --var-b: var(--var-a). An arrow from var-b points to var-c with the assignment --var-c: var(--var-b). The arrow from var-b to var-c is highlighted in yellow and orange, indicating the currently active step. The var-c node is also highlighted.

--var-a: calc(var(--var-c) + 1)

  • --clock: 2
  • --var-a: 1
  • --var-b: 0
  • --var-c: 0
A diagram illustrates a data flow cycle between three variables: --var-a, --var-b, and --var-c, each enclosed in an oval node. An arrow from --var-a points to --var-b and is labeled "--var-b: var(--var-a)". An arrow from --var-b points to --var-c and is labeled "--var-c: var(--var-b)". A prominent, bright yellow/orange arrow shows data actively flowing from --var-c to --var-a, indicating the update path for --var-a based on --var-c.
  • --clock: 3
  • --var-a: 1
  • --var-b: 1
  • --var-c: 0

Assignments:

  • --var-a: calc(var(--var-c) + 1)
  • --var-c: var(--var-b)
  • --var-b: var(--var-a)

A diagram illustrates a circular data flow between three variables: --var-a, --var-b, and --var-c. An arrow from --var-c points to --var-a, associated with the assignment --var-a: calc(var(--var-c) + 1). An arrow from --var-b points to --var-c, associated with the assignment --var-c: var(--var-b). An arrow from --var-a points to --var-b, associated with the assignment --var-b: var(--var-a). The arrow from --var-a to --var-b is highlighted in yellow, indicating the current or active flow.

  • --clock: 1
  • --var-a: 2
  • --var-b: 1
  • --var-c: 1

Variable Update Rules

  • --var-a: calc(var(--var-c) + 1)
  • --var-c: var(--var-b)
  • --var-b: var(--var-a)

A diagram illustrates data flow and dependencies between three variables: --var-a, --var-b, and --var-c. These variables are represented as nodes in a cyclical graph. An arrow from --var-c points to --var-a with the operation "--var-a: calc(var(--var-c) + 1)". An arrow from --var-a points to --var-b with the operation "--var-b: var(--var-a)". An arrow from --var-b points to --var-c with the operation "--var-c: var(--var-b)". The arrow showing the flow from --var-b to --var-c is highlighted in yellow.

  • --clock: 2
  • --var-a: 2
  • --var-b: 1
  • --var-c: 1

Transformation Rules:

  • --var-a: calc(var(--var-c) + 1)
  • --var-b: var(--var-a)
  • --var-c: var(--var-b)
A diagram illustrates a cyclical data flow between three variables, represented by rounded rectangular nodes labeled '--var-a', '--var-b', and '--var-c'. An arrow points from '--var-c' to '--var-a', another from '--var-a' to '--var-b', and a third from '--var-b' back to '--var-c'. The arrow from '--var-c' to '--var-a' is highlighted with a yellow-to-orange gradient, indicating an active operation. The calculation for '--var-a' is displayed above this highlighted arrow as: 'calc(var(--var-c) + 1)'. The assignment for '--var-b' is shown on its incoming arrow as 'var(--var-a)', and for '--var-c' as 'var(--var-b)'.
  • --clock: 1
  • --var-a: 9
  • --var-b: 8
  • --var-c: 8

Variable update rules:

  • --var-a is assigned the result of calc(var(--var-c) + 1)
  • --var-b is assigned the value of var(--var-a)
  • --var-c is assigned the value of var(--var-b)

A diagram illustrating a cyclic dependency between three variables: --var-a, --var-b, and --var-c. Arrows show the flow: from --var-c to --var-a, from --var-a to --var-b, and from --var-b to --var-c, forming a continuous cycle.

we have a cpu!

we have a cpu!

... with 1 instruction and 1 register

Registers & Memory

@property --mem0 { /* ... */ }

cpu {
  animation: store 1ms infinite, execute 1ms infinite;
  animation-play-state: paused, paused;
  @container style(--clock: 1) {
    animation-play-state: running, paused;
  }
  @container style(--clock: 3) {
    animation-play-state: paused, running;
  }
  --mem0: calc(var(--mem0c) + 1);
}

@keyframes store { 0%, 100% {
  --mem0c: var(--mem0b);
}}
@keyframes execute { 0%, 100% {
  --mem0b: var(--mem0);
}}

--clock: 0

--mem0: 11

Registers & Memory

@property --memo { /* ... */ }

cpu {
  animation: store 1s infinite, execute 1s infinite;
  animation-play-state: paused, paused;
}

@container style(--clock: 1) {
  animation-play-state: running, paused;
}

@container style(--clock: 3) {
  animation-play-state: paused, running;
}

--mem0: calc(var(--membc) + 1);

@keyframes store { 0%, 100% {
  --membc: var(--mem0);
}}

@keyframes execute { 0%, 100% {
  --memdb: var(--mem0);
}}
  • --clock: 2
  • --mem0: 13

Registers & Memory

@property --mem0 { /* ... */ }

cpu {
	animation: store 1ms infinite, execute 1ms infinite;
	animation-play-state: paused, paused;
}
@container style(--clock: 1) {
	animation-play-state: running, paused;
}
@container style(--clock: 2) {
	animation-play-state: paused, running;
	--mem0: calc(var(--memDb) + 1);
}

@keyframes store { 0%, 100% {
	--mem0: var(--memDb);
}}

@keyframes execute { 0%, 100% {
	--memDb: var(--mem);
}}
  • --clock: 2
  • --mem0: 15

Registers & Memory

@property --mem0 { /* ... */ }
@property --mem1 { /* ... */ }
@property --mem2 { /* ... */ }

cpu {
    animation: store 1ms infinite, execute 1ms infinite;
    animation-play-state: paused, paused;
    @container style(--clock: 1) {
        animation-play-state: running, paused;
    }
    @container style(--clock: 3) {
        animation-play-state: running, running;
    }
    --mem0: calc(var(--mem0c) + 1);
    --mem1: calc(var(--mem1c) + 2);
    --mem2: calc(var(--mem2c) + 3);
}

@keyframes store { 0%, 100% {
    --mem0c: var(--mem0b);
    --mem1c: var(--mem1b);
    --mem2c: var(--mem2b);
}}
@keyframes execute { 0%, 100% {
    --mem0b: var(--mem0);
    --mem1b: var(--mem1);
    --mem2b: var(--mem2);
}}

Current State:

  • --clock: 0
  • --mem0: 2
  • --mem1: 12
  • --mem2: 12
  • --writeAddr: 2;
  • --writeData: 12;
A diagram showing CSS code on the left defining memory properties and animation states, and on the right, the current values of clock, memory registers (--mem0, --mem1, --mem2) along with `--writeAddr` and `--writeData` values. Orange arrows point from `--writeAddr: 2` and `--writeData: 12` to `--mem2: 12`, indicating a write operation.

Memory read

@function --readMem(--at <integer>) returns <integer> {
result: if(
	style(--at:0): var(--mem0c);
	style(--at:1): var(--mem1c);
	style(--at:2): var(--mem2c)
);
}
cpu {
/* ... */
--mem0: var(--mem0c);
--mem1: var(--mem1c);
--mem2: var(--mem2c);
--data: --readMem(0);
}

--clock: 3

--mem0: 16

--mem1: 32

--mem2: 48

--data: 16

Memory read

@function --readMem(--at <integer>) returns <integer> {
    result: if (
        style(--at:0): var(--mem0c);
        style(--at:1): var(--mem1c);
        style(--at:2): var(--mem2c)
    );
}
cpu {
    /* ... */
    --mem0: var(--mem0c);
    --mem1: var(--mem1c);
    --mem2: var(--mem2c);
    --data: --readMem(0);
}
--clock
3
--mem0
17
--mem1
34
--mem2
51
--data
17

Memory read

@function --readMem(--at <integer>) returns <integer> {
	result: if(
		style(--at:0): var(--mem0c);
		style(--at:1): var(--mem1c);
		style(--at:2): var(--mem2c)
	);
}
cpu {
	/* ... */
	--mem0: var(--mem0c);
	--mem1: var(--mem1c);
	--mem2: var(--mem2c);
	--data: --readMem(0);
}
  • --clock: 1
  • --mem0: 21
  • --mem1: 42
  • --mem2: 63
  • --data: 21

Memory write

cpu {
	/* ... */
	--mem0: var(--mem0c);
	--mem1: var(--mem1c);
	--mem2: var(--mem2c);
}

--clock: 1

--mem0: 1

--mem1: 2

--mem2: 3

Memory write

cpu {
	/* ... */
	--writeDest: 1;
	--writeData: 123;

	--mem0: var(--mem0c);
	--mem1: var(--mem1c);
	--mem2: var(--mem2c);
}
  • --clock: 1
  • --mem0: 10
  • --mem1: 20
  • --mem2: 30

Memory write

cpu {
    /* ... */
    --writeDest: 1;
    --writeData: 123;

    --mem0: if(style(--writeDest:0):var(--writeData);else:var(--mem0c));
    --mem1: if(style(--writeDest:1):var(--writeData);else:var(--mem1c));
    --mem2: if(style(--writeDest:2):var(--writeData);else:var(--mem2c));
}

--clock: 3

--mem0: 11

--mem1: 123

--mem2: 33

Instruction pointer

@property --IP {
	syntax: '<integer>';
	inherits: true;
	initial-value: 0;
}

cpu {
	/* ... */
	--inst: --readMem(var(--IPc));
	--instLen: 1;
	--IP: mod(var(--IPc) + var(--instLen), 8);
}
  • --IPc: 1
  • --inst: 10
  • --mem0: 0
  • --mem1: 10
  • --mem2: 20
  • --mem3: 0
  • --mem4: 10
  • --mem5: 10
  • --mem6: 20
  • --mem7: 0
The slide shows code on the left defining an instruction pointer (IP) property and a CPU block. On the right, a list of current variable values and memory states is displayed. The code lines `--inst: --readMem(var(--IPc));` and `--IP: mod(var(--IPc) + var(--instLen), 8);` are highlighted, and an arrow points to the value of `--mem1: 10` in the list of states.

Instruction pointer

@property --IP {
  syntax: '<integer>';
  inherits: true;
  initial-value: 0;
}

cpu {
  /* ... */

  --inst: --readMem(var(--IPc));
  --instLen: 1;

  --IP: mod(var(--IPc) + var(--instLen), 8);
}

--IPc: 7

--inst: 0

--mem0: 0

--mem1: 10

--mem2: 20

--mem3: 0

--mem4: 10

--mem5: 10

--mem6: 20

--mem7: 0

The right side displays a list of program state variables and their integer values, where '--mem7: 0' is highlighted.

Instruction pointer

@property --IP {
  syntax: '<integer>';
  inherits: true;
  initial-value: 0;
}

cpu {
  /* ... */
  --inst: --readMem(var(--IPc));
  --instLen: 1;
  --IP: mod(var(--IPc) + var(--instLen), 8);
}
  • --IPc: 3
  • --inst: 0
  • --mem0: 0
  • --mem1: 10
  • --mem2: 20
  • --mem3: 0
  • --mem4: 10
  • --mem5: 10
  • --mem6: 20
  • --mem7: 0
A code editor screenshot showing a custom CSS property definition for `--IP` and a `cpu` block simulating instruction fetching logic. To the right, a list of variable and memory states, where `--mem3: 0` is highlighted.

Instruction pointer

@property --IP {
	syntax: '<integer>';
	inherits: true;
	initial-value: 0;
}

cpu {
	/* ... */

	--inst: --readMem(var(--IPc));
	--instLen: 1;

	--IP: mod(var(--IPc) + var(--instLen), 8);
}

&::after {
	@container style(--inst: 10) { opacity: 0.5; }
	@container style(--inst: 20) { outline: 2px solid red; }
}
  • --IPc: 7
  • --inst: 0
  • --mem0: 0
  • --mem1: 10
  • --mem2: 20
  • --mem3: 0
  • --mem4: 10
  • --mem5: 10
  • --mem6: 20
  • --mem7: 0
A code snippet on the left defines properties and behavior for a CPU, including instruction reading and styling rules. On the right, a list of variables and their integer values is displayed, with `--mem7: 0` highlighted.

Instruction pointer

@property --IP {
  syntax: '<integer>';
  inherits: true;
  initial-value: 0;
}

cpu {
  /* ... */

  --inst: --readMem(var(--IPc));
  --instLen: 1;

  --IP: mod(var(--IPc) + var(--instLen), 8);
}

&::after {
  @container style(--inst: 10) { opacity: 0.5; }
  @container style(--inst: 20) { outline: 2px solid red; }
}

--IPc: 1

--inst: 10

--mem0: 0

--mem1: 10

--mem2: 20

--mem3: 0

--mem4: 10

--mem5: 10

--mem6: 20

--mem7: 0

Instruction pointer

@property --IP {
  syntax: '<integer>';
  inherits: true;
  initial-value: 0;
}

cpu {
  /* ... */

  --inst: --readMem(var(--IPc));
  --instLen: 1;

  --IP: mod(var(--IPc) + var(--instLen), 8);
}

&::after {
  @container style(--inst: 10) { opacity: 0.5; }
  @container style(--inst: 20) { outline: 2px solid red; }
}
  • --IPc: 5
  • --inst: 10
  • --mem0: 0
  • --mem1: 10
  • --mem2: 20
  • --mem3: 0
  • --mem4: 10
  • --mem5: 10
  • --mem6: 20
  • --mem7: 0
A slide featuring a code editor screenshot displaying CSS-like syntax on the left. On the right, a list of variable names and their integer values is presented, with an arrow highlighting `--mem5: 10`.

Instruction pointer

@property --IP {
  syntax: '<integer>';
  inherits: true;
  initial-value: 0;
}

cpu {
  /* ... */

  --inst: --readMem(var(--IPc));
  --instLen: 1;

  --IP: mod(var(--IPc) + var(--instLen), 8);

&::after {
  @container style(--inst: 10) { opacity: 0.5; }
  @container style(--inst: 20) { outline: 2px solid red; }
}
}
  • --IPc: 6
  • --inst: 20
  • --mem0: 0
  • --mem1: 10
  • --mem2: 20
  • --mem3: 0
  • --mem4: 10
  • --mem5: 10
  • --mem6: 20
  • --mem7: 0
A code editor interface on the left displays CSS-like syntax defining an instruction pointer and CPU logic. On the right, a debug panel shows a list of variables and their current values, with `--mem6: 20` highlighted by a purple arrow.

Instruction pointer

@property --IP {
  syntax: '<integer>';
  inherits: true;
  initial-value: 0;
}

cpu {
  /* ... */

  --inst: --readMem(var(--IPc));
  --instLen: 1;

  --IP: mod(var(--IPc) + var(--instLen), 8);
}

&::after {
  @container style(--inst: 10) { opacity: 0.5; }
  @container style(--inst: 20) { outline: 2px solid red; }
}
  • --IPc: 1
  • --inst: 10
  • --mem0: 0
  • --mem1: 10
  • --mem2: 20
  • --mem3: 0
  • --mem4: 10
  • --mem5: 10
  • --mem6: 20
  • --mem7: 0

A code editor screenshot on the left displays CSS-like custom property definitions for an instruction pointer (IP) and CPU behavior, including logic for reading memory and applying styles based on instruction values. On the right, a debug panel lists variables and their current values, with '--mem1: 10' highlighted by a purple outline.

Instruction pointer

@property --IP {
	syntax: '<integer>';
	inherits: true;
	initial-value: 0;
}

cpu {
	/* ... */

	--inst: --readMem(var(--IPc));
	--instLen: 1;

	--IP: mod(var(--IPc) + var(--instLen), 8);
}

&::after {
	@container style(--inst: 10) { opacity: 0.5; }
	@container style(--inst: 20) { outline: 2px solid red; }
}
  • --IPc: 4
  • --inst: 10
  • --mem0: 0
  • --mem1: 10
  • --mem2: 20
  • --mem3: 0
  • --mem4: 10
  • --mem5: 10
  • --mem6: 20
  • --mem7: 0
A slide showing CSS-like code on the left defining an instruction pointer and CPU logic. On the right, a panel displays current variable and memory states, with '--mem4: 10' presented as an interactive input field with arrows.

Let's add some instructions!

Let's add some

  • MOV
    • ↳ Se
    • ↳ Se

Let's add some instructions!

  • MOV - move value into register

    • Set reg-1 to number 13: MOV REG1, 13
    • Set reg-1 to reg-2: MOV REG1, REG2
  • ADD - addition

    • reg-1 = reg-1 + reg-2: ADD REG1, REG2
  • SUB - subtraction

    • reg-1 = reg-1 - reg-2: SUB REG1, REG2
  • MUL - multiplication

  • DIV - division

IDInst
1MOV
2ADD
3SUB
4MUL
5DIV
An orange arrow visually indicates that the value '13' is moved into 'REG1' in the MOV instruction example.

Sample program & compilation

IDInst
1MOV
2ADD
3SUB
4MUL
5DIV
A table listing instruction IDs and their corresponding instruction names.

Sample program & compilation

// source code
a = (100 + 91) * 7
// deconstructed
a = 100
b = 91
a = a + b
b = 7
a = a * b
// assembly
MOV REG1, 100
MOV REG2, 91
ADD REG1, REG2
MOV REG2, 7
MUL REG1, REG2
// executable
1 -1 100
1 -2 91
2 -1 -2
1 -2 7
4 -1 -2

^^ this is what a compiler/toolchain does! ^^

ID Inst
1 MOV
2 ADD
3 SUB
4 MUL
5 DIV

Sample program & compilation

@property --mem0 {
  syntax: '<integer>';
  inherits: true;
  initial-value: 1;
}
@property --mem1 {
  syntax: '<integer>';
  inherits: true;
  initial-value: -1;
}
@property --mem2 {
  syntax: '<integer>';
  inherits: true;
  initial-value: 100;
}
@property --mem3 {
  syntax: '<integer>';
  inherits: true;
  initial-value: 1;
}
@property --mem4 {
  syntax: '<integer>';
  inherits: true;
  initial-value: ...;
}
// executable
1 -1 100
1 -2 91
2 -1 -2
1 -2 7
4 -1 -2
IDInst
1MOV
2ADD
3SUB
4MUL
5DIV
The slide displays a code snippet defining CSS custom properties with initial integer values on the left. In the center, there is a section labeled "executable" containing five lines of numerical instructions. Arrows point from the `initial-value` lines in the CSS code to specific numbers within the "executable" section. On the right, a table maps instruction IDs (1-5) to instruction names (MOV, ADD, SUB, MUL, DIV).

Executing a program

cpu {
    /* ... */

    --inst: --readMem(var(--IPC, 0));
    --instLen: 3;

    --IP: mod(var(--IPC) + var(--instLen), 15);

    --writeDest: -100;
    --writeData: 123;
}
  • --IPC: 0
  • --inst: 1
  • --reg1: 100
  • --reg2: 0
  • --mem0: 1 <--- MOV
  • --mem1: -1
  • --mem2: 100
  • --mem3: 1
  • --mem4: -2
  • --mem5: 91
  • --mem6: 2
  • --mem7: -1
  • --mem8: -2
  • --mem9: 1
  • --mem10: -2
  • --mem11: 7
  • --mem12: 4
  • --mem13: -1
  • --mem14: -2

Executing a program

cpu {
    /* ... */

    --inst: --readMem(var(--IPc, 0));
    --arg1: --readMem(calc(var(--IPc) + 1));
    --arg2: --readMem(calc(var(--IPc) + 2));
    --arg1val:
        if(style(--arg1 < 0):--readMem(var(--arg1));else:var(--arg1));
    --arg2val:
        if(style(--arg2 < 0):--readMem(var(--arg2));else:var(--arg2));
    --instLen: 3;

    --IP: mod(var(--IPc) + var(--instLen), 15);

    --writeDest: var(--arg1);
    --writeData: --getVal();
}

Current CPU and Memory State:

  • --IPc: 0
  • --inst: 1
  • --reg1: 100
  • --reg2: 0
  • --mem:0: 1 <--- MOV
  • --mem:1: -1
  • --mem:2: 100
  • --mem:3: 1
  • --mem:4: -2
  • --mem:5: 91
  • --mem:6: 2
  • --mem:7: -1
  • --mem:8: -2
  • --mem:9: 1
  • --mem:10: -2
  • --mem:11: 7
  • --mem:12: 4
  • --mem:13: -1
  • --mem:14: -2
A pseudocode representation of CPU execution logic is shown on the left. On the right, a debug output displays the current state of CPU registers and memory. A purple box highlights the first three memory locations: mem:0 contains the instruction '1 <--- MOV', mem:1 contains '-1', and mem:2 contains '100'.

Executing a program

@function --getVal() returns <integer> {
	result: if(
		style(--inst:1): --MOV();
		else:0
	);
}

cpu {
	/* ... */

	--inst: --readMem(var(--IPC, 0));
	--arg1: --readMem(calc(var(--IPC) + 1));
	--arg2: --readMem(calc(var(--IPC) + 2));
	--arg1val:
		if(style(--arg1 < 0):--readMem(var(--arg1)));else:var(--arg1));
	--arg2val:
		if(style(--arg2 < 0):--readMem(var(--arg2)));else:var(--arg2));
	--instLen: 3;

	--IP: mod(var(--IPC) + var(--instLen), 15);

	--writeDest: var(--arg1);
	--writeData: --getVal();
}
  • --IPC: 0
  • --inst: 1
  • --reg1: 100
  • --reg2: 0
  • --mem0: 1 <--- MOV
  • --mem1: -1
  • --mem2: 100
  • --mem3: 1
  • --mem4: -2
  • --mem5: 91
  • --mem6: 2
  • --mem7: -1
  • --mem8: -2
  • --mem9: 1
  • --mem10: -2
  • --mem11: 7
  • --mem12: 4
  • --mem13: -1
  • --mem14: -2
The slide illustrates the execution of a program, showing a pseudo-code representation of a CPU's logic on the left and a snapshot of its memory and register state on the right. The CPU logic includes fetching instructions, calculating arguments, determining instruction length, updating the instruction pointer, and handling data writes. The memory state highlights `mem0` as holding an instruction value of '1' labeled as 'MOV', with `mem1` and `mem2` holding '-1' and '100' respectively, likely representing arguments or data for the MOV instruction.

Executing a program

@function --MOV() returns <integer> {
  result: var(--arg2val);
}

@function --ADD() returns <integer> {
  result: calc(var(--arg1val) + var(--arg2val));
}

@function --SUB() returns <integer> {
  result: calc(var(--arg1val) - var(--arg2val));
}

@function --MUL() returns <integer> {
  result: calc(var(--arg1val) * var(--arg2val));
}

@function --DIV() returns <integer> {
  result: round(down, var(--arg1val) / var(--arg2val));
}

@function --getVal() returns <integer> {
  result: /* ... */;
}
--IPC: 0
--inst: 1
--reg1: 100
--reg2: 0
--mem0: 1 <--- MOV
--mem1: -1
--mem2: 100
--mem3: 1
--mem4: -2
--mem5: 91
--mem6: 2
--mem7: -1
--mem8: -2
--mem9: 1
--mem10: -2
--mem11: 7
--mem12: 4
--mem13: -1
--mem14: -2
A presentation slide titled 'Executing a program'. On the left, a code block defines several custom functions (MOV, ADD, SUB, MUL, DIV, getVal) that resemble CSS custom properties and functions for arithmetic operations. On the right, a debugger-like output displays program state variables including IPC, inst, reg1, reg2, and memory addresses from mem0 to mem14. A purple rectangular highlight box emphasizes the entries for --mem0: 1 <--- MOV, --mem1: -1, and --mem2: 100.

Executing a program

// deconstructed

a = 100
b = 91
a = a + b
b = 7
a = a * b

// assembly

MOV REG1, 100
MOV REG2, 91
ADD REG1, REG2
MOV REG2, 7
MUL REG1, REG2

// executable

1 -1 100
1 -2 91
2 -1 -2
1 -2 7
4 -1 -2
  • IPC: 0
  • inst: 1
  • reg1: 100
  • reg2: 0
  • mem0: 1 <--- MOV
  • mem1: -1
  • mem2: 100
  • mem3: 1
  • mem4: -2
  • mem5: 91
  • mem6: 2
  • mem7: -1
  • mem8: -2
  • mem9: 1
  • mem10: -2
  • mem11: 7
  • mem12: 4
  • mem13: -1
  • mem14: -2

A slide illustrating the execution of a program, showing its representation in deconstructed pseudocode, assembly language, and an executable format. Alongside these, a panel displays the current state of the CPU's instruction pointer (IPC), current instruction (inst), registers (reg1, reg2), and various memory addresses (mem0 through mem14). The first instruction, "a = 100" in deconstructed, "MOV REG1, 100" in assembly, and "1 -1 100" in executable, is highlighted, with corresponding register and memory values showing the effect of this instruction.

Executing a program

Deconstructed

a = 100
b = 91
a = a + b
b = 7
a = a * b

Assembly

MOV REG1, 100
MOV REG2, 91
ADD REG1, REG2
MOV REG2, 7
MUL REG1, REG2

Executable

1 -1 100
1 -2 91
2 -1 -2
1 -2 7
4 -1 -2

System State

  • IPC: 3
  • inst: 1
  • reg1: 100
  • reg2: 91
  • mem0: 1
  • mem1: -1
  • mem2: 100
  • mem3: 1 <--- MOV
  • mem4: -2
  • mem5: 91
  • mem6: 2
  • mem7: -1
  • mem8: -2
  • mem9: 1
  • mem10: -2
  • mem11: 7
  • mem12: 4
  • mem13: -1
  • mem14: -2
A visual representation of program execution showing three columns for different levels of abstraction: 'deconstructed' pseudocode, 'assembly' instructions, and 'executable' machine code. A highlight bar spans the second instruction in each of these columns, specifically "b = 91", "MOV REG2, 91", and "1 -2 91". On the right, a 'system state' panel lists CPU registers and memory values, with a box highlighting the entry for 'mem3: 1 <--- MOV', indicating the currently executing instruction and its corresponding memory address and operation.

Executing a program

// deconstructed

a = 100
b = 91
a = a + b
b = 7
a = a * b

// assembly

MOV REG1, 100
MOV REG2, 91
ADD REG1, REG2
MOV REG2, 7
MUL REG1, REG2

// executable

1 -1 100
1 -2 91
2 -1 -2
1 -2 7
4 -1 -2
  • --IPC: 6
  • --inst: 2
  • --reg1: 191
  • --reg2: 91
  • --mem0: 1
  • --mem1: -1
  • --mem2: 100
  • --mem3: 1
  • --mem4: -2
  • --mem5: 91
  • --mem6: 2 <--- ADD
  • --mem7: -1
  • --mem8: -2
  • --mem9: 1
  • --mem10: -2
  • --mem11: 7
  • --mem12: 4
  • --mem13: -1
  • --mem14: -2

Executing a program

Deconstructed Code

a = 100
b = 91
a = a + b
b = 7
a = a * b

Assembly Code

MOV REG1, 100
MOV REG2, 91
ADD REG1, REG2
MOV REG2, 7
MUL REG1, REG2

Executable Code

1 -1 100
1 -2 91
2 -1 -2
1 -2 7
4 -1 -2

Execution State

  • --IPC: 9
  • --inst: 1
  • --reg1: 191
  • --reg2: 7
  • --mem0: 1
  • --mem1: -1
  • --mem2: 100
  • --mem3: 1
  • --mem4: -2
  • --mem5: 91
  • --mem6: 2
  • --mem7: -1
  • --mem8: -2
  • --mem9: 1 <--- MOV
  • --mem10: -2
  • --mem11: 7
  • --mem12: 4
  • --mem13: -1
  • --mem14: -2
The slide illustrates a program's journey from high-level deconstructed code to assembly and then to an executable (numerical) format. On the right, it shows the state of a CPU's registers and memory, with specific lines of code and memory highlighted to indicate the current execution point and relevant memory content.

Executing a program

// deconstructed

a = 100
b = 91
a = a + b
b = 7
a = a * b

// assembly

MOV REG1, 100
MOV REG2, 91
ADD REG1, REG2
MOV REG2, 7
MUL REG1, REG2

// executable

1 -1 100
1 -2 91
2 -1 -2
1 -2 7
4 -1 -2
  • --IPC: 12
  • --inst: 4
  • --reg1: 1337
  • --reg2: 7
  • --mem0: 1
  • --mem1: -1
  • --mem2: 100
  • --mem3: 1
  • --mem4: -2
  • --mem5: 91
  • --mem6: 2
  • --mem7: -1
  • --mem8: -2
  • --mem9: 1
  • --mem10: -2
  • --mem11: 7
  • --mem12: 4 <--- MUL
  • --mem13: -1
  • --mem14: -2
A program execution visualization with three code panels (deconstructed, assembly, executable) on the left, and a state dump on the right. The line `a = a * b` in deconstructed code, `MUL REG1, REG2` in assembly, and `4 -1 -2` in executable code are highlighted. An arrow points to `--reg1: 1337` in the state dump, and `--mem12: 4 <--- MUL` is enclosed in a box.

Executing a program

// deconstructed

a = 100
b = 91
a = a + b
a = a + b
b = 7
a = a * b

// assembly

MOV REG1, 100
MOV REG2, 91
ADD REG1, REG2
MOV REG2, 7
MUL REG1, REG2

// executable

1 -1 100
1 -2 91
2 -1 -2
1 -2 7
4 -1 -2

Program State

  • --IPC: 12
  • --inst: 4
  • --reg1: 1337
  • --reg2: 7
  • --mem0: 1
  • --mem1: -1
  • --mem2: 100
  • --mem3: 1
  • --mem4: -2
  • --mem5: 91
  • --mem6: 2
  • --mem7: -1
  • --mem8: -2
  • --mem9: 1
  • --mem10: -2
  • --mem11: 7
  • --mem12: 4 <--- MUL
  • --mem13: -1
  • --mem14: -2
The slide displays three columns of code: deconstructed pseudo-code, assembly language, and a low-level executable format, illustrating the transformation of a program. To the right, a panel shows the current state of program execution including Instruction Pointer (IPC), current instruction, register values, and memory contents. A red arrow highlights that the value of `reg1` (1337) corresponds to the `ADD REG1, REG2` instruction in the assembly code. A box highlights the memory address `mem12` containing the value `4 <--- MUL`.

we have a cpu!

we have a cpu!

... with no logic

Let's add some conditionals!

  • JMP - jump to a different part of the code
    • Move IP to 6: JMP 6
  • CMP - subtraction, but instead of saving the result, save flags
    • Compare reg-1 to number 13: CMP REG1, 13
    • Sets flags:
      • Zero Flag (ZF) - if result is 0
      • Sign Flag (SF) - if result is negative
  • JL/JLE/JE/JG/JGE/JNL/JNLE/JNE/JNG/JNGE - jump if (not) (less/equal/greater)

Let's add some conditionals!

  • JMP - jump to a different part of the code
    • Move IP
  • CMP - subtract
    • Compare
    • Sets flag
      • Zero
      • Sign
  • JL/JLE/JE/J... (equal/greater)

x86 jump instructions

JA, JAE, JB, JBE, JC, JCXZ, JE, JG, JGE, JL, JLE, JMP, JNA, JNAE, JNB, JNBE, JNC, JNE, JNG, JNGE, JNL, JNLE, JNO, JNP, JNS, JNZ, JO, JP, JPE, JPO, JS, JZ

Let's add some conditionals!

  • JMP - jump to a different part of the code
    • Move IP to 6: JMP 6
  • CMP - subtraction, but instead of saving the result, save flags
    • Compare reg-1 to number 13: CMP REG1, 13
    • Sets flags:
      • Zero Flag (ZF) - if result is 0
      • Sign Flag (SF) - if result is negative
  • JL/JLE/JE/JG/JGE/JNL/JNLE/JNE/JNG/JNGE - jump if (not) (less/equal/greater)
    • JE (jump equal) - jump if ZF = 1
    • JG (jump greater) - jump if ZF = 0 and SF = 0
    • JNGE (jump not greater and not equal) - jump if SF = 1

Conditional example programs

a = 10
a += (a > 5) ? 2 : 5
// ternary if example
a = 10
b = 5
cmp = (a <= 5)
if (!cmp)
	b = 2
a = a + b
MOV REG1, 10 // 0 (IP)
MOV REG2, 5 // 3
CMP REG1, 5 // 6
JLE 15 // 9 -
MOV REG2, 2 // 12 |
MOV REG2, 2 // 15
a = 2
for (b = 0; b < 3; b++)
	a = a * a
// for loop example
a = 2
b = 0
{ a = a * a
  b = b + 1
  cmp = (b < 3)
} while (cmp)
MOV REG1, 2 // 0 (IP)
MOV REG2, 0 // 3
MUL REG1, REG1 // 6 <-
ADD REG2, 1 // 9 |
CMP REG2, 3 // 12 |
JL 6 // 15-/
The slide presents six code examples arranged in a grid. The left column shows high-level code for a ternary if statement and a for loop. The middle column shows equivalent high-level code for an if statement and a while loop. The right column shows the assembly language translation for the if statement and the while loop examples, including instructions like MOV, CMP, JLE, MUL, ADD, and JL.

Conditionals

@property --flags {
	syntax: '<integer>';
	inherits: true;
	initial-value: 0;
}
@function --getDest() returns <integer>{
	result: if(
		style(--inst:6):--D-CMP();
		style(--inst:7):--D-JMP();
		style(--inst:8):--D-JL();
		else:var(--arg1));
}
cpu {
	/* ... */

	--IP: if(style(--writeDest:-10):var(--writeData);
		else:calc(var(--IPc, 0) + var(--instLen)));

	--writeDest: --getDest();
	--writeData: --getVal();
}
  • --IPC: -3
  • --flags: 0
  • --inst: -100
  • --reg1: 0
  • --reg2: 0
  • --mem0: 1 <--- ???
  • --mem1: -1
  • --mem2: 2
  • --mem3: 1
  • --mem4: -2
  • --mem5: 0
  • --mem6: 4
  • --mem7: -1
  • --mem8: -1
  • --mem9: 2
  • --mem10: -2
  • --mem11: 1
  • --mem12: 6
  • --mem13: -2
  • --mem14: 3
  • --mem15: 8
  • --mem16: 0
  • --mem17: 6
A slide presenting code definitions for properties, functions, and CPU logic on the left, alongside a simulation state dump or variable values on the right. A purple box highlights the line "--mem0: 1 <--- ???" in the state dump.

Conditionals

@function --CMP() returns <integer> {
	--tmp: calc(var(--arg1val) - var(--arg2val));
	--zeroFlag: max(0, 1 - abs(var(--tmp)));
	--signFlag: max(0, 0 - sign(var(--tmp)));
	result: calc(var(--zeroFlag) + var(--signFlag) * 2);
}
@function --D-CMP() returns <integer> {
	result: -11;
}
@function --JMP() returns <integer> {
	result: var(--arg2val);
}
@function --D-JMP() returns <integer> {
	result: -10;
}
@function --JL() returns <integer> {
	result: --JMP();
}
@function --D-JL() returns <integer> {
	result: if(style(--flagsc >= 2): -10;else: -100);
}
  • --IPC: -3
  • --flags: 0
  • --inst: -100
  • --reg1: 0
  • --reg2: 0
  • --mem0: 1 <--- ???
  • --mem1: -1
  • --mem2: 2
  • --mem3: 1
  • --mem4: -2
  • --mem5: 0
  • --mem6: 4
  • --mem7: -1
  • --mem8: -1
  • --mem9: 2
  • --mem10: -2
  • --mem11: 1
  • --mem12: 6
  • --mem13: -2
  • --mem14: 3
  • --mem15: 8
  • --mem16: 0
  • --mem17: 6
The slide displays several code function definitions for conditional logic on the left side, written in a custom domain-specific language. On the right, a list of register and memory values representing system state is shown. A box highlights the memory values for `mem0`, `mem1`, and `mem2`.

Conditionals

@function --CMP() returns <integer> {
  --tmp: calc(var(--arg1val) - var(--arg2val));
  --zeroFlag: max(0, 1 - abs(var(--tmp)));
  --signFlag: max(0, 0 - sign(var(--tmp)));
  result: calc(var(--zeroFlag) + var(--signFlag) * 2);
}
@function --D-CMP() returns <integer> {
  result: -11;
}
@function --JMP() returns <integer> {
  result: var(--arg2val);
}
@function --D-JMP() returns <integer> {
  result: -10;
}
@function --JL() returns <integer> {
  result: --JMP();
}
@function --D-JL() returns <integer> {
  result: if(style(--flagsc >= 2):-10;else:-100);
}
  • --IPC: 3
  • --flags: 0
  • --inst: 1
  • --reg1: 2
  • --reg2: 0
  • --mem0: 1
  • --mem1: -1
  • --mem2: 2
  • --mem3: 1 <--- MOV
  • --mem4: -2
  • --mem5: 0
  • --mem6: 4
  • --mem7: -1
  • --mem8: -1
  • --mem9: 2
  • --mem10: -2
  • --mem11: 1
  • --mem12: 6
  • --mem13: -2
  • --mem14: 3
  • --mem15: 8
  • --mem16: 0
  • --mem17: 6
A purple rectangle highlights the line "--mem3: 1 <--- MOV" in the list of memory and register states.

Conditionals


@function --CMP() returns <integer> {
  --tmp: calc(var(--arg1val) - var(--arg2val));
  --zeroFlag: max(0, 1 - abs(var(--tmp)));
  --signFlag: max(0, 0 - sign(var(--tmp)));
  result: calc(var(--zeroFlag) + var(--signFlag) * 2);
}

@function --D-CMP() returns <integer> {
  result: -11;
}

@function --JMP() returns <integer> {
  result: var(--arg2val);
}

@function --D-JMP() returns <integer> {
  result: -10;
}

@function --JL() returns <integer> {
  result: --JMP();
}

@function --D-JL() returns <integer> {
  result: if(style(--flagsc >= 2): -10; else: -100);
}
  

--IPc: 9
--flags: 0
--inst: 2
--reg1: 4
--reg2: 1
--mem0: 1
--mem1: -1
--mem2: 2
--mem3: 1
--mem4: -2
--mem5: 0
--mem6: 4
--mem7: -1
--mem8: -1
--mem9: 2 <--- ADD
--mem10: -2
--mem11: 1
--mem12: 6
--mem13: -2
--mem14: 3
--mem15: 8
--mem16: 0
--mem17: 6
  

The slide shows two code-like sections. The left section defines several functions, including compare (--CMP), jump (--JMP), and jump less (--JL), which appear to simulate CPU conditional logic. The right section displays a system state dump with values for instruction pointer (--IPc), flags, instruction (--inst), registers (--reg1, --reg2), and memory locations (--mem0 to --mem17). The entry for --mem9 is highlighted and indicates an "ADD" operation.

Conditionals

@function --CMP() returns <integer>{
    --tmp: calc(var(--arg1val) - var(--arg2val));
    --zeroFlag: max(0, 1 - abs(var(--tmp)));
    --signFlag: max(0, 0 - sign(var(--tmp)));
    result: calc(var(--zeroFlag) + var(--signFlag) * 2);
}

@function --D-CMP() returns <integer>{
    result: -11;
}

@function --JMP() returns <integer>{
    result: var(--arg2val);
}

@function --D-JMP() returns <integer>{
    result: -10;
}

@function --JL() returns <integer>{
    result: --JMP();
}

@function --D-JL() returns <integer>{
    result: if(style(--flagsc >= 2): -10; else:-100);
}
--IPC: 15
--flags: 2
--inst: 8
--reg1: 4
--reg2: 1
--mem0: 1
--mem1: -1
--mem2: 2
--mem3: 1
--mem4: -2
--mem5: 0
--mem6: 4
--mem7: -1
--mem8: -1
--mem9: 2
--mem10: -2
--mem11: 1
--mem12: 6
--mem13: -2
--mem14: 3
--mem15: 8 <--- JL
--mem16: 0
--mem17: 6

Conditionals


@function --CMP() returns <integer> {
	--tmp: calc(var(--arg1val) - var(--arg2val));
	--zeroFlag: max(0, 1 - abs(var(--tmp)));
	--signFlag: max(0, 0 - sign(var(--tmp)));
	result: calc(var(--zeroFlag) + var(--signFlag) * 2);
}

@function --D-CMP() returns <integer> {
	result: -11;
}

@function --JMP() returns <integer> {
	result: var(--arg2val);
}

@function --D-JMP() returns <integer> {
	result: -10;
}

@function --JL() returns <integer> {
	result: --JMP();
}

@function --D-JL() returns <integer> {
	result: if(style(--flagsc >= 2): -10;else:-100);
}
    
  • --IPc: 9
  • --flags: 2
  • --inst: 2
  • --reg1: 16
  • --reg2: 2
  • --mem0: 1
  • --mem1: -1
  • --mem2: 2
  • --mem3: 1
  • --mem4: -2
  • --mem5: 0
  • --mem6: 4
  • --mem7: -1
  • --mem8: -1
  • --mem9: 2 <--- ADD
  • --mem10: -2
  • --mem11: 1
  • --mem12: 6
  • --mem13: -2
  • --mem14: 3
  • --mem15: 8
  • --mem16: 0
  • --mem17: 6

Code snippets defining conditional operations are shown on the left. On the right, a list of memory and register states is displayed, with "mem9: 2 <--- ADD" highlighted.

Conditionals

@function --CMP() returns <integer> {
  --tmp: calc(var(--arg1val) - var(--arg2val));
  --zeroFlag: max(0, 1 - abs(var(--tmp)));
  --signFlag: max(0, 0 - sign(var(--tmp)));
  result: calc(var(--zeroFlag) + var(--signFlag) * 2);
}
@function --D-CMP() returns <integer> {
  result: -11;
}
@function --JMP() returns <integer> {
  result: var(--arg2val);
}
@function --D-JMP() returns <integer> {
  result: -10;
}
@function --JL() returns <integer> {
  result: --JMP();
}
@function --D-JL() returns <integer> {
  result: if(style(--flagsc >= 2): -10; else: -100);
}
  • --IPC: 15
  • --flags: 2
  • --inst: 8
  • --reg1: 16
  • --reg2: 2
  • --mem0: 1
  • --mem1: -1
  • --mem2: 2
  • --mem3: 1
  • --mem4: -2
  • --mem5: 0
  • --mem6: 4
  • --mem7: -1
  • --mem8: -1
  • --mem9: 2
  • --mem10: -2
  • --mem11: 1
  • --mem12: 6
  • --mem13: -2
  • --mem14: 3
  • --mem15: 8 <--- JL
  • --mem16: 0
  • --mem17: 6

Conditionals

@function --CMP() returns <integer> {
  --tmp: calc(var(--arg1val) - var(--arg2val));
  --zeroFlag: max(0, 1 - abs(var(--tmp)));
  --signFlag: max(0, 0 - sign(var(--tmp)));
  result: calc(var(--zeroFlag) + var(--signFlag) * 2);
}
@function --D-CMP() returns <integer> {
  result: -11;
}
@function --JMP() returns <integer> {
  result: var(--arg2val);
}
@function --D-JMP() returns <integer> {
  result: -10;
}
@function --JL() returns <integer> {
  result: --JMP();
}
@function --D-JL() returns <integer> {
  result: if(style(--flagsc >= 2): -10; else: -100);
}
--IPc: 15
--flags: 1
--inst: 8
--reg1: 256
--reg2: 3
--mem0: 1
--mem1: -1
--mem2: 2
--mem3: 1
--mem4: -2
--mem5: 0
--mem6: 4
--mem7: -1
--mem8: -1
--mem9: 2
--mem10: -2
--mem11: 1
--mem12: 6
--mem13: -2
--mem14: 3
--mem15: 8 <--- JL
--mem16: 0
--mem17: 6
A pink arrow points from '--reg1: 256' in the state dump towards the left side of the slide. The line '--mem15: 8 <--- JL' in the state dump is highlighted with a purple rectangular box.

Conditionals

@function ---CMP() returns <integer> {
    ---tmp: calc(var(---arg1val) - var(---arg2val));
    ---zeroFlag: max(0, 1 - abs(var(---tmp)));
    ---signFlag: max(0, 0 - sign(var(---tmp)));
    result: calc(var(---zeroFlag) + var(---signFlag) * 2);
}

@function ---0-CMP() returns <integer> {
    result: -11;
}

@function ---JMP() returns <integer> {
    result: var(---arg2val);
}

@function ---0-JMP() returns <integer> {
    result: -10;
}

@function ---JL() returns <integer> {
    result: ---JMP();
}

@function ---0-JL() returns <integer> {
    result: if(style(---flagsc >= 2);-100);
}
---IPC: 15
---flags: 1
---inst: 8
---reg1: 256
---reg2: 3
---mem0: 1
---mem1: -1
---mem2: 2
---mem3: 1
---mem4: -2
---mem5: 0
---mem6: 4
---mem7: -1
---mem8: -1
---mem9: 2
---mem10: -2
---mem11: 1
---mem12: 6
---mem13: -2
---mem14: 3
---mem15: 8 <--- JL
---mem16: 0
---mem17: 6
A red horizontal arrow points to the line "---reg1: 256" in the data section. A light grey rectangular highlight box surrounds the lines "---mem15: 8 <--- JL", "---mem16: 0", and "---mem17: 6" in the data section.

Conditionals

@function --CMP() returns <integer> {
	--tmp: calc(var(--arg1val) - var(--arg2val));
	--zeroFlag: max(0, 1 - abs(var(--tmp)));
	--signFlag: max(0, 0 - sign(var(--tmp)));
	result: calc(var(--zeroFlag) + var(--signFlag) * 2);
}

@function --D-CMP() returns <integer> {
	result: -11;
}

@function --JMP() returns <integer> {
	result: var(--arg2val);
}

@function --D-JMP() returns <integer> {
	result: -10;
}

@function --JL() returns <integer> {
	result: --JMP();
}

@function --D-JL() returns <integer> {
	result: if(style(--flagsc > 2):-10;else:-100);
}
  • IPC: 15
  • inst: 1
  • flags: 8
  • reg1: 256
  • reg2: 3
  • mem0: 1
  • mem1: -1
  • mem2: 2
  • mem3: 1
  • mem4: 2
  • mem5: 0
  • mem6: 4
  • mem7: -1
  • mem8: -1
  • mem9: 2
  • mem10: 2
  • mem11: 1
  • mem12: 6
  • mem13: -2
  • mem14: 3
  • mem15: 8 <-- JL
  • mem16: 0
  • mem17: 6
A red arrow points to the line "reg1: 256". A rectangular highlight surrounds the line "mem15: 8 <-- JL".

we have a cpu!

Output

  • ASCII text output
  • Write characters into a register
    • MOV OUT, 65 will write "A" (A is 0x41 hex, 65 dec)
  • Need function to map numbers -> ASCII strings

Example output program

Example output program

print("hello css day!")

// print example

Example output program

print("hello css day!")

// print example
MOV OUT, 'h'
MOV OUT, 'e'
MOV OUT, 'l'
MOV OUT, 'l'
MOV OUT, 'o'
MOV OUT, ' '
MOV OUT, 'c'
MOV OUT, 's'
MOV OUT, 's'
MOV OUT, ' '
MOV OUT, 'd'
MOV OUT, 'a'
MOV OUT, 'y'
MOV OUT, '!'
1 -14 104
1 -14 101
1 -14 108
1 -14 108
1 -14 111
1 -14 32
1 -14 99
1 -14 115
1 -14 115
1 -14 32
1 -14 100
1 -14 97
1 -14 121
1 -14 33

Output

<clock><cpu></cpu></clock>
<style>
@property --output {
  syntax: '<content-list>';
  inherits: true;
  initial-value: "";
}

cpu {
  /* ... */
}
</style>
-IPc: -3
inst: 100
--mem0: 1 <-- MOV
--mem1: -14
--mem2: 104
--mem3: 1
--mem4: -14
--mem5: 101
--mem6: 1
--mem7: -14
--mem8: 108
--mem9: 1
--mem10: -14
--mem11: 108
--mem12: 1
--mem13: -14
--mem14: 111
--mem15: 1
--mem16: -14
--mem17: 32
--mem18: 1
--mem19: -14
--mem20: 99
--mem21: 1
--mem22: -14
--mem23: 115
--mem24: 1
--mem25: -14
--mem26: 115
--mem27: 1
--mem28: -14
--mem29: 32
--mem30: 1
--mem31: -14
--mem32: 100
--mem33: 1
--mem34: -14
--mem35: 97
--mem36: 1
--mem37: -14
--mem38: 121
--mem39: 1
--mem40: -14
--mem41: 33

Output

<clock><cpu></cpu></clock>
<style>
@property --output {
  	syntax: '<content-list>';
  	inherits: true;
  	initial-value: "";
}

cpu {
  	/* ... */
  	--output: if(
    		style(--writeDest: -14): var(--outputc, "") --i2char(var(--writeData));
    		else: var(--outputc)
  	);
}
</style>
--IPC: 3
inst: 100
--mem0: 1 <-- MOV
--mem1: -14
--mem2: 104
--mem3: 1
--mem4: -14
--mem5: 101
--mem6: 1
--mem7: -14
--mem8: 108
--mem9: 1
--mem10: -14
--mem11: 108
--mem12: 1
--mem13: -14
--mem14: 111
--mem15: 1
--mem16: -14
--mem17: 32
--mem18: 1
--mem19: -14
--mem20: 99
--mem21: 1
--mem22: -14
--mem23: 115
--mem24: 1
--mem25: -14
--mem26: 115
--mem27: 1
--mem28: -14
--mem29: 32
--mem30: 1
--mem31: -14
--mem32: 100
--mem33: 1
--mem34: -14
--mem35: 97
--mem36: 1
--mem37: -14
--mem38: 121
--mem39: 1
--mem40: -14
--mem41: 33
A debugging output pane displays a list of memory addresses and their values, with entries for --mem0 through --mem2 highlighted.

Output

<clock><cpu><screen></screen></cpu></clock>

<style>
@property --output {
	syntax: '<content-list>';
	inherits: true;
	initial-value: "";
}

cpu {
	/* ... */

	--output: if(
		style(--writeDest: -14): var(--outputc, "") --i2char(var(--writeData));
		else:var(--outputc)
	);
}

screen::after {
	content: var(--output);
}
</style>
-IP: 3
-inst: 100
-mem0: 1 <-- MOV
-mem1: -14
-mem2: 104
-mem3: 1
-mem4: -14
-mem5: 101
-mem6: 1
-mem7: -14
-mem8: 108
-mem9: 1
-mem10: -14
-mem11: 108
-mem12: 1
-mem13: -14
-mem14: 111
-mem15: 1
-mem16: -14
-mem17: 32
-mem18: 1
-mem19: -14
-mem20: 99
-mem21: 1
-mem22: -14
-mem23: 115
-mem24: 1
-mem25: -14
-mem26: 115
-mem27: 1
-mem28: -14
-mem29: 32
-mem30: 1
-mem31: -14
-mem32: 100
-mem33: 1
-mem34: -14
-mem35: 97
-mem36: 1
-mem37: -14
-mem38: 121
-mem39: 1
-mem40: -14
-mem41: 33
Two red rectangular outlines appear on the right side. One highlights the lines "-mem0: 1 <-- MOV", "-mem1: -14", and "-mem2: 104". The other is an empty rectangle to its right, indicating a blank space.
<section class='slide-text'><h3>Output</h3><pre><code> &lt;clock&gt;&lt;cpu&gt;&lt;screen&gt;&lt;/screen&gt;&lt;/cpu&gt;&lt;/clock&gt; &lt;style&gt; @function --i2char(--i integer) returns &lt;string&gt; { result: if(style(--i:0) " ", style(--i:32) "!", style(--i:33) &quot;&quot;, style(--i:34) "#", style(--i:35) "$", style(--i:36) "%", style(--i:37) "&amp;", style(--i:3
<section class='slide-text'> <h3>Output</h3> <pre><code data-lang='custom'>&lt;clock&gt;&lt;cpu&gt;&lt;screen&gt;&lt;/screen&gt;&lt;/cpu&gt;&lt;/clock&gt; &lt;style&gt; @function --i2char(--i &lt;integer&gt;) returns &lt;string&gt; { result: if(style(--i:10):" ", style(--i:32):"!", style(--i:33):"&quot;", style(--i:34):"#", style(--i:35):"$", style(--i:36):"%", style(--i:37):"&amp;", style(--i:38):"'", style(--i:39):"(", style(--i:40):")", style(--i:41):"*", style(--i:42):"+", style(--i:43):",", style(--i:44):"-", style(--i:45):".", style(--i:46):"/", style(--i:47):"0", style(--i:48):"1", style(--i:49):"2", style(--i:50):"3", style(--i:51):"4", style(--i:52):"5", style(--i:53):"6", style(--i:54):"7", style(--i:55):"8", style(--i:56):"9", style(--i:57):":", style(--i:58):";", style(--i:59):"&lt;", style(--i:60):"=", style(--i:61):"&gt;", style(--i:62):"?", style(--i:63):"@", style(--i:64):"A", style(--i:65):"B", style(--i:66):"C", style(--i:67):"D", style(--i:68):"E", style(--i:69):"F", style(--i:70):"G", style(--i:71):"H", style(--i:72):"I", style(--i:73):"J", style(--i:74):"K", style(--i:75):"L", style(--i:76):"M", style(--i:77):"N", style(--i:78):"O", style(--i:79):"P", style(--i:80):"Q", style(--i:81):"R", style(--i:82):"S", style(--i:83):"T", style(--i:84):"U", style(--i:85):"V", style(--i:86):"

Output

<clock><cpu><screen>/screen></cpu></clock>

<style>
@function __i2char(--i integer) returns <string> {
	result: if(style(--i:10):" ",style(--i:32):"!",style(--i:33):""" ,style(--i:34):"#" ,style(--i:35):"$" ,style(--i:36):"%" ,style(--i:37):"&",style(--i:38):"'",style(--i:39):"(" ,style(--i:40):")" ,style(--i:41):"*" ,style(--i:42):"+" ,style(--i:43):"," ,style(--i:44):"-" ,style(--i:45):"." ,style(--i:46):"/" ,style(--i:47):"0" ,style(--i:48):"1" ,style(--i:49):"2" ,style(--i:50):"3" ,style(--i:51):"4" ,style(--i:52):"5" ,style(--i:53):"6" ,style(--i:54):"7" ,style(--i:55):"8" ,style(--i:56):"9" ,style(--i:57):":" ,style(--i:58):";" ,style(--i:59):"<" ,style(--i:60):"=" ,style(--i:61):">" ,style(--i:62):"?" ,style(--i:63):"@" ,style(--i:64):"A" ,style(--i:65):"B" ,style(--i:66):"C" ,style(--i:67):"D" ,style(--i:68):"E" ,style(--i:69):"F" ,style(--i:70):"G" ,style(--i:71):"H" ,style(--i:72):"I" ,style(--i:73):"J" ,style(--i:74):"K" ,style(--i:75):"L" ,style(--i:76):"M" ,style(--i:77):"N" ,style(--i:78):"O" ,style(--i:79):"P" ,style(--i:80):"Q" ,style(--i:81):"R" ,style(--i:82):"S" ,style(--i:83):"T" ,style(--i:84):"U" ,style(--i:85):"V" ,style(--i:86):"W" ,style(--i:87):"X" ,style(--i:88):"Y" ,style(--i:89):"Z" ,style(--i:90):"[" ,style(--i:91):"\" ,style(--i:92):"]" ,style(--i:93):"^" ,style(--i:94):"_" ,style(--i:95):"`" ,style(--i:96):"a" ,style(--i:97):"b" ,style(--i:98):"c" ,style(--i:99):"d" ,style(--i:100):"e" ,style(--i:101):"f" ,style(--i:102):"g" ,style(--i:103):"h" ,style(--i:104):"i" ,style(--i:105):"j" ,style(--i:106):"k" ,style(--i:107):"l" ,style(--i:108):"m" ,style(--i:109):"n" ,style(--i:110):"o" ,style(--i:111):"p" ,style(--i:112):"q" ,style(--i:113):"r" ,style(--i:114):"s" ,style(--i:115):"t" ,style(--i:116):"u" ,style(--i:117):"v" ,style(--i:118):"w" ,style(--i:119):"x" ,style(--i:120):"y" ,style(--i:121):"z" ,style(--i:122):"{" ,style(--i:123):"|" ,style(--i:124):"}" ,style(--i:125):"~" ,style(--i:126):"", else:"x");
}

@property --output {
	syntax: '<content-list>';
	inherits: true;
	initial-value: "";
}

cpu { /* ... */

	--output: if(
		style(--writeBest:-14):var(--outputc, "") + i2char(var(--writeData));
		else:var(--outputc)
	);
}

screen::after {
	content: var(--output);
}
</style>
--iPc: 12
--inst: 1
--mem0: 1
--mem1: -14
--mem2: 104
--mem3: 1
--mem4: -14
--mem5: 101
--mem6: 1
--mem7: -14
--mem8: 108
--mem9: 1
--mem10: -14
--mem11: 108
--mem12: 1 <-- MOV
--mem13: -14
--mem14: 111
--mem15: 1
--mem16: -14
--mem17: 32
--mem18: 1
--mem19: -14
--mem20: 99
--mem21: 1
--mem22: -14
--mem23: 115
--mem24: 1
--mem25: -14
--mem26: 115
--mem27: 1
--mem28: -14
--mem29: 32
--mem30: 1
--mem31: -14
--mem32: 100
--mem33: 1
--mem34: -14
--mem35: 97
--mem36: 1
--mem37: -14
--mem38: 121
--mem39: 1
--mem40: -14
--mem41: 33
<section class='slide-text'><h3>Output</h3><pre><code data-lang='custom'>&lt;clock&gt;&lt;cpu&gt;&lt;screen&gt;&lt;/screen&gt;&lt;/cpu&gt;&lt;/clock&gt; &lt;style&gt; @function --i2char (--i integer) returns &lt;string&gt; { result: if(style(--i:10):&quot;a &quot;,style(--i:32):&quot; &quot;,style(--i:33):&quot;!&quot;,style(--i:34):&quot;&quot;&quot;, style(--i:37):&quot;%&quot
<section class='slide-text'> <h3>Output</h3> <pre><code data-lang='css'>&lt;style&gt; /* _char(--i: &lt;integer&gt;) returns &lt;string&gt; */ li:nth-of-type(0) { style: var(--char-code) } li:nth-of-type(0) { style: "a" } li:nth-of-type(1) { style: var(--char-code) } li:nth-of-type(1) { style: "b" } li:nth-of-type(2) { style: var(--char-code) } li:nth-of-type(2)
A white vertical banner features a geometric pattern of interlocking rectangular blocks at its base, illuminated by blue light.
A tall, light-colored panel featuring a geometric pattern of dark rectangular blocks in its lower half. The pattern is illuminated from below by a blue light.

Input

  • On-screen keyboard
    • Button press
    • Write input into
  • Get register
    • CPU
    • Address
  • Show output
    • Memory

Input

  • On-screen keyboard input
    • Based on `:hover:active`
    • Writes output into the `INP` register
  • Get result in a separate register
    • `CMP INP, 0` and `JZ` loop can check for entry
    • After input is consumed, it must be reset: `MOV INP, 0`
  • Show/hide keyboard by writing into a register
    • `MOV SKB, 1` will show keyboard (`SKB = ShowKeyBoard`)

Input

  • On-screen keyboard input
    • Based on :hover:active
    • Writes output into the INP register
  • Get result in a separate register
    • CMP INP, 0 and JZ loop can check for entry
    • After input is consumed, it must be reset: MOV INP, 0
  • Show/hide keyboard by writing into a register
    • MOV SKB, 1 will show keyboard (SKB = ShowKeyBoard)

Example input/output program

Example input/output program

while (true) {
    char = waitForInput()
    print(char)
}

// i/o example

Example input/output program

while (true) {
    char = waitForInput()
    print(char)
}

// i/o example
{ showKeyboard = 1
    while (!input) {
    }
    output = input
    showKeyboard = 0
    input = 0
} while (true)
MOV SKB, 1
CMP INP, 0
JZ 3
MOV OUT, INP
MOV SKB, 0
MOV INP, 0
JMP 0

Input

<clock><cpu><screen></screen></cpu></clock>

<style>
cpu {
    /* ... */
}
</style>
--IPc: -3
--inst: -100
--flags: 0
--showKeyboard: 0
--input: 0
--mem0: 1 <--- ???
--mem1: -12
--mem2: 1
--mem3: 6
--mem4: -13
--mem5: 0
--mem6: 9
--mem7: -13
--mem8: 3
--mem9: 1
--mem10: -14
--mem11: -13
--mem12: 1
--mem13: -12
--mem14: 0
--mem15: 1
--mem16: -13
--mem17: 0
--mem18: 7
--mem19: 0
--mem20: 0

A red rectangular outline highlights the area next to the "--showKeyboard: 0" line in the debug output. A purple rectangular outline highlights the memory variables "--mem0" through "--mem2" in the debug output.

Input

<clock><cpu><screen></screen>
<key-board><div>
<button>0</button><button>1</button><button>2</button><button>3</button><button>4</button>
<button>5</button><button>6</button><button>7</button><button>8</button><button>9</button>
<button>Q</button><button>W</button><button>E</button><button>R</button><button>T</button>
<button>Y</button><button>U</button><button>I</button><button>O</button><button>P</button>
</div><div><button>A</button><button>S</button><button>D</button><button>F</button><button>G</button>
<button>H</button><button>J</button><button>K</button><button>L</button></div>
<div><button>Z</button><button>X</button><button>C</button><button>V</button><button>B</button>
<button>N</button><button>M</button></div></key-board>
</cpu></clock>
<style>
@property --showKeyboard {
  syntax: '<integer>';
  inherits: true;
  initial-value: 0;
}
@property --input {
  syntax: '<integer>';
  inherits: true;
  initial-value: 0;
}
cpu {
  /* ... */
}
key-board {
  display: if(style(--showKeyboard):1):block;else:none);
}
</style>
  • --IPC: -3
  • --inst: -100
  • --flags: 0
  • --showKeyboard: 0
  • --input: 0
  • --mem0: 1 <--- ???
  • --mem1: -12
  • --mem2: 1
  • --mem3: 6
  • --mem4: -13
  • --mem5: 0
  • --mem6: 9
  • --mem7: -13
  • --mem8: 3
  • --mem9: 1
  • --mem10: -14
  • --mem11: -13
  • --mem12: 1
  • --mem13: -12
  • --mem14: 0
  • --mem15: 1
  • --mem16: -13
  • --mem17: 0
  • --mem18: 7
  • --mem19: 0
  • --mem20: 0
A screenshot of a custom programming environment or CPU emulator. The left side displays XML-like code defining a keyboard layout and CSS-like styling rules. The right side shows a debugger or memory output panel with various registers and memory addresses and their integer values. A small red outlined square is visible near the top right, possibly representing a screen output.

Input

<clock><cpu><screen></screen><key-board>...</key-board></cpu></clock>

<style>
/*property --showKeyboard (SKB, -12), --input (INP, -13) */

cpu {
	/* ... */
}

key-board {
	display: if(style(--showKeyboard):block;else:none);
}

&:has(key-board button:nth-child(1):hover:active) { --input: 48; }
&:has(key-board button:nth-child(2):hover:active) { --input: 49; }
&:has(key-board button:nth-child(3):hover:active) { --input: 50; }
&:has(key-board button:nth-child(4):hover:active) { --input: 51; }
&:has(key-board button:nth-child(5):hover:active) { --input: 52; }
&:has(key-board button:nth-child(6):hover:active) { --input: 53; }
&:has(key-board button:nth-child(7):hover:active) { --input: 54; }
&:has(key-board button:nth-child(8):hover:active) { --input: 55; }
&:has(key-board button:nth-child(9):hover:active) { --input: 56; }
&:has(key-board button:nth-child(10):hover:active) { --input: 57; }

&:has(key-board button:nth-child(11):hover:active) { --input: 81; }
&:has(key-board button:nth-child(12):hover:active) { --input: 87; }
&:has(key-board button:nth-child(13):hover:active) { --input: 69; }
&:has(key-board button:nth-child(14):hover:active) { --input: 82; }
&:has(key-board button:nth-child(15):hover:active) { --input: 84; }
&:has(key-board button:nth-child(16):hover:active) { --input: 89; }
&:has(key-board button:nth-child(17):hover:active) { --input: 85; }
&:has(key-board button:nth-child(18):hover:active) { --input: 73; }
&:has(key-board button:nth-child(19):hover:active) { --input: 79; }
&:has(key-board button:nth-child(20):hover:active) { --input: 80; }

&:has(key-board button:nth-child(21):hover:active) { --input: 65; }
&:has(key-board button:nth-child(22):hover:active) { --input: 83; }
&:has(key-board button:nth-child(23):hover:active) { --input: 68; }
&:has(key-board button:nth-child(24):hover:active) { --input: 70; }
&:has(key-board button:nth-child(25):hover:active) { --input: 71; }
&:has(key-board button:nth-child(26):hover:active) { --input: 72; }
&:has(key-board button:nth-child(27):hover:active) { --input: 74; }
&:has(key-board button:nth-child(28):hover:active) { --input: 75; }
&:has(key-board button:nth-child(29):hover:active) { --input: 76; }

&:has(key-board button:nth-child(32):hover:active) { --input: 90; }
&:has(key-board button:nth-child(33):hover:active) { --input: 88; }
&:has(key-board button:nth-child(34):hover:active) { --input: 67; }
&:has(key-board button:nth-child(35):hover:active) { --input: 86; }
&:has(key-board button:nth-child(36):hover:active) { --input: 66; }
&:has(key-board button:nth-child(37):hover:active) { --input: 78; }
&:has(key-board button:nth-child(38):hover:active) { --input: 77; }
...
</style>
  • --iPc: -3
  • --inst: -100
  • --flags: 0
  • --showKeyboard: 0
  • --input: 0
  • --mem0: 1 <--- ???
  • --mem1: -12
  • --mem2: 1
  • --mem3: 6
  • --mem4: -13
  • --mem5: 0
  • --mem6: 9
  • --mem7: -13
  • --mem8: 3
  • --mem9: 1
  • --mem10: -14
  • --mem11: -13
  • --mem12: 1
  • --mem13: -12
  • --mem14: 0
  • --mem15: 1
  • --mem16: -13
  • --mem17: 0
  • --mem18: 7
  • --mem19: 0
  • --mem20: 0
A small red square outline is visible on the right side of the slide.
<section class='slide-text'> <h3>Input</h3> <pre><code data-lang='css'>&lt;clock&gt;&lt;cpu&gt;&lt;screen&gt;&lt;screen&gt;&lt;key-board&gt;...&lt;/key-board&gt;&lt;/cpu&gt;&lt;/clock&gt; &lt;style&gt; /* @property --showKeyBoard (SKB, -12), --input (INP, -13) */ cpu { /* ... */ } key-board { display: if(style(--showKeyboard): block; else:none); } &amp;:has(key-board button:nth
<section class='slide-text'> <h3>Input</h3> <pre><code data-lang='css'>&lt;clock&gt;&lt;cpu&gt;&lt;screen&gt;/screen&gt;&lt;key-board/--/&gt;&lt;/key-board&gt;&lt;/cpu&gt;&lt;/clock&gt; &lt;style&gt; /* @property --showKeyboard (SKB, -12), --input (INP, 13) */ cpu { /* ... */ } key-board { display: if(--showKeyboard: 1) block; else: none; } &amp;:has(key-board button:nth-child(1
<section class='slide-text'> <h3>Input</h3> <pre><code data-lang='html'>&lt;clock&gt;&lt;cpu&gt;&lt;screen&gt;&lt;key-board&gt;&lt;/screen&gt;&lt;/key-board&gt;&lt;/cpu&gt;&lt;/clock&gt; &lt;style&gt; /*@property --showKeyboard (SKB, -12), --input (INP, -13) */ cpu { /* ... */ } key-board { display: if(style(--showKeyboard:1), block, else(none)); } &amp;:has(key-board button:nth-child(1):hover:active) { --input: 48; } &amp;:has(key-board button:nth-child(2):hover:active) { --input: 49; } &amp;:has(key-board button:nth-child(3):hover:active) { --input: 50; } &amp;:has(key-board button:nth-child(4):hover:active) { --input: 51; } &amp;:has(key-board button:nth-child(5):hover:active) { --input: 52; } &amp;:has(key-board button:nth-child(6):hover:active) { --input: 53; } &amp;:has(key-board button:nth-child(7):hover:active) { --input: 54; } &amp;:has(key-board button:nth-child(8):hover:active) { --input: 55; } &amp;:has(key-board button:nth-child(9):hover:active) { --input: 56; } &amp;:has(key-board button:nth-child(10):hover:active) { --input: 57; } &amp;:has(key-board button:nth-child(11):hover:active) { --input: 87; } &amp;:has(key-board button:nth-child(12):hover:active) { --input: 87; } &amp;:has(key-board button:nth-child(13):hover:active) { --input: 89; } &amp;:has(key-board button:nth-child(14):hover:active) { --input: 85; } &amp;:has(key-board button:nth-child(15):hover:active) { --input: 84; } &amp;:has(key-board button:nth-child(16):hover:active) { --input: 89; } &amp;:has(key-board button:nth-child(17):hover:active) { --input: 85; } &amp;:has(key-board button:nth-child(18):hover:active) { --input: 73; } &amp;:has(key-board button:nth-child(19):hover:active) { --input: 79; } &amp;:has(key-board button:nth-child(20):hover:active) { --input: 80; } &amp;:has(key-board button:nth-child(21):hover:active) { --input: 65; } &amp;:has(key-board button:nth-child(22):hover:active) { --input: 83; } &amp;:has(key-board button:nth-child(23):hover:active) { --input: 68; } &amp;:
<section class='slide-text'> <h3>Input</h3> <pre><code data-lang='css'>&lt;clock&gt;&lt;cpu&gt;&lt;screen&gt;&lt;/screen&gt;&lt;key-board&gt;&lt;/key-board&gt;&lt;/cpu&gt;&lt;/clock&gt; &lt;style&gt; /* @property --showKeyboard (SKB, -12), --input (INP, -13) */ cpu { /* ... */ } key-board { display: if(style(--showKeyboard)): block; else:none; } &amp;:has(key-board button:nth-child(1

Input

A log of keyboard input events shown during an interaction:


input keyBoard(KEY_H, 0, 1)
input keyBoard(KEY_H, 0, 0)
input keyBoard(KEY_I, 0, 1)
input keyBoard(KEY_I, 0, 0)
input keyBoard(KEY_ENTER, 0, 1)
input keyBoard(KEY_ENTER, 0, 0)
input keyBoard(KEY_H, 0, 1)
input keyBoard(KEY_H, 0, 0)
input keyBoard(KEY_I, 0, 1)
input keyBoard(KEY_I, 0, 0)
input keyBoard(KEY_ENTER, 0, 1)
input keyBoard(KEY_ENTER, 0, 0)
...
console.log("Memory state:", Array(21).fill(0).map((_, i) => ({ value: (Math.random() * 15) | 0, index: i })))
...
    

The displayed output is "HI".

Current program state and memory values:


-IPC: 3
-inst: 6
-flags: 3
-showKeyboard: 1
-input: 0
-mem0: 1
-mem1: 12
-mem2: 1
-mem3: 6
-mem4: 13
-mem5: 0
-mem6: 9
-mem7: 13
-mem8: 3
-mem9: 1
-mem10: 14
-mem11: 13
-mem12: 1
-mem13: 12
-mem14: 0
-mem15: 1
-mem16: 13
-mem17: 0
-mem18: 7
-mem19: 0
-mem20: 0
    

An arrow points from "-mem6: 9" to the text "CMP", indicating a compare operation related to this memory value.

A screenshot showing a virtual keyboard interface with a standard QWERTY layout for letters, a row of numbers (0-9), and "HI" displayed in a text box above the keyboard. On the left side, a console log displays a series of keyboard input events.

Input

key_board.add_key_down(67)
...

System State

  • IPC: 6
  • inst: 9
  • flags: 3
  • showKeyboard: 1
  • input: 0
  • mem0: 1
  • mem1: 12
  • mem2: 1
  • mem3: 6
  • mem4: -13
  • mem5: 0
  • mem6: 9 <-- JZ
  • mem7: -13
  • mem8: 3
  • mem9: 1
  • mem10: -14
  • mem11: -13
  • mem12: 1
  • mem13: -12
  • mem14: 0
  • mem15: 1
  • mem16: -13
  • mem17: 0
  • mem18: 7
  • mem19: 0
  • mem20: 0

Output Display

HI

Virtual Keyboard Layout

  • Row 1: 0 1 2 3 4 5 6 7 8 9
  • Row 2: Q W E R T Y U I O P
  • Row 3: A S D F G H J K L
  • Row 4: Z X C V B N M
A screenshot of a debugger interface, showing a log of repeated "key_board.add_key_down" events on the left. On the right, it displays system state variables like IPC, inst, flags, input, and memory values, along with an output box showing "HI" and a virtual QWERTY keyboard layout.

Input

  • Output display: HI
  • System state variables:
    • IPC: 3
    • inst: 6
    • flags: 3
    • showKeyboard: 1
    • input: 0
    • mem0: 1
    • mem1: 12
    • mem2: 1
    • mem3: 6 <-- CMP
    • mem4: -13
    • mem5: 0
    • mem6: 9
    • mem7: -13
    • mem8: 3
    • mem9: 1
    • mem10: -14
    • mem11: -13
    • mem12: 1
    • mem13: -12
    • mem14: 0
    • mem15: 1
    • mem16: -13
    • mem17: 0
    • mem18: 7
    • mem19: 0
    • mem20: 0
A screenshot of a console-like interface. The left panel shows repetitive log output messages, each beginning with "Hey board". The right panel includes a virtual QWERTY keyboard layout below the listed state variables.

we have a cpu!

... and it can do everything we'd want!!!

we have a cpu!

... and it can do everything we'd want!!!

but its not x86 ...

we have a cpu!

... and it can do everything we'd want!!!

but its not x86 ...

... this is going to be painful.

bonus css trick!

@property --y {
	syntax: '<integer>';
	inherits: true;
	initial-value: 0;
}
@function --int(--i <integer>) returns <integer> {
	result: var(--i);
}
foo {
	/* doesn't work */
	--x: calc(1 + 1);
	--x2: if(style(--x:2):1);
	/* works */
	--y: calc(1 + 1);
	--y2: if(style(--y:2):1);
	/* works */
	--z: --int(calc(1 + 1));
	--z2: if(style(--z:2):1);
}

Bitwise operations

  • AND
  • OR
  • XOR
  • NOT
  • Right shift
  • Left shift

Bitwise operations - AND (16 bit)

@function —and(--a <integer>, --b <integer>) returns <integer> {
	--a1: mod(var(--a), 2);
	--a2: mod(round(down, var(--a) / 2), 2);
	--a3: mod(round(down, var(--a) / 4), 2);
	--a4: mod(round(down, var(--a) / 8), 2);
	--a5: mod(round(down, var(--a) / 16), 2);
	--a6: mod(round(down, var(--a) / 32), 2);
	--a7: mod(round(down, var(--a) / 64), 2);
	--a8: mod(round(down, var(--a) / 128), 2);
	--a9: mod(round(down, var(--a) / 256), 2);
	--a10: mod(round(down, var(--a) / 512), 2);
	--a11: mod(round(down, var(--a) / 1024), 2);
	--a12: mod(round(down, var(--a) / 2048), 2);
	--a13: mod(round(down, var(--a) / 4096), 2);
	--a14: mod(round(down, var(--a) / 8192), 2);
	--a15: mod(round(down, var(--a) / 16384), 2);
	--a16: mod(round(down, var(--a) / 32768), 2);

	--b1: mod(var(--b), 2);
	--b2: mod(round(down, var(--b) / 2), 2);
	--b3: mod(round(down, var(--b) / 4), 2);
	--b4: mod(round(down, var(--b) / 8), 2);
	--b5: mod(round(down, var(--b) / 16), 2);
	--b6: mod(round(down, var(--b) / 32), 2);
	--b7: mod(round(down, var(--b) / 64), 2);
	--b8: mod(round(down, var(--b) / 128), 2);
	--b9: mod(round(down, var(--b) / 256), 2);
	--b10: mod(round(down, var(--b) / 512), 2);
	--b11: mod(round(down, var(--b) / 1024), 2);
	--b12: mod(round(down, var(--b) / 2048), 2);
	--b13: mod(round(down, var(--b) / 4096), 2);
	--b14: mod(round(down, var(--b) / 8192), 2);
	--b15: mod(round(down, var(--b) / 16384), 2);
	--b16: mod(round(down, var(--b) / 32768), 2);

	result: calc(
		var(--a1) * var(--b1) +
		var(--a2) * var(--b2) * 2 +
		var(--a3) * var(--b3) * 4 +
		var(--a4) * var(--b4) * 8 +
		var(--a5) * var(--b5) * 16 +
		var(--a6) * var(--b6) * 32 +
		var(--a7) * var(--b7) * 64 +
		var(--a8) * var(--b8) * 128 +
		var(--a9) * var(--b9) * 256 +
		var(--a10) * var(--b10) * 512 +
		var(--a11) * var(--b11) * 1024 +
		var(--a12) * var(--b12) * 2048 +
		var(--a13) * var(--b13) * 4096 +
		var(--a14) * var(--b14) * 8192 +
		var(--a15) * var(--b15) * 16384 +
		var(--a16) * var(--b16) * 32768
	);
}

Bitwise operations - AND (4 bit)

/* AND:    00001111
         & 10101010
         = 00001010 */
@function --and(--a <integer>, --b <integer>) returns <integer> {
    --a1: mod(var(--a), 2);
    --a2: mod(round(down, var(--a) / 2), 2);
    --a3: mod(round(down, var(--a) / 4), 2);
    --a4: mod(round(down, var(--a) / 8), 2);
    --b1: mod(var(--b), 2);
    --b2: mod(round(down, var(--b) / 2), 2);
    --b3: mod(round(down, var(--b) / 4), 2);
    --b4: mod(round(down, var(--b) / 8), 2);
    result: calc(
        var(--a1) * var(--b1) +
        var(--a2) * var(--b2) * 2 +
        var(--a3) * var(--b3) * 4 +
        var(--a4) * var(--b4) * 8;
    );
}

Bitwise operations - XOR (4 bit)

/* XOR:   00001111
 & 10101010
 = 10100101 */

@function --xor(--a <integer>, --b <integer>) returns <integer> {
  --a1: mod(var(--a), 2);
  --a2: mod(round(down, var(--a) / 2), 2);
  --a3: mod(round(down, var(--a) / 4), 2);
  --a4: mod(round(down, var(--a) / 8), 2);
  --b1: mod(var(--b), 2);
  --b2: mod(round(down, var(--b) / 2), 2);
  --b3: mod(round(down, var(--b) / 4), 2);
  --b4: mod(round(down, var(--b) / 8), 2);
  result: calc(
    min(1, var(--a1) + var(--b1)) - var(--a1) * var(--b1) +
    calc(min(1, var(--a2) + var(--b2)) - var(--a2) * var(--b2)) * 2 +
    calc(min(1, var(--a3) + var(--b3)) - var(--a3) * var(--b3)) * 4 +
    calc(min(1, var(--a4) + var(--b4)) - var(--a4) * var(--b4)) * 8
  );
}

Bitwise operations - NOT (4 bit)

/* NOT: ! 00001111
 = 11110000 */
@function --not(--a <integer>) returns <integer> {
	--a1: mod(var(--a), 2);
	--a2: mod(round(down, var(--a) / 2), 2);
	--a3: mod(round(down, var(--a) / 4), 2);
	--a4: mod(round(down, var(--a) / 8), 2);
	result: calc(
		(1 - var(--a1)) +
		(1 - var(--a2)) * 2 +
		(1 - var(--a3)) * 4 +
		(1 - var(--a4)) * 8
	);
}

Bitwise operations - NOT (4 bit)

/* NOT: ! 00001111
     = 11110000 */
@function --not(
  --a1: mod(var(--a), 2),
  --a2: mod(round(var(--a) / 2), 2),
  --a3: mod(round(var(--a) / 4), 2),
  --a4: mod(round(var(--a) / 8), 2),
  result: calc(
    (1 - var(--a1)) * 1 +
    (1 - var(--a2)) * 2 +
    (1 - var(--a3)) * 4 +
    (1 - var(--a4)) * 8
  );
}

Daniel-Abrecht opened on Feb 24, 2026

I think there is still some room for optimizations. For example, I think the --not function could be written in a much simpler way:

@function --not(--a <integer>) returns <integer> {
  result: calc(65535 - mod(var(--a),65536));
}
Screenshot of a code editor showing a CSS-like function for a 4-bit bitwise NOT operation, with an overlay of a discussion thread suggesting an optimized version of the function for 16-bit integers.

Logical shifts

/* right shift: 00001111 >> 2
 * = 00000011 */
@function --rightShift(--a <integer>, --b <integer>) returns <integer> {
	result: round(down, var(--a) / pow(2, var(--b)));
}
/* left shift: 00001111 << 2
 * = 00111100 */
@function --leftShift(--a <integer>, --b <integer>) returns <integer> {
	--shift: if(
		style(--b:0):1;
		style(--b:1):2;
		style(--b:2):4;
		style(--b:3):8;
		elsecalc(var(--a) * pow(2, var(--b)));
	);
	result: calc(var(--a) * var(--shift));
}

Stack

probably too much for this talk but its pretty much:

  • Part of memory you can push values onto and pop them out of
    • Instructions: PUSH, POP
  • Used to call functions and return from them
    • Instructions: CALL, RET

Source: Wikipedia, Intel 8086 registers

Main registers

Value Example Name Full Name / Purpose
0000 AX AX (accumulator)
BX BX (base)
CX CX (counter)
DX DX (extended acc)
A table displaying the main registers of the Intel 8086 CPU, their names, and their full names or purposes.

Source: Wikipedia, Intel 8086 registers

Main registers

0000AHALAX (accumulator)
BHBLBX (base)
CHCLCX (counter)
DHDLDX (extended acc)

Source: Wikipedia, Intel 8086 registers

Main registers

AHALAX(accumulator)
CHCLCX(counter)
DHDLDX(extended acc)
0 0 0 0BHBLBX(base)
<section class='slide-text'><h3>Source: W</h3><h3>Main registers</h3><ul><li>AH</li><li>CH</li><li>DH</li><li>0000 BH</li></ul><pre><code data-lang='assembly'>RAX: 00007FF78E8609C4 RBX: 00000000 RCX: 00000000 RDX: 00007FF RBP: 00000000 RSP: 00000000 RSI: 00000000 RDI: 00000000 R8: 0000

Registers and instruction

The 8086 has eight more-or-less general 16-bit registers (including the stack pointer but excluding the instruction pointer, flag register and segment registers). Four of them AX, BX, CX, DX, can also be accessed as 8-bit register pairs (see figure) while the other four, SI, DI, BP, SP, are 16-bit only.

In a modern x64 debugger (x64dbg), these correspond to:

  • RAX (Extended Accumulator)
  • RBX (Extended Base)
  • RCX (Extended Count)
  • RDX (Extended Data)

A diagram titled "Figure 7. 8086 Register Model" shows four 16-bit CPU registers: AX (Accumulator), BX (Base), CX (Count), and DX (Data). Each register is depicted as being composed of two 8-bit halves, a High (H) and a Low (L) part (e.g., AH and AL for AX).

Overlaying this diagram is a text snippet defining these 8086 registers and their 8-bit accessibility.

To the right, a screenshot of the x64dbg debugger displays a list of x64 registers, prominently featuring RAX, RBX, RCX, and RDX (highlighted in red) with their current hexadecimal values, visually linking the 8086 model to modern register names.

x86 Register Details and Encodings

From a technical document (e.g., Wikipedia):

  • General purpose 16-bit registers: AX, BX, CX, DX.
  • AL, BL, CL, DL, AH, BH, CH, DH are 8-bit registers; BP, SP are 16-bit only.

From Intel's manual:

Table 3-1. Register Encodings
Register Encoding Corresponding Full Register
AL 0 AX
CL 1 CX
DL 2 DX
BL 3 BX

A composite image showing excerpts from technical documentation. On the left, a partial view of a document (likely Wikipedia) discussing x86 registers, with "AX, BX, CX, DX" highlighted. On the right, the Intel logo and a table from an Intel manual titled "Table 3-1. Register Encodings", illustrating the 8-bit low registers AL, CL, DL, BL and their numerical encodings 0, 1, 2, 3 respectively, with these entries highlighted. A debugger window (x64dbg) is partially visible behind the Intel table.

8086 Register Model and Register Encodings

Screenshot showing two panels of technical documentation. The left panel displays a diagram of the 8086 Register Model and explanatory text about registers and instructions. The right panel, branded with an Intel logo, presents a table of register encodings, possibly from a debugger or a technical manual.
A large, abstract geometric pattern made of dark, interconnected rectangular shapes is displayed on a light background, illuminated by a blue light.

Index registers

  • SP Stack Pointer
  • BP Base Pointer
  • SI Source Index
  • DI Destination Index

Program counter

  • IP Instruction Pointer

Segment registers

  • ES Extra Segment
  • CS Code Segment
  • SS Stack Segment
  • DS Data Segment
  • SI Source Index (current value: `0000`)
  • DI Destination Index (current value: `0000`)

Program counter

  • IP Instruction Pointer (current value: `0000`)

Segment registers

  • ES Extra Segment (current value: `0000`)
  • CS Code Segment (current value: `0000`)
  • SS Stack Segment (current value: `0000`)
  • DS Data Segment (current value: `0000`)

Status register

  • The status register displays flags, including the Overflow flag (O), Sign flag (S), Zero flag (Z), and Carry flag (C).
A diagram illustrating the layout of the status register flags, highlighting positions for Overflow (O), Sign (S), Zero (Z), and Carry (C) flags.
  • SI 0000 Source Index
  • DI 0000 Destination Index

Program counter

  • IP 0000 Instruction Pointer

Segment registers

  • ES 0000 Extra Segment
  • CS 0000 Code Segment
  • SS 0000 Stack Segment
  • DS 0000 Data Segment

Status register

Flags: ---O---SZ-A-P-C

The P flag is the Parity flag.

A diagram showing CPU registers and flags. Registers like Source Index, Destination Index, Instruction Pointer, Extra Segment, Code Segment, Stack Segment, and Data Segment are listed with their current value '0000'. Below this, the CPU status flags are visually represented, with the Parity (P) flag highlighted in yellow.
ValueRegisterDescription
0000SISource Index
0000DIDestination Index

Program counter

0000IPInstruction Pointer

Segment registers

0000ESExtra Segment
0000CSCode Segment
0000SSStack Segment
0000DSData Segment

Status register

The status register displays the flag bits: ---O-ITSZ-A-P-C Flags. The 'T' bit is identified as the Trap flag, and the 'I' bit as the Interrupt flag.

A diagram illustrating CPU registers and status flags, showing their abbreviations, values, and full names, including Source Index, Destination Index, Program Counter, Segment Registers (Extra, Code, Stack, Data), and a breakdown of Status Register flags.

Source: Wikipedia, Intel 8086 registers

Main registers

High ByteLow ByteFull Register
AHALAX (accumulator)
CHCLCX (counter)
DHDLDX (extended acc)
0000BHBLBX (base)

Index registers

RegisterDescription
0000SPStack Pointer
0000BPBase Pointer
0000SISource Index
0000DIDestination Index

Program counter

RegisterDescription
0000IPInstruction Pointer

Segment registers

RegisterValueDescription
ES0000Extra Segment
CS0000Code Segment
SS0000Stack Segment
DS0000Data Segment

Status register

---ODITSZ-A-P-C Flags

Intel 8086 Registers

Source: Wikipedia

Main registers

  • AH, AL = AX (accumulator)
  • CH, CL = CX (counter)
  • DH, DL = DX (extended acc)
  • BH, BL = BX (base)

Index registers

  • SP (Stack Pointer)
  • BP (Base Pointer)
  • SI (Source Index)
  • DI (Destination Index)

Program counter

  • IP (Instruction Pointer)

Segment registers

  • ES (Extra Segment)
  • CS (Code Segment)
  • SS (Stack Segment)
  • DS (Data Segment)

Status register

O D I T S Z A P C Flags

The slide presents a detailed table outlining the Intel 8086 registers, categorized into Main, Index, Program Counter, Segment, and Status registers, each with their abbreviations and full descriptions.

Source: Wikipedia, Intel 8086 registers

Main registers

  • AH AL AX (accumulator)
  • CH CL CX (counter)
  • DH DL DX (extended acc)
  • BH BL BX (base)

Index registers

  • 0000 SP Stack Pointer
  • 0000 BP Base Pointer
  • 0000 SI Source Index
  • 0000 DI Destination Index

Program counter

  • 0000 IP Instruction Pointer

Segment registers

  • ES 0000 Extra Segment
  • CS 0000 Code Segment
  • SS 0000 Stack Segment
  • DS 0000 Data Segment

Status register

  • O D I T S Z A P C Flags

x86 is 16bit (on the 8086)

  • ... but bytes in memory are 8bit

x86 is 16bit (on the 8086)

... but bytes in memory are 8bit

--addrDest: 1;
--addrVal: 1234;
--addrVal1: mod(var(--addrVal), 256);
--addrVal2: round(down, var(--addrVal) / 256);

...

--m1: if(
    style(--addrDest:1): var(--addrVal1);
    style(--addrDest:0) and style(--isWordWrite:1): var(--addrVal2);
    else:var(--__1m1));

--m2: if(
    style(--addrDest:2): var(--addrVal1);
    style(--addrDest:1) and style(--isWordWrite:1): var(--addrVal2);
    else:var(--__1m2));
The slide displays a geometric pattern composed of interconnected dark rectangular blocks on a lighter background. The pattern is illuminated by a blue light emanating from the bottom.

x86 instructions

Q: How long are they?

x86 instruction length

Q: How long are x86 instructions?

A: They're all different!

  1. 06 PUSH, 07 POP, 0E PUSH, 16 PUSH, 17 POP, 1E PUSH, 1F POP, 26 ES:, 27 DAA, 2E CS:, 2F DAS, 36 SS:, 37 AAA, 3E DS:, 3F AAS, 40 INC, 41 INC, 42 INC, 43 INC, 44 INC, 45 INC, 46 INC, 47 INC, 48 DEC, 49 DEC, 4A DEC, 4B DEC, 4C DEC, 4D DEC, 4E DEC, 4F DEC, 50 PUSH, 51 PUSH, 52 PUSH, 53 PUSH, 54 PUSH, 55 PUSH, 56 PUSH, 57 PUSH, 58 POP, 59 POP, 5A POP, 5B POP, 5C POP, 5D POP, 5E POP, 5F POP, 90 NOP, 91 XCHG, 92 XCHG, 93 XCHG, 94 XCHG, 95 XCHG, 96 XCHG, 97 XCHG, 98 CBW, 99 CWD, 9B WAIT, 9C PUSHF, 9D POPF, 9E SAHF, 9F LAHF, A4 MOVSB, A5 MOVSW, A6 CMPSB, A7 CMPSW, AA STOSB, AB STOSW, AC LODSB, AD LODSW, AE SCASB, AF SCASW, C3 RET, CB RETF, CC INT, CE INTO, CF IRET, D7 XLAT, EC IN, ED IN, EE OUT, EF OUT, F0 LOCK, F2 REPNZ, F3 REPZ, F4 HLT, F5 CMC, F8 CLC, F9 STC, FA CLI, FB STI, FC CLD, FD STD
  2. 04 ADD, 0C OR, 14 ADC, 1C SBB, 24 AND, 2C SUB, 34 XOR, 3C CMP, 70 JO, 71 JNO, 72 JB, 73 JNB, 74 JZ, 75 JNZ, 76 JBE, 77 JA, 78 JS, 79 JNS, 7A JPE, 7B JPO, 7C JL, 7D JGE, 7E JLE, 7F JG, A8 TEST, B0 MOV, B1 MOV, B2 MOV, B3 MOV, B4 MOV, B5 MOV, B6 MOV, B7 MOV, CD INT, D4 AAM, D5 AAD, E0 LOOPNZ, E1 LOOPZ, E2 LOOP, E3 JCXZ, E4 IN, E5 IN, E6 OUT, E7 OUT, EB JMP
  3. 05 ADD, 0D OR, 15 ADC, 1D SBB, 25 AND, 2D SUB, 35 XOR, 3D CMP, A0 MOV, A1 MOV, A2 MOV, A3 MOV, A9 TEST, B8 MOV, B9 MOV, BA MOV, BB MOV, BC MOV, BD MOV, BE MOV, BF MOV, C2 RET, CA RETF, E8 CALL, E9 JMP
  4. (none)
  5. 9A CALL, EA JMP

x86 instruction length

Q: How long are x86 instructions?

A: They're all different!

  1. 06 PUSH, 07 POP, 0E PUSH, 1E PUSH, 1F POP, 26 ES:, 27 DAA, 2E CS:, 2F DAS, 36 SS:, 37 AAA, 3E DS:, 3F AAS, 40 INC, 41 INC, 42 INC, 43 INC, 44 INC, 45 INC, 46 INC, 47 INC, 48 DEC, 49 DEC, 4A DEC, 4B DEC, 4C DEC, 4D DEC, 4E DEC, 4F DEC, 50 PUSH, 51 PUSH, 52 PUSH, 53 PUSH, 54 PUSH, 55 PUSH, 56 PUSH, 57 PUSH, 58 POP, 59 POP, 5A POP, 5B POP, 5C POP, 5D POP, 5E POP, 5F POP, 90 NOP, 91 XCHG, 92 XCHG, 93 XCHG, 94 XCHG, 95 XCHG, 96 XCHG, 97 XCHG, 98 CBW, 99 CWD, 9A CALLF, 9B WAIT, 9C PUSHF, 9D POPF, 9E SAHF, 9F LAHF, A4 MOVSB, A5 MOVSW, A6 CMPSB, A7 CMPSW, AA STOSB, AB STOSW, AE SCASB, AF SCASW, C3 RET, CB RETF, CC INT, CE INTO, CF IRET, D7 XLAT, EC IN, ED IN, EE OUT, EF OUT, F0 LOCK, F2 REPNZ, F3 REPZ, F4 HLT, F5 CMC, F6 CLC, F7 STC, FA CLI, FB STI, FC CLD, FD STD
  2. 04 ADD, 0C ADD, 14 SBB, 24 AND, 2C SUB, 34 XOR, 3C CMP, 70 JO, 71 JNO, 72 JB, 73 JNB, 74 JZ, 75 JNZ, 76 JBE, 77 JA, 78 JS, 79 JNS, 7A JPE, 7B JPO, 7C JL, 7D JGE, 7E JLE, 7F JG, A8 TEST, B0 MOV, B1 MOV, B2 MOV, B3 MOV, B4 MOV, B5 MOV, B6 MOV, B7 MOV, C0 INT, D4 AAM, D5 AAD, E0 LOOPNZ, E1 LOOPZ, E2 LOOP, E3 JCXZ, E4 IN, E5 IN, E6 OUT, E7 OUT, E8 JMP
  3. 05 ADD, 0D OR, 15 ADC, 1D SBB, 25 AND, 2D SUB, 35 XOR, 3D CMP, A0 MOV, A1 MOV, A2 MOV, A3 MOV, A9 TEST, B8 MOV, B9 MOV, BA MOV, BB MOV, BC MOV, BD MOV, BE MOV, BF MOV, C2 RET, CA RETF, E8 CALL, E9 JMP
  4. (none)
  5. 9A CALL, EA JMP
<section class='slide-text'> <h3>@function --getInstLen() returns &lt;integer&gt;</h3> <pre><code>result: if(style(--instId:1):2, style(--instId:2):2, style(--instId:3):2, style(--instId:4):2, style(--instId:5):2, style(--instId:6):3, style(--instId:9):2, style(- instId:10):2, style(--instId:11):2, style(--instId:12):2, style(--instId:13):2, style(--instId:14):3, style(--instId:15):2, style(--instId:
<section class='slide-text'> <pre><code data-lang='css'>@function --getInstLen() returns &lt;result: if(style(--instId:1)):2; style(--instId:6):3; style(--instId:9):2; style(--instId:10):2; style(--instId:11):2; style(--instId:17):2; style(--instId:18):2; style(--instId:19):2; style(--instId:26):2; style(--instId:27):2; style(--instId:28):2; style(--instId:35):2; style(--instId:36):2;
<section class='slide-text'><h3>x86 instruction length</h3><p>Q: How long are x86 instructions?</p><p>A: <strong>They're all different!</strong></p><h4>1. (One-byte instructions)</h4><ul><li><code>06</code> PUSH</li><li><code>07</code> POP</li><li><code>0E</code> PUSH</li><li><code>16</code> PUSH</li><li><code>17</code> POP</li><li><code>1E</code> PUSH</li><li><code>1F</code> POP</li><li><code>26</code> ES::</li><li><code>27</code> DAA</li><li><code>2E</code> CS::</li><li><code>2F</code> DAS</li><li><code>36</code> SS::</li><li><code>37</code> AAA</li><li><code>3E</code> DS::</li>

x86 ModR/M

INSTNAMEARG1ARG2
28SUBEbGb

encoded: 28 0A 13 37

decoded:

x86 ModR/M Encoding (16-bit mode)
R/MMOD
0001[a]1011
000[BX+SI][BX+SI+disp8][BX+SI+disp16]AL / AX
001[BX+DI][BX+DI+disp8][BX+DI+disp16]CL / CX
010[BP+SI][BP+SI+disp8][BP+SI+disp16]DL / DX
011[BP+DI][BP+DI+disp8][BP+DI+disp16]BL / BX
100[SI][SI+disp8][SI+disp16]AH / SP
101[DI][DI+disp8][DI+disp16]CH / BP
110[disp16][BP+disp8][BP+disp16]DH / SI
111[BX][BX+disp8][BX+disp16]BH / DI
Bit76543210
Usage"Mod""Reg""R/M"

source: Wikipedia, x86 Mod & R/M encoding, 16-bit mode

x86 ModR/M

INST NAME ARG1 ARG2
28 SUB Eb Gb
R/M MOD
00 01[a] 10 11
000 [BX+SI] [BX+SI+disp8] [BX+SI+disp16] AL / AX
001 [BX+DI] [BX+DI+disp8] [BX+DI+disp16] CL / CX
010 [BP+SI] [BP+SI+disp8] [BP+SI+disp16] DL / DX
011 [BP+DI] [BP+DI+disp8] [BP+DI+disp16] BL / BX
100 [SI] [SI+disp8] [SI+disp16] AH / SP
101 [DI] [DI+disp8] [DI+disp16] CH / BP
110 [disp16] [BP+disp8] [BP+disp16] DH / SI
111 [BX] [BX+disp8] [BX+disp16] BH / DI

encoded:

28 0A 13 37

decoded:

SUB [BP+SI] CL

00 001 010

Bit 7 6 5 4 3 2 1 0
Usage "Mod" "Reg" "R/M"

source: Wikipedia, x86 Mod & R/M encoding, 16-bit mode

A technical slide illustrating the x86 ModR/M byte encoding. It features two tables: one showing instruction opcodes, including SUB with opcode 28 and argument types Eb and Gb; and a larger ModR/M table that maps Mod and R/M bit combinations to various memory addressing modes or registers. A green arrow highlights the connection between 'CL / CX' in the ModR/M table and 'CL' in the decoded instruction 'SUB [BP+SI] CL'. The ModR/M byte '00 001 010' is broken down, with bits 7-6 labeled 'Mod', bits 5-3 labeled 'Reg', and bits 2-0 labeled 'R/M'. Red boxes visually emphasize 'Gb' in the instruction table, 'CL / CX' in the ModR/M table, and the 'Reg' field of the ModR/M byte breakdown, indicating key elements for decoding.

x86 ModR/M

encoded:

28 BC 13 37

decoded:

SUB

INST NAME ARG1 ARG2
28 SUB Eb Gb
R/M MOD
00 01[a] 10 11
000 [BX+SI] [BX+SI+disp8] [BX+SI+disp16] AL / AX
001 [BX+DI] [BX+DI+disp8] [BX+DI+disp16] CL / CX
010 [BP+SI] [BP+SI+disp8] [BP+SI+disp16] DL / DX
011 [BP+DI] [BP+DI+disp8] [BP+DI+disp16] BL / BX
100 [SI] [SI+disp8] [SI+disp16] AH / SP
101 [DI] [DI+disp8] [DI+disp16] CH / BP
110 [disp16] [BP+disp8] [BP+disp16] DH / SI
111 [BX] [BX+disp8] [BX+disp16] BH / DI
Bit 7 6 5 4 3 2 1 0
Usage "Mod" "Reg" "R/M"

Source: Wikipedia, x86 Mod & R/M encoding, 16-bit mode

The slide displays an x86 ModR/M encoding guide. It features a table mapping the `28` instruction code to the `SUB` operation. An arrow connects `SUB` in this instruction table to `SUB` in a "decoded" section. A larger "MOD R/M" table shows how different R/M values (000-111) combine with MOD values (00, 01, 10, 11) to specify operands, ranging from memory addresses like `[BX+SI]` to registers like `AL / AX`. A smaller table below indicates that bits 7-6 are for "Mod", 5-3 for "Reg", and 2-0 for "R/M". The cell `[disp16]` within the MOD R/M table (for R/M `110` and MOD `00`) is highlighted.

x86 ModR/M

INSTNAMEARG1ARG2
28SUBEbGb
R/MMOD
0001[a]1011
000[BX+SI][BX+SI+disp8][BX+SI+disp16]AL / AX
001[BX+DI][BX+DI+disp8][BX+DI+disp16]CL / CX
010[BP+SI][BP+SI+disp8][BP+SI+disp16]DL / DX
011[BP+DI][BP+DI+disp8][BP+DI+disp16]BL / BX
100[SI][SI+disp8][SI+disp16]AH / SP
101[DI][DI+disp8][DI+disp16]CH / BP
110[disp16][BP+disp8][BP+disp16]DH / SI
111[BX][BX+disp8][BX+disp16]BH / DI

encoded:

28 BC 13 37

decoded:

SUB

Bit76543210
Usage"Mod""Reg""R/M"

source: Wikipedia, x86 Mod & R/M encoding, 16-bit mode

x86 ModR/M

encoded:

28 BC 13 37

decoded:

SUB [SI+disp16]

INSTNAMEARG1ARG2
28SUBEbGb
R/MMOD
0001[a]1011
000[BX+SI][BX+SI+disp8][BX+SI+disp16]AL / AX
001[BX+DI][BX+DI+disp8][BX+DI+disp16]CL / CX
010[BP+SI][BP+SI+disp8][BP+SI+disp16]DL / DX
011[BP+DI][BP+DI+disp8][BP+DI+disp16]BL / BX
100[SI][SI+disp8][SI+disp16]AH / SP
101[DI][DI+disp8][DI+disp16]CH / BP
110[disp16][BP+disp8][BP+disp16]DH / SI
111[BX][BX+disp8][BX+disp16]BH / DI

10 111 100

Bit76543210
Usage"Mod""Reg""R/M"

source: Wikipedia, x86 Mod & R/M encoding, 16-bit mode

The slide demonstrates x86 ModR/M byte decoding. It displays an instruction table with 'SUB Eb Gb' for opcode '28'. The encoded sequence '28 BC 13 37' is shown, which decodes to 'SUB [SI+disp16]'. A ModR/M lookup table provides memory addressing modes based on 'MOD' and 'R/M' bits. A green highlight indicates '[SI+disp16]' in the table, corresponding to MOD '10' and R/M '100'. An arrow points from this table entry to the decoded instruction. The binary representation '10 111 100' is presented, with '10' highlighted in red as 'Mod' and '100' highlighted in orange as 'R/M', illustrating how these bits map to the corresponding values in the ModR/M table.

x86 ModR/M

INSTNAMEARG1ARG2
28SUBEbGb

encoded: 28 BC 13 37

decoded: SUB [SI+0x7313] BH

R/MMOD
0001[a]1011
000[BX+SI][BX+SI+disp8][BX+SI+disp16]AL / AX
001[BX+DI][BX+DI+disp8][BX+DI+disp16]CL / CX
010[BP+SI][BP+SI+disp8][BP+SI+disp16]DL / DX
011[BP+DI][BP+DI+disp8][BP+DI+disp16]BL / BX
100[SI][SI+disp8][SI+disp16]AH / SP
101[DI][DI+disp8][DI+disp16]CH / BP
110[disp16][BP+disp8][BP+disp16]DH / SI
111[BX][BX+disp8][BX+disp16]BH / DI

10 111 100

Bit76543210
Usage"Mod""Reg""R/M"

source: Wikipedia, x86 Mod & R/M encoding, 16-bit mode

<section class='slide-text'> <h3>x86 ModR/M</h3> <p>encoded:</p> <pre><code>28 BC 13 37</code></pre> <p>decoded:</p> <pre><code>SUB [SI+0x7313] BH</code></pre> <table> <thead> <tr> <th>INST</th> <th>NAME</th> <th>ARG1</th> <th>ARG2</th> </tr> </thead> <tbody> <tr> <td>28</td> <td>SUB</td> <td>Eb</td> <td>Gb</td> </tr> </tbody> </table> <p>10 111 100</p> <table> <thead> <tr> <th>Bit</th> <th>7</th> <th>6</th> <th>5</th> <th>4</th> <th>3</th> <th>2</th> <th>1</th> <th>0</th> </tr>

x86 ModR/M

INSTNAMEARG1ARG2
28SUBEbGb

encoded: 28 BC 13 37

decoded: SUB [SI+0x7313] BH

R/MMOD
0001[a]1011
000[BX+SI][BX+SI+disp8][BX+SI+disp16]AL / AX
001[BX+DI][BX+DI+disp8][BX+DI+disp16]CL / CX
010[BP+SI][BP+SI+disp8][BP+SI+disp16]DL / DX
011[BP+DI][BP+DI+disp8][BP+DI+disp16]BL / BX
100[SI][SI+disp8][SI+disp16]AH / SP
101[DI][DI+disp8][DI+disp16]CH / BP
110[disp16][BP+disp8][BP+disp16]DH / SI
111[BX][BX+disp8][BX+disp16]BH / DI

10 111 100

Bit76543210
Usage"Mod""Reg""R/M"

source: Wikipedia, x86 Mod & R/M encoding, 16-bit mode

A table shows x86 ModR/M encoding. The table maps R/M bits and MOD bits to different memory addressing modes and registers. An arrow highlights the cell for MOD '01' and R/M '100', which contains '[SI+disp8]'. Below the decoded instruction, a diagram visually breaks down a byte '10 111 100' into its 'Mod', 'Reg', and 'R/M' bit fields.
<section class='slide-text'> <pre><code data-lang='pseudocode'>@function --getModRmLen() returns &lt;integer&gt; { result: if (style(--_modRm_mod):0 and style(--_modRm_rm):4) and style(--_modRm_sib):2) and style(--_modRm_disp):2; else:0); } @function --getModRmAddr() returns &lt;integer&gt; { --_reg: if (style(--_instrArgType):1) { style(--_instrArgType):5 } else:0; --_arg: if (style(--_instrArgType):1) { style(--_instrArgType
<section class='slide-text'><pre><code data-lang='pseudocode'>integer&gt; { style(-modRm_mod:0):2; style(-modRm_mod:1):1; style((-modRm_mod:2)):2; else:0)); } integer&gt; { style((-instArgType:5)):1; else:0)); } m_rn_0): calc(var(___1BX) + var(___1SI)); m_rn_1): calc(var(___1BX) + var(___1DI)); m_rn_2): calc(var(___1BP) + var(___1SI)); m_rn_3): calc(var
odRm_rm_2):-3;
odRm_rm_3):-4;
odRm_rm_4):-5;
odRm_rm_5):-6;
odRm_rm_6):-7;
odRm_rm_7):-8;
integer> {
	; style(--instArg2Type:5):1;else:0);
else:0);
eg:1):-10;
eg:1):-11;
eg:1):-12;
eg:1):-13;
rg8:1):-31;
rg8:1):-32;
rg8:1):-33;
rg8:1):-34;
rg8:1):-21;
rg8:1):-22;
rg8:1):-23;
rg8:1):-24;

x86 group instructions

x86 group instructions

R/MMOD
0001[a]1011
000[BX+SI][BX+SI+disp8][BX+SI+disp16]AL / AX
001[BX+DI][BX+DI+disp8][BX+DI+disp16]CL / CX
010[BP+SI][BP+SI+disp8][BP+SI+disp16]DL / DX
011[BP+DI][BP+DI+disp8][BP+DI+disp16]BL / BX
100[SI][SI+disp8][SI+disp16]AH / SP
101[DI][DI+disp8][DI+disp16]CH / BP
110[disp16][BP+disp8][BP+disp16]DH / SI
111[BX][BX+disp8][BX+disp16]BH / DI

source: Wikipedia, x86 Mod & R/M encoding, 16-bit mode

INSTNAMEARG1ARG2
80ADDEbIb
80OREbIb
80ADCEbIb
80SBBEbIb
80ANDEbIb
80SUBEbIb
80XOREbIb
80CMPEbIb
Two tables displaying x86 instruction encoding information. The left table details the ModR/M byte encoding for 16-bit mode, showing how R/M and MOD values map to memory addressing modes and registers. The right table lists several x86 instructions (ADD, OR, ADC, SBB, AND, SUB, XOR, CMP) that all share the instruction byte '80', indicating they belong to a group where the specific operation is determined by other encoding bits.

x86 group instructions

x86 Mod & R/M encoding, 16-bit mode
R/MMOD
0001[a]1011
000[BX+SI][BX+SI+disp8][BX+SI+disp16]AL / AX
001[BX+DI][BX+DI+disp8][BX+DI+disp16]CL / CX
010[BP+SI][BP+SI+disp8][BP+SI+disp16]DL / DX
011[BP+DI][BP+DI+disp8][BP+DI+disp16]BL / BX
100[SI][SI+disp8][SI+disp16]AH / SP
101[DI][DI+disp8][DI+disp16]CH / BP
110[disp16][BP+disp8][BP+disp16]DH / SI
111[BX][BX+disp8][BX+disp16]BH / DI

source: Wikipedia, x86 Mod & R/M encoding, 16-bit mode

x86 Group 1 Instructions (Opcode 80h)
INSTNAMEARG1ARG2
80ADDEbIb
80OREbIb
80ADCEbIb
80SBBEbIb
80ANDEbIb
80SUBEbIb
80XOREbIb
80CMPEbIb
The slide presents two tables related to x86 instruction encoding. The left table details x86 ModR/M byte encoding for 16-bit mode, showing how register/memory operands are determined based on MOD and R/M bits. The right table lists x86 Group 1 instructions, all sharing the opcode 80h, along with their names and argument types.

x86 group instructions

x86 Mod R/M Encoding, 16-bit Mode
R/M MOD
00 01[a] 10 11
000 [BX+SI] [BX+SI+disp8] [BX+SI+disp16] AL / AX
001 [BX+DI] [BX+DI+disp8] [BX+DI+disp16] CL / CX
010 [BP+SI] [BP+SI+disp8] [BP+SI+disp16] DL / DX
011 [BP+DI] [BP+DI+disp8] [BP+DI+disp16] BL / BX
100 [SI] [SI+disp8] [SI+disp16] AH / SP
101 [DI] [DI+disp8] [DI+disp16] CH / BP
110 [disp16] [BP+disp8] [BP+disp16] DH / SI
111 [BX] [BX+disp8] [BX+disp16] BH / DI

source: Wikipedia, x86 Mod & R/M encoding, 16-bit mode

Instructions using opcode 80
INST NAME ARG1 ARG2
80 ADD Eb Ib
80 OR Eb Ib
80 ADC Eb Ib
80 SBB Eb Ib
80 AND Eb Ib
80 SUB Eb Ib
80 XOR Eb Ib
80 CMP Eb Ib

The slide displays two tables related to x86 instructions. The left table is an x86 Mod R/M encoding table for 16-bit mode, detailing how memory operands are addressed using combinations of MOD bits (00, 01, 10, 11) and R/M bits (000-111). The right table lists several x86 group instructions (ADD, OR, ADC, SBB, AND, SUB, XOR, CMP), all sharing the same instruction byte 80, along with their operand types (Eb, Ib).

x86 group instructions

INSTNAMEARG1ARG2
80ADDEbIb
80OREbIb
80ADCEbIb
80SBBEbIb
80ANDEbIb
80SUBEbIb
80XOREbIb
80CMPEbIb
A table detailing x86 group instructions, showing their instruction byte, name, and argument types.

x86 group instructions

-0123456789ABCDEF
0ADDADDADDADDADDPUSHPOPORORORORORPUSH--
1ADCADCADCADCADCPUSHPOPSBBSBBSBBSBBSBBPUSHPOP
2ANDANDANDANDANDES:DAASUBSUBSUBSUBSUBCS:DAS
3XORXORXORXORXORSS:AAACMPCMPCMPCMPCMPDS:AAS
4INCINCINCINCINCINCINCDECDECDECDECDECDECDEC
5PUSHPUSHPUSHPUSHPUSHPUSHPUSHPOPPOPPOPPOPPOPPOPPOP
6--------------------------------
7JOJNOJBJNBJZJNZJBEJAJSJNSJPEJPOJLJGEJLEJG
8GRP1GRP1GRP1GRP1TESTTESTXCHGXCHGMOVMOVMOVMOVMOVLEAMOVPOP
9NOPXCHGXCHGXCHGXCHGXCHGXCHGCBWCWDCALLWAITPUSHFPOPFSAHFLAHF
AMOVMOVMOVMOVSBMOVSWCMPSBCMPSWTESTTESTSTOSBSTOSWLODSBLODSWSCASBSCASW
BMOVMOVMOVMOVMOVMOVMOVMOVMOVMOVMOVMOVMOVMOVMOVMOV
C----RETRETLESLDSMOVMOV--RETFRETFINTINTINTOIRET
DGRP2GRP2GRP2GRP2AAMAADXLAT------------------
ELOOPNZLOOPZLOOPJCXZININOUTOUTCALLJMPJMPJMPININOUTOUT
FLOCK--REPNZREPZHLTCMCGRP3aGRP3bCLCSTCCLISTICLDSTDGRP4GRP5
GADDORADCSBBANDSUBXORCMPROLRORRCLRCRSHLSHR--SAR
GTEST--NOTNEGMULIMULDIVIDIVTEST--NOTNEGMULIMULDIVIDIV
GINCDEC------------INCDECCALLCALLJMPJMPPUSH--
INSTNAMEARG1ARG2
80ADDEbIb
80OREbIb
80ADCEbIb
80SBBEbIb
80ANDEbIb
80SUBEbIb
80XOREbIb
80CMPEbIb
82ADDEbIb
82OREbIb
82ADCEbIb
82SBBEbIb
82ANDEbIb
82SUBEbIb
82XOREbIb
82CMPEbIb
Two tables displaying x86 instruction opcodes and their corresponding instruction names and arguments.
<section class='slide-text'><h3>@function --getInstId() returns &lt;integer&gt; {</h3><pre><code> --inst0: --readMem(---1IP); result: if(style(--inst0:0); 1; style(--inst0:1); 2; style(--inst0:2); 3; style(--inst0:3); 4; style(--inst0:4); 5; style(--inst0:5); 6; style(--inst0:6); 7; style(--inst0:7); 8; style(--inst0:8); 9; style(--inst0:9); 10; style(--inst0:10); 1
<section class='slide-text'><pre><code data-lang='css'>@function --getInstId() returns &lt;integer&gt; { --inst0: --readMem(var(--_1IP)); result: if(style(--inst0:0); 0; style(--inst0:1); 1; style(--inst0:2); 2; style(--inst0:3); 3; style(--inst0:4); 4; style(--inst0:5); 5; style(--inst0:6); 6; style(--inst0:7); 7; style(--inst0:8); 8; style(--inst0:9); 9; style(--inst0
<function - getInst() returns <view of ...
SNATB:0 style(--inst0);
SNATB:1 style(--inst1);
SNATB:2 style(--inst2);
SNATB:3 style(--inst3);
SNATB:4 style(--inst4);
...
SNATB:78 style(--inst78);
SNATB:79 style(--inst79);
SNATB:80 style(--inst80);
SNATB:81 style(--inst81);
SNATB:82 style(--inst82);
SNATB:83 style(--inst83);
SNATB:84 style(--inst84);
...
SNATB:126 style(--inst126);
SNATB:127 style(--inst127);
SNATB:128 style(--inst128) and style(--modm_reg_0);
SNATB:129 style(--inst129) and style(--modm_reg_1);
SNATB:130 style(--inst130) and style(--modm_reg_2);
SNATB:131 style(--inst131) and style(--modm_reg_3);
SNATB:132 style(--inst132) and style(--modm_reg_4);
...
SNATB:253 style(--inst253) and style(--modm_reg_5);
SNATB:254 style(--inst254) and style(--modm_reg_6);
SNATB:255 style(--inst255) and style(--modm_reg_7);
} else {
    style(--inst-1);
}
#include <stdio.h>
#include "instructions.h"

// Hardware Interface
volatile int* p_regA = (volatile int*)0x0000;
volatile int* p_regB = (volatile int*)0x0004;
volatile int* p_result = (volatile int*)0x0008;
volatile int* p_opcode = (volatile int*)0x000C;

int main() {
  while (1) {
    // Wait for the CSS engine to perform the instruction.
    // The CSS engine writes to p_result when done.
    if (*p_result != -1) {
      // Clear the result register
      *p_result = -1;
    }
  }
  return 0;
}

we have a cpu!

we have a cpu!

... and we can write C code for it!

void (*writeChar1)(char);
void (*writeChar8)(const char[8]);

void printString(const char src[]) {
	int i = 0;
	while (src[i]) { writeChar8( (const char*)( (int)src+i ) ); i+=8;}
}

void pascal(void) {
	int n=5, c=1, i, j;
	for(i=0;i<n;i++) {
		for(j=1;j<n-i;j++) {
			writeChar1(0x20);writeChar1(0x20); }
		for(j=0;j<=i;j++) {
			if (j==0||i==0)
				c=1;
			else
				c=c*(i-j+1)/j;
			writeChar1(0x20);writeChar1(0x20);writeChar1(0x30 + c);
		}
		writeChar1(0x0a);
	}
}

static const char JS_IS_DEAD[] = "JavaScript is dead x86!nnx800";
static const char CSS_FTW[] = "CSS ftw!";

int _start(void) {
	writeChar1 = (void*)(0x2000);
	writeChar8 = (void*)(0x2004);

	printString(JS_IS_DEAD);
	pascal();
	while (1)
		writeChar8(CSS_FTW);
	return 1337;
}
	c=c*(i-j+1)/j;
	writeChar1(0x20);writeChar1(0x20);writeChar1(0x20);writeChar1(0x30 + c);
	}
	writeChar1(0x0a);
	}
}

static const char JS_IS_DEAD[] = "JavaScript is dead x86!nnx00";
static const char CSS_FTW[] = "CSS ftw!";

int _start(void) {
	writeChar1 = (void*)(0x2000);
	writeChar8 = (void*)(0x2004);

	printString(JS_IS_DEAD);
	pascal();
	while (1)
		writeChar8(CSS_FTW);
	return 1337;
}
c=c*(i-j+1)/j;
writeChar1(0x20); writeChar1(0x20); writeChar1(0x20); writeChar1(0x30 + c);
}
writeChar1(0x0a);
}
}

static const char JS_IS_DEAD[] = "JavaScript is dead x86!nnx00";
static const char CSS_FTW[] = "CSS ftw!";

int _start(void) {
	writeChar1 = (void*)(0x2000);
	writeChar8 = (void*)(0x2004);

	printString(JS_IS_DEAD);
	pascal();
	while (1)
		writeChar8(CSS_FTW);
	return 1337;
}
c=c*(i-j+1)/j;
writeChar1(0x20);writeChar1(0x20);writeChar1(0x20);writeChar1(0x30 + c);
}
writeChar1(0x0a);
}
}

static const char JS_IS_DEAD[] = "JavaScript is dead x86!nnx00";
static const char CSS_FTW[] = "CSS ftw!";

int _start(void) {
    writeChar1 = (void*)(0x2000);
    writeChar8 = (void*)(0x2004);

    printString(JS_IS_DEAD);
    pascal();
    while (1)
        writeChar8(CSS_FTW);
    return 1337;
}
...
	c = c * (i - j + 1) / j;
	writeChar1(0x20); writeChar1(0x20); writeChar1(0x20); writeChar1(0x30 + c);
}
	writeChar1(0x0a);
}

static const char JS_IS_DEAD[] = "JavaScript is dead x86!nnx00";
static const char CSS_FTW[] = "CSS ftw!";

int _start(void) {
	writeChar1 = (void*)(0x2000);
	writeChar8 = (void*)(0x2004);

	printString(JS_IS_DEAD);
	pascal();
	while (1)
		writeChar8(CSS_FTW);
	return 1337;
}
Screenshot of C code in an editor.
int i = 0;
while (src[i]) { writeChar8( (const char*)(((int)src+i) ); i+=8;}
}

void pascal(void) {
	int n=5, c=1,i,j;
	for(i=0;i<n;i++) {
		for(j=1;j<n-i;j++) {
			writeChar1(0x20);writeChar1(0x20);
		}
		for(j=0;j<=i;j++) {
			if (j==0||i==0)
				c=1;
			else
				c=c*(i-j+1)/j;
			writeChar1(0x20);writeChar1(0x20);writeChar1(0x20);writeChar1(0x30 + c);
		}
		writeChar1(0x0a);
	}
}

static const char JS_IS_DEAD[] = "JavaScript is dead x86!nnx00";
static const char CSS_FTW[] = "CSS ftw!";
Screenshot of C code in a text editor, displaying a while loop, a function named `pascal` that calculates Pascal's triangle, and two string constant declarations.
int i = 0;
while (src[i]) { writeChar8( (const char*)(((int)src+i) ) ); i+=8;}

void pascal(void) {
	int n=5, c=1,i,j;
	for(i=0;i<n;i++) {
		for(j=1;j<n-i;j++) {
			writeChar1(0x20);
		}
		for(j=0;j<=i;j++) {
			if (j==0||i==0)
				c=1;
			else
				c=c*(i-j+1)/j;
			writeChar1(0x20);writeChar1(0x20);writeChar1(0x20);writeChar1(0x30 + c);
		}
		writeChar1(0x0a);
	}
}

static const char JS_IS_DEAD[] = "JavaScript is dead x86!nnx00";
static const char CSS_FTW[] = "CSS ftw!";
void (*writeChar1)(char);
void (*writeChar8)(const char[8]);

void printString(const char src[]) {
    int i = 0;
    while (src[i]) { writeChar8((const char*)(int)src+i ); i+=8;}
}

void pascal(void) {
    int n=5, c=1, i, j;
    for(i=0;i<n;i++) {
        for(j=1;j<n-i;j++) {
            writeChar1(0x20);writeChar1(0x20); }
        for(j=0;j<=i;j++) {
            if (j==0||i==0)
                c=1;
            else
                c=c*(i-j+1)/j;
            writeChar1(0x20);writeChar1(0x20);writeChar1(0x30 + c);
        }
        writeChar1(0x0a);
    }
}

static const char JS_IS_DEAD[] = "JavaScript is dead x86!nnx80";
static const char CSS_FTW[] = "CSS ftw!";

int _start(void) {
    writeChar1 = (void*)(0x2000);
    writeChar8 = (void*)(0x2004);

    printString(JS_IS_DEAD);
    pascal();
    while (1)
        writeChar8(CSS_FTW);
    return 1337;
}
$
A dark screen representing a command-line interface.
$ ls
demo.c
$
Screenshot of a terminal window showing the output of the 'ls' command, listing a file named 'demo.c'.
$ ls
demo.c
$ ia16-elf-gcc demo.c -o demo.a -nostdlib -O2 # https://gitlab.com/tkchia/build-ia16
$ xxd demo.a
Screenshot of a terminal window displaying shell commands and their output.
$ ia16-elt-gcc demo.c -o demo.a -nostdlib -U2 # https://gitlab.com/tkchia/build-1016
$ xxd demo.a
0000000: 5655 89e5 8b5e 068d 7708 803f 0074 148d VU.^...w.?..t.
0000010: 44f8 50ff 1658 0283 c608 83c4 0280 7cf8 D.P..X......|.
0000020: 0075 ec89 ec5d 5ec3 5657 5589 e583 ec04 .u...].VWU....
0000030: c746 fe00 008b 56fe 89d6 b805 0029 0089 .F....V......).
0000040: 46fc bf01 0039 f874 17b0 2050 ff16 5602 F....9.t.. P.V.
0000050: b020 50ff 1656 0247 83c4 0439 7efc 75e9 P.V.G..9~u.
0000060: 31ff c746 fc01 00b0 2050 ff16 5602 b020 1..F.... P.V.
0000070: 50ff 1656 02b0 2050 ff16 5602 8a46 fc04 P.V..P..V..F.
0000080: 3050 ff16 5602 4783 c408 3b7e fe7f 348b 0P..V.G...;~.4.
0000090: 46fc f7e6 99f7 ff89 46fc 4eb0 2050 ff16 F......F.N. P.
00000a0: 5602 b020 50ff 1656 02b0 2050 ff16 5602 V..V.. P..V.
00000b0: 8a46 fc04 3050 ff16 5602 4783 c408 3b7e .F..0P..V.G...;~
00000c0: fe7e ccb0 0a50 ff16 5602 ff46 fe8b 46fe ~...P..V..F..F.
00000d0: 83c4 0283 f805 7403 e95a ff89 ec5d 5f5e ..t..t..Z..]_^
00000e0: c356 c706 5602 0020 c706 5802 0420 be44 .V.V.. ..X. .D
00000f0: 02b8 0420 8d54 f852 ffd0 83c6 0883 c402 ...T.R.......
0000100: 807c f800 7415 a158 028d 54f8 52ff d083 .|..t..X..T.R...
0000110: c608 83c4 0280 7cf8 0075 ebe8 0aff be33 .....l..u.....3
0000120: 0256 ff16 5802 83c4 0256 ff16 5802 83c4 V.X..V..X...X.
0000130: 02eb ee43 5353 2066 7477 2100 4a61 7661 ...CSS ftw!.Java
0000140: 5363 7269 7074 2069 7320 6465 6164 2086 Script is dead .
0000150: 210a 0a00 00                               !....
$
Screenshot of a terminal window displaying commands and the hex dump of a compiled program file. The commands show a C file being compiled with `ia16-elt-gcc` and then its hexadecimal representation being viewed with `xxd`. The hex dump includes an ASCII interpretation column, which contains the text "CSS ftw! Java Script is dead .".
$ ia16-elt-gcc demo.c -o demo.a -nostdlib -U2 # <a href="https://gitlab.com/tkchia/build-ia16">https://gitlab.com/tkchia/build-ia16</a>
$ xxd demo.a
00000000: 5655 89e5 8b5e 068d 7708 803f 0074 148d VU.....^..w..?.t..
00000010: 44f8 50ff 1658 0283 c608 83c4 0280 7cf8 D.P..X.........|.
00000020: 0075 ec89 ec5d 5ec3 5657 5589 e583 ec04 .u...]^.VWU....
00000030: c746 fe00 008b 56fe 89d6 b805 0029 d089 .F....V....)..
00000040: 46fc bf01 0039 f874 17b0 2050 ff16 5602 F....9.t.. P..V.
00000050: b020 50ff 1656 0247 83c4 0439 7efc 75e9 . P..V.G...9~u.
00000060: 31ff c746 fc01 00b0 2050 ff16 5602 b020 1..F.... P..V. .
00000070: 50ff 1656 02b0 2050 ff16 5602 8a46 fc04 P..V. .P..V..F..
00000080: 3050 ff16 5602 4783 c408 3b7e fe7f 348b 0P..V.G...;~..4.
00000090: 46fc f7e6 99f7 ff89 46fc 4eb0 2050 ff16 F.......F.N. P..
000000a0: 5602 b020 50ff 1656 02b0 2050 ff16 5602 V. .P..V. .P..V.
000000b0: 8a46 fc04 3050 ff16 5602 4783 c408 3b7e .F..0P..V.G...;~
000000c0: fe7e cc80 0a50 ff16 5602 ff46 fe8b 46fe ~..P..V..F..F.
000000d0: 83c4 0283 f805 7403 e95a ff89 ec5d 5f5e ...t..Z...]_^
000000e0: c356 c706 5602 0020 c706 5802 0420 be44 .V..V.. ..X.. .D
000000f0: 02b8 0420 8d54 f852 ffd0 83c6 0883 c402 .. .T.R.......
00000100: 807c f800 7415 a158 028d 54f8 52ff d083 .|.t.X..T.R...
00000110: c608 83c4 0280 7cf8 0075 ebe8 0aff be33 ...|.u.....3
00000120: 0256 ff16 5802 83c4 0256 ff16 5802 83c4 .V..X....V..X...
00000130: 02eb ee43 5353 2066 7477 2100 4a61 7661 ...CSS ftw!.Java
00000140: 5363 7269 7074 2069 7320 6465 6164 2086 Script is dead .
00000150: 210a 0a00 00 !....
$ objdump -D -b binary -m i8086 -M intel demo.a
Screenshot of a terminal displaying C compilation, hex dump, and disassembly commands and their outputs.
<section class='slide-text'> <pre><code data-lang='assembly'>11e: be 33 02 mov si,0x233 121: 56 push si 122: ff 16 58 02 call WORD PTR ds:0x258 126: 83 c4 02 add sp,0x2 129: 56 push si 12a: ff 16 58 02 call WORD PTR ds:0x258 12e: 83 c4 02
$ od -t u1 demo.a
0000000 86 85 137 229 139 94 6 141 119 8 128 63 0 116 20 141
0000020 68 248 80 255 22 88 2 131 198 8 131 196 2 128 124 248
0000040 0 117 236 137 236 93 94 195 86 87 85 137 229 131 236 4
0000060 199 70 254 0 0 139 86 254 137 214 184 5 0 41 208 137
0000100 70 252 191 1 0 57 248 116 23 176 32 80 255 22 86 2
0000120 176 32 80 255 22 86 2 71 131 196 4 57 126 252 117 233
0000140 49 255 199 70 252 1 0 176 32 80 255 22 86 2 176 32
0000160 80 255 22 86 2 176 32 80 255 22 86 2 138 70 252 4
0000200 48 80 255 22 86 2 71 131 196 8 59 126 254 127 52 139
0000220 70 252 247 230 153 247 255 137 70 252 78 176 32 80 255 22
0000240 86 2 176 32 80 255 22 86 2 176 32 80 255 22 86 2
0000260 138 70 252 4 48 80 255 22 86 2 71 131 196 8 59 126
0000300 254 126 204 176 10 80 255 22 86 2 255 70 254 139 70 254
0000320 131 196 2 131 248 5 116 3 233 90 255 137 236 93 95 94
0000340 195 86 199 6 86 2 0 32 199 6 88 2 4 32 190 68
0000360 2 184 4 32 141 84 248 82 255 208 131 198 8 131 196 2
0000400 128 124 248 0 116 21 161 88 2 141 84 248 82 255 208 131
0000420 198 8 131 196 2 128 124 248 0 117 235 232 10 255 190 51
0000440 2 86 255 22 88 2 131 196 2 86 255 22 88 2 131 196
0000460 2 235 238 67 83 83 32 102 116 119 33 0 74 97 118 97
0000500 83 99 114 105 112 116 32 105 115 32 100 101 97 108 32 134
0000520 33 10 10 0 0
0000525
$
Screenshot of a terminal displaying the output of the `od -t u1 demo.a` command, showing a memory dump of numerical values.
<section class='slide-text'> <pre><code>$ od -t u1 demo.a 0000000 86 85 137 229 139 94 6 141 119 8 128 63 0 116 20 141 0000020 68 248 80 255 22 88 2 131 198 8 131 196 2 128 124 248 0000040 0 117 2
$ od -t u1 demo.a
0000000 86 85 137 229 139 94 6 141 119 8 128 63 0 116 20 141
0000020 68 248 80 255 22 88 2 131 196 8 2 128 124 248
0000040 0 117 236 137 236 93 94 195 86 87 85 137 229 131 236 4
0000060 199 70 254 0 0 139 86 254 137 214 184 8 0 41 208 137
0000100 70 252 191 0 57 248 154 23 176 32 80 255 22 86 2
0000120 176 32 80 255 22 86 2 71 131 196 4 57 126 252 176 33
0000140 49 255 199 70 252 1 0 176 32 80 255 22 86 2 117 32
0000160 80 255 22 86 2 176 32 80 255 22 86 2 138 70 252
0000200 8 80 255 22 86 2 71 131 196 8 59 126 254 127 52 139
0000220 70 252 247 230 153 247 255 70 252 78 176 32 80 255 22
0000240 86 2 176 32 80 255 22 86 2 176 32 80 255 22 86 2
0000260 138 70 252 4 48 80 255 22 86 2 71 131 196 8 59 126
0000300 254 126 204 176 10 80 255 22 86 2 255 70 254 139 70 254
0000320 131 196 2 131 248 5 116 3 233 90 255 137 236 93 95 94
0000340 195 86 199 6 0 86 2 0 32 199 6 88 2 4 32 190 68
0000360 2 184 4 32 141 84 248 82 255 208 131 198 8 131 196 2
0000400 128 124 248 0 116 21 161 88 2 141 84 248 82 255 208 131
0000420 198 8 131 196 2 128 124 248 0 117 235 232 10 255 190 51
0000440 2 86 255 22 88 2 131 196 2 86 255 22 88 2 131 196
0000460 2 235 238 67 83 32 102 116 119 33 0 74 97 118 97
0000500 83 99 114 105 112 116 32 105 115 32 100 101 97 100 32 134
0000520 33 10 10 0
0000525
$
@property --n256 {
	syntax: "<integer>";
	initial-value: 84;
	inherits: true;
}
@property --n257 {
	syntax: "<integer>";
	initial-value: 85;
	inherits: true;
}
@property --n258 {
	syntax: "<integer>";
	initial-value: 137;
	inherits: true;
}
@property --n259 {
	syntax: "<integer>";
	initial-value: 229;
	inherits: true;
}
@property --n260 {
	syntax: "<integer>";
	initial-value: 139;
	inherits: true;
}
> od -t u1 demo.a
0000000 86 85 137 229 139 94 6 141 119 8 128 63 0 116 20 141
0000020 68 248 80 255 22 8 2 131 196 2 128 124 248
0000040 0 117 236 137 236 93 94 195 86 87 85 137 229 131 236 4
0000060 199 70 254 0 139 86 254 137 214 184 5 0 41 208 137
0000080 70 252 191 1 0 57 248 134 33 176 32 88 255 22 2
0000100 70 252 191 2 71 131 196 4 57 126 252 117 233
0000120 176 32 80 255 22 86 2 176 32 80 255 22 86 2 176 32
0000140 49 255 199 70 252 1 0 176 32 80 255 22 86 2 176 32
0000160 80 255 22 86 2 80 255 22 86 2 138 70 252 4
0000180 2 131 196 8 59 126 254 127 52 139
0000200 48 80 255 22 2 71 131 196 8 59 126 254 127 52 139
0000220 70 252 247 230 153 247 255 78 176 32 80 255 22
0000240 86 2 176 32 80 255 22 86 2 176 32 80 255 22
0000260 138 70 252 4 48 80 255 22 86 2 71 131 196 8 59 126
0000280 254 126 204 176 10 80 255 22 86 2 255 70 254 139 70 254
0000300 131 196 2 131 248 5 116 3 233 90 255 137 236 93 95 94
0000320 195 86 199 6 86 2 0 32 199 6 88 2 4 32 190 68
0000340 195 86 199 2 131 196 2 84 255 208 131 198 8 131 196 2
0000360 2 184 4 32 141 84 248 82 255 208 131 198 8 131 196 2
0000380 128 124 248 0 116 21 161 88 2 141 84 248 82 255 208 131
0000400 198 8 131 196 2 128 124 248 0 117 235 232 10 255 190 51
0000420 198 8 131 196 2 88 2 131 196 2 86 255 22 88 2 131 196
0000440 2 86 255 2 235 238
0000460 2 235 238 67 83 83 32 102 116 119 33 0 74 97 118 97
0000480 83 99 114 105 112 116 32 105 115 32 100 101 97 100 32 134
0000500 33 10 10 0
0000520 10
0000525 $
@property --m256 {
  syntax: "<integer>";
  initial-value: 86;
  inherits: true;
}
@property --m257 {
  syntax: "<integer>";
  initial-value: 85;
  inherits: true;
}
@property --m258 {
  syntax: "<integer>";
  initial-value: 137;
  inherits: true;
}
@property --m259 {
  syntax: "<integer>";
  initial-value: 229;
  inherits: true;
}
@property --m260 {
  syntax: "<integer>";
  initial-value: 139;
  inherits: true;
}
<section class='slide-text'><pre><code>$ od -t u1 demo.a 0000000 86 85 137 229 94 6 141 119 8 128 63 0 116 20 141 0000020 68 248 80 255 22 88 2 131 196 2 128 124 248 0000040 0 117 236 137 236 93 94

JavaScript is dead 💀 !

INSTAXCXDXBXSPBPSIDIIPESCSSSDS
CALL3200012561262013320000
A pixelated block of data, likely representing memory contents or raw binary data, is displayed below the table of register values and is framed with a blue border.

JavaScript is dead 💀 !

INSTAXCXDXBXSPBPSIDIIPESCSSSDS
JNZ3200012621258023500000
Screenshot of an emulator or debugger interface, displaying "JavaScript is dead 💀 !" on a purple screen. Below this, a table shows x86 CPU register values including AX, CX, DX, BX, SP, BP, SI, DI, IP, ES, CS, SS, DS, and the instruction JNZ. Further below, a pixelated memory dump is visible.

JavaScript is dead 💀!

INST AX CX DX BX SP BP SI DI IP ES CS SS DS
MOV 12 0 0 0 1258 0 0 0 329 0 0 0 0
Screenshot of a retro-style terminal or debugger interface with a purple background, displaying the text "JavaScript is dead 💀!" and a table of CPU register values.

JavaScript is dead 💀 !

INST CMP AX CX DX BX SP BP SI DI IP ES CS SS DS
12 32 0 0 0 0 1258 1242 0 0 547 0 0 0 0
A purple screen styled like a retro computer terminal or debugger, displaying the text "JavaScript is dead 💀 !" at the top. Below the text is a table showing x86 processor register values (INST, CMP, AX, CX, DX, BX, SP, BP, SI, DI, IP, ES, CS, SS, DS) and their corresponding numeric values. Below the table is a horizontal band of pixelated, unreadable characters, resembling memory contents or a disassembled code view.

Thank you!

JavaScript is dead 💀 !

1

lyra.horse
INSTAXCXDXBXSPBPSIDIIPESCSSSDS
CMP401012581262113250000
A QR code linking to lyra.horse. A debugger interface displays CPU registers and their values, with a hexadecimal memory dump below.

Thank you!

JavaScript is dead 💀 !

1
1
INST AX CX DX BX SP BP SI DI ES CS SS DS
PUSH 32 0 2 2 1258 1242 2 0 531 0 0 0 0
lyra.horse
A QR code. A row of pixelated, blocky graphics below the debugger output, resembling a data stream or memory visualization.

Thank you!

JavaScript is dead 💀!

1   1
1   1

INST AX CX DX BX SP BP SI DI DP ES CS SS DS XS
INC  32 0  0  0  1254 0  2  0  343 0  0  0  0
lyra.horsehttps://lyra.horse
A QR code linking to lyra.horse. Below the register display, there is a blurred line of what appears to be a memory dump or further machine code output.

Thank you!

JavaScript is dead 💀 !

1

1 1

1

lyra.horse

INSTAXCXDXBXSPBPSIDIIPESCSSSDS
IDIV200012581262214050000

QR code linking to https://lyra.horse.

A debugger-like interface at the bottom showing CPU register values and a pixelated memory or code visualization bar.

Thank you!

https://lyra.horse

JavaScript is dead 💀!

1 1
1 1 2
lyra.horse
INST AX CX DX BX SP BP SI DI IP ES CS SS DS
JLE 50 0 0 0 1258 1262 1 2 449 0 0 0 0

A technical display showing CPU register values and a memory visualization bar, resembling a debugger or console output.

Thank you!

JavaScript is dead 💀 !

  1
1   1
  2

lyra.horse

INST AX   CX DX BX SP   SI   DI BP IP   ES CS SS DS
RET  32   0  0  0  1250 1242 0  2  8193 0  0  0  0

A QR code is displayed, linking to lyra.horse.

Below the register dump, a horizontal strip shows a pattern of small, pixelated black and white blocks, possibly representing memory content or graphical output.

Thank you!

JavaScript is dead 💀!


1
1   1
1 2 1
  
lyra.horse
INST AX CX DX BX SP BP SI DI IP ES CS SS DS
RLF  49 0  0  0  1256 1242 0  0  0  449 0  0  0  0
https://lyra.horse/

A QR code is displayed.

Screenshot of an x86 emulator output showing register values (INST, AX, CX, DX, BX, SP, BP, SI, DI, IP, ES, CS, SS, DS).

Thank you!

JavaScript is dead 💀!

  1
1 2 1
  1
INST RET AX CX DX SP SI DI BP ES CS SS DS
12    0  0  0  1252 0  0  8193 0  0  0  0
[...]
lyra.horse
A QR code linking to lyra.horse.

Thank you!

JavaScript is dead 💀!

1 1
1 2 1
  

lyra.horse

Scan this QR code: https://lyra.horse/

INST AX CX DX BX SP SI DI BP ES CS SS DS
17 0 0 0 0 1252 1242 0 585 0 0 0 0
AEEF 0 0 0 0 ... ... ... ... ... ... ... ...

Below the register table is a line of pixelated characters, likely representing memory or instruction trace data.

A QR code linking to https://lyra.horse/.

Thank you!

JavaScript is dead 💀!

    1
   1 1
  1 2 1
 1 3 3 1
1 4 6 4 1
    

CSS ftw!CSS ftw!CSS ftw!CSS ftw!CSS ftw!CSS ftw!CSS ftw!CSS ftw!CSS ftw!

CSS ftw!CSS ftw!

lyra.horse


INST AX CX DX BX SP BP SI DI ES CS SS DS
     5  0  0  0 1268 0  563 0  554 0  0  0
CALL 5
    

A QR code links to lyra.horse.

A debug console interface displays CPU registers and values, along with an instruction 'CALL 5' and a heavily pixelated, unreadable section below it, resembling a memory dump.

Thank you!

JavaScript is dead 💀!

   1
  1 1
 1 2 1
1 3 3 1
1 4 6 4 1
    

lyra.horse

CSS ftw!CSS ftw!CSS ftw!CSS ftw!CSS ftw!CSS ftw!CSS ftw!CSS ftw!

CSS ftw!CSS ftw!CSS ftw!CSS ftw!CSS ftw!CSS ftw!CSS ftw!CSS ftw!

INST AX CX DX BX SP BP SI DI IP CS SS DS ES FS GS
ADD 5 0 0 0 1268 0 0 563 0 550 0 0 0 0 0

A QR code, likely linking to https://lyra.horse/.

Thank you!

JavaScript is dead 💀 !

          1
         1 1
        1 2 1
       1 3 3 1
      1 4 6 4 1
  

CSS ftw!CSS ftw!CSS ftw!CSS ftw!CSS ftw!CSS ftw!CSS ftw! lyra.horse ftw!

CSS ftw!CSS ftw!CSS ftw!CSS ftw!CSS ftw!CSS ftw!CSS ftw!

CSS ftw!CSS ftw!CSS ftw!CSS ftw!CSS ftw!CSS ftw!CSS ftw!

CSS ftw!CSS ftw!CSS ftw!CSS ftw!CSS ftw!CSS ftw!CSS ftw!

CSS ftw!CSS ftw!CSS ftw!CSS ftw!CSS ftw!CSS ftw!CSS ftw!

INST AX CX DX BX SP BP SI DI IP CS SS DS ES FS GS
PUSH 5 0 0 0 1270 0 563 0 545 0 0 0 0 0 0

(Below the table, there is a line of obscured hexadecimal values.)

https://lyra.horse/
A screen simulating a terminal or debugger, displaying text and a QR code.

Thank you!

lyra.horse
INST AX CX DX SP BP DI SI DS ES SS CS IP
RET 5 0 0 1266 D 0 8196 0 0 0 1 0
A QR code linking to https://lyra.horse/.

Thank you!

CSS ftw!CSS ftw!CSS ftw!CSS ftw!CSS ftw!CSS ftw!

lyra.horse

INST AX CX DX BX SP BP SI DI CS IP ES SS DS
0    0  0  0  0  1770 0  563 0  561 0  0  0  0
A thank you slide designed to resemble an old terminal or debugger interface, featuring a large QR code that links to lyra.horse. The text "CSS ftw!" is repeated multiple times throughout the display, and a section at the bottom shows technical register-like values.

People

  • Blackle
  • Chainori
  • Corncicle
  • PPK
  • Rykarn
  • Yellow Afterlife

Technologies & Tools

  • C
  • Chrome DevTools
  • container style queries
  • CSS counters
  • CSS keyframes
  • details element
  • GCC
  • Gecko
  • objdump
  • TailwindCSS
  • WebKit
  • x86 assembly

Standards & Specs

  • ASCII
  • ModRM byte
  • SVG
  • x86

Concepts & Methods

  • checkbox hack
  • CSS CPU hack
  • Pascal's Triangle

Organisations & Products

  • cohost
  • Intel 8086

Works

  • CSS Puzzle Box
  • Game of Life