Refactoring Components
So the boring name of this talk is refactoring components, but I find it more fun to think of it as getting on the refactor tractor.
Um, so we did all this already, but if anybody wants to follow along the slides at home, they're available at refactortractor.ez.codes.
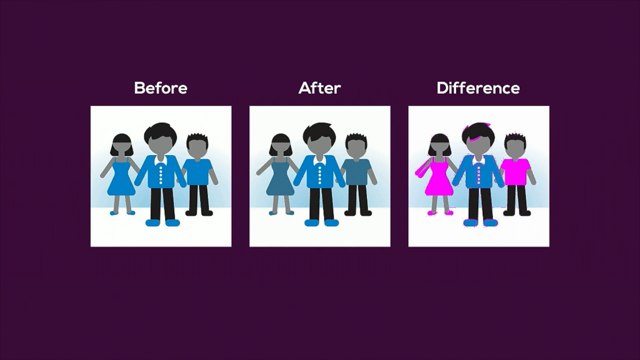
and yeah, so today we're gonna talk about refactoring and the number one thing that we need to remember when we're refactoring is we wanna change the implementation of our code, but we don't wanna change the behavior, right?
We don't wanna introduce bugs obviously.
But we also probably don't wanna fix bugs accidentally.
if we've got bugs in our code, it's possible our users are relying on those bugs.
They've got workarounds for them.
So if we are gonna fix them, they need to go through proper change management process.
the best example I can think of that is, Internet Explorer, which was basically all bugs.
but it would've been a bit awkward if Microsoft went around fixing them because millions of websites would've broken.
people were relying on the behavior of those bugs.
So we wanna make sure that we do our refactoring safely and that we don't change any behavior.
So we've got a couple of tools that I wanna talk about that we can use to make, our refactoring safer.
the first is characterization tests, and the second is snapshot tests.
And then I'm gonna do a live demo of putting this all together.
And I did not pray to the demo gods this morning, so we'll see how that goes.
All right, let's start with characterization tests.
So the concept of characterization tests comes from this book working effectively with Legacy Code by Michael C.
Feathers.
if you are working with Legacy Code, and I feel like we all are at some point, and you wanna do it effectively, this might be the book for you.
But we're just gonna look at, characterization tests.
characterization tests differ from your standard feature tests.
When you're writing feature tests, you start by writing a test with some expectations.
And then you write code and you make the code, you change the code until the test passes, assuming you're doing TDD . If you're not doing tdd, I guess you write some code that's wrong and then you write some tests and then you go back and change your code item.
I don't know.
You do you.
When we're writing characterization tests though, we already have the code, so we write some tests with no expectations and then we change the test until we change those expectations, until the test passes.
So feature tests, the code changes, but the test stays the same.
Characterization tests, the test changes, but the code stays the same.
All right, so let's, do an example.
We've got our little function here that formats dates for us it's using moment js, which if you're familiar, is not recommended anymore.
it's got some issues with mutable dates and stuff, and it's probably better to use something a bit more modern.
So we are going to refactor this.
function.
I'm gonna start by writing our characterization tests.
So we'll start with our scribe, our format date function.
now when I'm writing tests, I like to start with the very simplest case, which in this case is gonna be when we pass nothing into the, into the function.
Ugh.
And we need our it.
So we don't know what it's gonna do.
So we just won't put anything in there and we can jump in and we can expect format date with nothing passed in gb.
And again, we don't know.
So now we run our test.
And of course our test fails because, it doesn't actually return two question marks ah, go up.
But from here we can see what actually happens so that we can see when we call format date with nothing, we get an empty string.
So we can say it returns an empty string and we've now got a test that documents that behavior and we can be confident that we're not gonna break that.
And we can keep going with our, other things that we can pass into this function.
So when we pass a date in it, again, we don't know.
So we jump in and we can just expect format, date, and we'll pass in a date, like to pass in one that's got all of the things below 10 so we can see how the padding works and we don't know what it's gonna return.
We run the test and we find out what it returns, which is unsurprisingly a formatted date string.
And now a test is gonna pass.
Okay?
So we can go through and do that with all of the different kinds of input that we can pass into this test.
Oops.
But, I won't make you sit through that.
So we've got here, when we pass in a date, when we pass in a string, when we pass in a number, and I've decided to write those tests based on what we can pass into the date.
constructor up here.
arguably we could write a bunch more tests.
We could write a test to see what happens when you pass in a bullion.
And it would actually be interesting because if you pass in false, it's gonna return empty string.
But if you pass in true, it's gonna return invalid date.
But I wouldn't do that.
and there's two reasons for that.
First of all, if I was writing this code in production, I would use TypeScript and it wouldn't be a problem.
And second, if you've got people using this function in your code base, in such a way that there's a chance that they're passing in booleans, you've probably got bigger problems than just refactoring Moment, I think so.
I'm happy with this test.
Sweet.
that's what we're gonna go with.
We're ready to do our refactoring now.
And to do that we're gonna replace, um, moment with format from date functions, which takes a date and a formatting string.
But, of course the formatting string is different to the formatting string that moment takes because why not?
We can see we rerun this, we get one failed test.
And the reason this test fails is because, moment when you pass in an invalid date returns the string invalid date, whereas date functions throws it, tgrows an actual error.
Now, you could argue that throwing an actual error is the better behavior, and I would 100% agree with you.
But again, we wanna not change the functionality of this, of this function because there could be someone out there who is relying on that odd way of, interesting way of handling errors.
So we can just jump in here, pass and make it return invalidate date.
And when we run our test, everything passes again, so we can be confident that we have done this refactoring and we haven't broken anything.
And this is still gonna keep working for everyone else.
For everyone who's using this function.
Now, you could argue that eight tests is a bit of overkill for, four lines of code that we've changed.
And you might ask, would I really do this in the real world?
And the answer is everything in software.
It depends.
If this function was used in a single component and you knew always what was being passed into it, then no, I'm not gonna bother writing all these tests.
I would just be a real cowboy and make the change.
But the last time I did a change like this, it was in a formatting function that was used across the whole code base.
So it was used in 300 different places, and I think that eight tests is probably an okay number for a change that's used in 300 different places.
Okay, so that's characterization tests, which is fine and it all works, and hopefully we'll understand that.
But the next question is, how does this apply when we're writing jsx, right?
How do we do this with our JSX code?
And the answer is basically the same.
So we can write a characterization test like this.
We've got a component that's just rendering out some user info.
Can everybody read that?
Yeah.
Cool.
so we can write our test where we render the component and we can just expect the container to have some text content.
We don't know what it is.
We run the test, fails, and we find out what the text content is.
So we can pop that in and we could write a meaningful test message and that will now pass.
So this is fine for a component like this, which is quite small and simple, and we can just check it using the text content, but it can be a bit cumbersome when you're working with bigger components that have got a lot more stuff going on.
And the good news is that we have another tool available for us to help with that kind of thing.
Oops.
And that is snapshot tests.
So for people who aren't familiar, the way that snapshot tests work is that the first time you run your test, it generates a snapshot, which is just a text representation of your component.
Then you can go ahead and make all your changes, do whatever you like.
And then you come back and run the test again.
It's gonna generate a new snapshot and it's gonna compare the two and tell you what's changed.
Okay.
So we can do that with, uh, this component here.
We can write our test.
We can say, we know that what we're gonna expect is that it matches the snapshot.
So we can pop that in and then instead of expecting it to have text content, we can just expect it to match snapshot.
And then when we run the test, we get this little message saying that we've had a snapshot written and we can see we've got this snapshot directory with this file here, and we've got this text representation of our component.
If we then jumped in and changed something, so say we changed Bob's birthday to the 2nd of January.
This time the snapshot's gonna fail.
And we're gonna get a little summary of what's changed between the two snapshots.
In our case, we're gonna say, yeah, we know that was right.
we made that change so we can update the snapshot.
So now it's gonna be checking against the new snapshot.
And we can see in the snapshot here that Bob's birthday was now on a Tuesday.
and then we could go ahead and do that refactor cuz we've we're confident about all of our changes.
So snapshot tests are super handy for this kind of thing, but there are a couple of gotchas to keep in mind when you're using them.
So first of all, if your component say, makes an API call, does something asynchronous before it renders, you need to make sure that you wait for that call to come back before you take the snapshot.
otherwise you're just gonna end up with a snapshot that looks like this.
And no matter how much you change the code, your test will just keep passing.
That's, all kinds of fun.
The other thing to keep in mind is that the snapshot doesn't render everything.
So if you're testing the state of a checkbox, this is what the snapshot's gonna look like.
So if you wanna test that when you do something, the checkbox is checked.
You can't use a snapshot test to test that.
There's no way to get that information into that snapshot.
But that said, snapshot tests are super useful in a bunch of different situations.
Okay?
Live demo time.
We've got an app, that we've built, the farm shop and it looks like this, so it's just selling some kind of plant stuff.
users can choose seed packets or seedlings.
They can enter a number of seed packets and they'll find out how much it's gonna cost and how much the postage is.
we've got some new requirements.
We wanna add a new type of product, right?
So we need to add a new radio button, um, for plants.
We wanna update the code that generates the, price and the label, and we need to calculate the postage.
Now, we could just do these all in order, but we're not gonna do that because if we start with the radio button, then we have to do all of the changes before we can merge it in and, release it, right?
Whereas if we start with the second requirement, we can just do that second requirement and merge it in because nobody's ever gonna be able to hit the code.
It's like using a feature flag, but without all of the hassle of an actual feature flag.
And it makes the demo work better.
So, so this is what it's gonna look like when we finished.
All right.
Whoops.
Not that one.
Not that one.
Oh no, this one.
Okay.
So this is the code for our product.
this code.
It was not originally a plant shop, but it is based on actual real production code, just with the names changed to protect the innocent or guilty.
So the bit of code that we care about here is this bit here.
This is, what's generating the label, right?
So it's gonna show seed packets and the price or seedlings and the price.
we could just add another block underneath that deals with plants, but I think that this is a really good opportunity for a bit of a refactor cuz there's a lot of repeated code there and it could be a lot simpler to make the change.
So we're gonna do that and the way that we're gonna start that is by writing some tests.
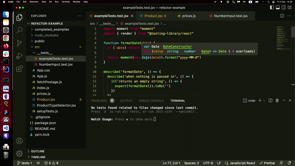
All right, so we wanna describe our product component.
yeah.
So we're gonna write some tests to make sure that we don't actually break anything when we do our refactor.
So there's four, cases that we need to test here.
It's seed packets with no amount entered, seed packets with an amount entered, seedlings, the same two cases.
So when seed packets is selected with no amount entered.
Oh my God, I cannot type today.
I wonder if it had anything to do with that beer I drank last night.
it's, and in this case, this is a perfect, opportunity to use snapshot tests because we have this huge component that's got a lot of stuff going on and we don't wanna check every single thing that's going on individually, so we can see it matches the snapshot.
So we need to grab our container.
No, not that screen.
Oh, not screen at all.
render.
what are we rendering?
Product.
And it takes a product com, prop, let's say corn.
All right.
And we also need to import render.
I normally use IntelliJ and I just cannot work out how to get VS code to just do that for me automatically.
okay, so the first thing we wanna do is select the radio button, uh, screen.
No, not that screen.
That screen.
we can get by role, which is a radio.
there's a couple of radio buttons on the screen, so we also need to pass it a name.
And then we can click the radio button and we can expect the container to match the snapshot.
Oh, we need to put the thing that we're clicking.
All right.
why have we got a fail test?
Because, This has got a capital P every time.
Every time I practice it, I do that and...
okay, so we've got our first snapshot written.
We can then jump in and do our second one.
With, oh, I should say no.
Okay.
With an amount.
That one's with no amount.
so we just need to jump in and actually enter an amount so we can see that input equals get by role.
Now the Input is an Input element of type number, so obviously the ARIA role is spin button because.
we're gonna type in the Input, the for number four, and we'll run our test and we've got another snapshot.
Cool.
One snapshot, obviously.
Alright, fine.
Oh, cause I changed the name in the test.
That's all.
All right.
Oh no, that's too many things.
Let's just copy these two for our other two use cases.
It'll be quick, I promise.
So when seedlings is selected with no amount entered, instead of getting seed packets, we wanna get seedlings.
And same down here.
seed…lings all right, so now we do that.
We've got our two new snapshots written.
We've got one obsolete one because I changed the name of the test.
We can just ignore that.
Let's see.
oh, we can press 'U' and remove it.
That's what we can do.
Yep.
Okay.
So this all looks good.
no, just run, I'm sorry.
Demo Gods.
Ah, no.
This.
This, oh, is not going well.
Unable to find, oh, radio and name seedling zoo.
Oh yeah.
Because when you type U, you've gotta do it in the console.
Don't just type it randomly anywhere.
Okay.
So now we're ignoring the obsolete snapshot.
We're moving on with our life.
Everything is great.
It all worked perfectly, except we get this warning.
and this warning, if you've ever written a test for anything in React, you've probably seen this warning.
it's not a very good warning, to be honest.
It is giving you important information, but the answer to fix it is almost never actually to wrap anything in act.
So in this case, what's happening is that in our product components, when we update the, thing in the label, it goes through this whole big rigmarole to calculate the postage.
And if the, product type is seed packets, it just returns nothing cuz the postage a fixed amount.
If the count is empty or zero, it just returns zero.
Otherwise, it does this asynchronous call to find out what the postage is.
So the test starts.
This call gets made.
It's running off, doing its asynchronous thing.
The test finishes.
Then this call returns, and the state of the component updates and React says, Hey, something happened after the test finished.
That's probably not what you wanted.
And you say, what are you talking about with wrapping it in act?
But actually it is something that we want.
So what we need to do is we need to wait until that, that API call has returned before we generate our snapshot.
And we can do that by, this is a little bit hacky, but I'm sure it's fine.
we've got the text "postage" on the screen, restate, and we can await.
expect postage not to have the text.
$0.
All right.
So now when we run it, our test fails, but that's what we're expecting because the snapshot has changed, because now instead of having the $0 postage, it's waited until we've actually fetched the postage before it's written the snapshot.
So this is exactly what we expect to happen.
We can update our snapshots and everything is good.
We've finally got rid of that obsolete one.
Okay, so now we're ready to actually make a change to our code.
So we're gonna jump in here and what we wanna do is pull all of this out into its own component.
And the reason for that is that we've actually got no way to test what happens when we make the product type plant.
As long as this is all, like inside this one big component, there's just no way to, to set the product types to plant.
So we can't write the test, but if we move it all out here, actually, um, we can, and I'm just gonna do this all in line in the same file because it's easier to copy and paste.
But you might not want to.
Okay, so we've got a couple of things here.
We need to, get the product type passed in, and then we can say, so this code is the same across the two of these, except for the seed packets.
So if we pull that out into its own variable, um, and make this seed packets and then seed.
lings.
Then, instead of having to worry about all of this, we can say the label is number of, uh, what did I call that?
Names, product type.
And instead of speci, specifying the product type here, we can just pass in product type, count.
We actually need to pass in.
So we can just add that there.
And again, get rid of this and replace it with product type.
And now we can get rid of all of this and we could run the test, but we haven't actually used it anywhere.
So it's gonna pass fine.
So now we can go rid of all of this nasty, code and just pass in our label with a product type of product type.
And count is count.
And now when we run our snapshot, it's actually gonna fail.
But the reason that it's failed is just because we've changed the white space, because we've added those extra interpolations in there.
It changes how the HTML is generated, but it's actually the same thing.
So we can just update it and we're all cool.
All right, so now we're ready to make our change except for one small thing.
there's actually a dependency in here that's hidden.
So this ID on this Input needs to be the same as the HTML 'for' on this label.
So there's a couple of different ways we can make sure of that.
We could just trust people and assume it's gonna be okay.
I'm not gonna recommend that.
we could pass the ID into the label, but what I would probably do is actually just accept that these two things are closely coupled and just put them all in the component together so we can grab all of this and we can drop it in here.
I also cannot get automatic formatting to work on this laptop in VS Code, so just imagine it looks nice.
so now we also need to just pass in this, handle count change, handle count change is a bit of a weird name for a prop, so let's just call it on change.
Okay.
oh, and I wanna change this cause it's not really a label anymore, is it?
It's a number input.
So we jump up here, we can change this to number input.
Oh.
And we can get rid of these divs.
Look at this.
We can put them down in the component too.
Oh, we did already.
Yep.
I'm on top of this now.
We run this, our snapshot fails.
Why did our snapshot fail?
I wasn't expecting this.
sorry.
[muffled voice from audience] Oh, oh, yes.
You are absolutely right.
Thank you.
10 points.
So she's winning now, just so you all know.
and it's called handle count change.
And now just like I said, all along, this test is passing.
All right, so now we're ready to, now we're ready to do our change, right?
Except for one other little thing that I would do before is I would actually go and write some tests specific to this new component.
we can just use the snapshot test like the behavior is covered in those, but to me it's a little bit weird having the test for this component in this other component.
And also when we go to make our change, we're gonna wanna write tests for the change.
And it would be good to have a whole set of tests.
the good news is I'm not gonna make you watch me write all that.
I have some I prepared earlier.
So these are just testing the same, the same scenarios that we were testing before.
So seed packets with no amount, seed packets with an amount, and the same thing with seedlings.
And one additional test here to check that we called the on change handler cuz apparently past me remembered about that.
and yeah, so that they're all just the same kind of tests.
you might argue that this is a bit of overkill.
We don't really need, there's two sets of tests.
Sure.
I'm not gonna make you write them, but I did time myself when I wrote them originally and it took four minutes.
So if you don't have four minutes for this, maybe talk to your boss about your workload.
okay.
So now we're ready to make a change, but the first thing that we wanna do when we make our change, because obviously I like TDD, is to write our tests.
And because we also like copying and pasting, it's gonna be real quick.
So now when the product type is plants, we're gonna pass in plants.
we're gonna check the label and it's gonna be, $15 cuz a plant is $15.
It was in the requirements, which I'm sure you all read carefully and that's gonna say plants.
And then just the same here.
When we enter an amount, the number of plants is gonna be $15 times 12, which is obviously.
180.
Thanks.
None of you.
when we run these, obviously they fail because we haven't actually written the code yet.
But now we're gonna write the code.
So, we're gonna jump in here, and it's gonna be a little bit anti-climactic because rather than having to write a whole bunch of code, all we actually need to do at this point is add our plants to our list here.
And add our plants to our prices here.
And we run our tests and everything passes.
So we've made our change.
and that's, kind of it.
cool.
So what did we learn?
The number one thing we learned, of course, is that when we're doing refactoring, we wanna make sure that we don't change the functionality, we only wanna change the implementation, and we learned a couple of ways to make that, to, to make sure that happens.
So we can use characterization tests to find out what our current behavior is, and we can use snapshot tests to save ourselves from writing out a bunch of expectations in J S X.
Yeah, and we learned that maybe we should type more carefully.
I dunno.
if you wanna look at the slides, there are this url, there is a P there.
I don't know why this laptop hates this font, but only the letter P, but.
it just does.
so yeah, the slides are available at refactortractor.ez.codes.
The code examples are available on GitHub, along with the finished example.
you can get me on Twitter because I like watching bin fires.
and that's everything.
Thank you.
As much as we all like working on greenfields projects, most of the work we actually do is on existing codebases. And existing codebases have technical debt. Technical debt makes code hard to modify. Being hard to modify slows down to development. So, how do we deal with this? We refactor!
But, refactoring is an inherently risky process. It’s very easy to break things in any complex system, especially if the test coverage is less than ideal. Worse, it’s possible to ruin users’ experience by accidentally fixing bugs that their workflows had come to rely on. To combat this we need to ensure that our refactor doesn’t change the existing behaviour in any way, while also leaving us free to add new functionality.
We’re going to have a look at how to decide when we actually should refactor, and how we can use tests to ensure we maintain the existing behaviour. We’ll have a look at our options for testing JSX, and the pros and cons of snapshot tests. And we’ll finish up with a demo, putting it all together.