Things you can do with CSS that used to need JS
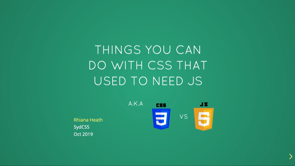
(laid-back music) - Thanks for that.
Really great to be here.
So I really like CSS, if you can't tell from my title there.
I think it's really powerful and I think more and more features are being added and more and more features are being adopted by lots of browsers, and there's a lot of cool stuff that if you haven't looked at CSS for a few years you might not know about, and even if you use it every day, you're still learning more and more things about it. I learnt a few things about it just before with Sarah's talk, so, that I'm, yeah, really excited about and I'm gonna go play with next time I can. So I guess the question is why use CSS for functionality? We've already got our HTML.
We've got our JavaScript.
I think I actually have the wrong slide deck up, so I might just quickly change that.
Sorry, I've given this talk a couple of times, so I've just gotta go pick my other one.
But why use CSS for functionality? We've already got, we've got our HTML for our markup, we've got our CSS for styling, so why would we then, and we've got our JavaScript for our nice functionality and for doing all the, for all the interactives and for controlling a lot of, like, when you click on things and things are expanding and a lot of those user interactives.
So why would we then replace that with CSS when CSS is supposed to just be for styling and for making things look a certain way? Well, this comes to this statistic.
This is something that I came across a few years ago when I was looking into accessibility.
A few years ago, a lot of screen readers really, really struggled with JavaScript, so I started looking into it, and it turns out that approximately 2% of users had JavaScript turned off.
And to me, this is a pretty big number.
At the time, I was still supporting things like IE6 when I was looking into this, and less than 2% of people were using that and we were spending hours and hours and hours and hours to accommodate IE6, which is great.
And we were just, yeah, but we were using JavaScript, as well, and so it's really important to try and include as many people as possible. This was for a variety of reasons that people were disabling JavaScript.
One is speed and bandwidth.
A lot of JavaScript-heavy applications, they can take a while to download if you're, especially if you're adding lots of packages and dealing with lots of time zones and things. Maybe you've got a bit more downloading there than you should.
Accessibility, as I mentioned.
If your screen reader's really struggling with JavaScript, you might just turn it off.
Security, in places where security is a big concern, there was a bit of a scare with evil JavaScript injecting into your browser and doing lots of things. And so in America and in particular in Germany, Germany at the moment is very, very high with no JS. In one study I saw, it was up to about 40% of people disabling JavaScript for security reasons.
And then my favourite reason was by accident. There was one study in the US where 2% of people were disabling JavaScript. Half of those were for security and the other half was they didn't know what JavaScript was, they didn't know it was disabled, and they, and, yeah, they just didn't know, and they didn't know that it could be better, so. And then there's, this is a very important stat to me, as well, that while your website is downloading, all of your users are non-JS users.
So you've probably seen this when you're out in the middle of nowhere and your phone's down to 3G and you're trying to access your website and you're trying to click on things and your content's moving up and down and the search isn't working yet and nothing's opening and closing and working as it should.
You're effectively being a no JS user at that point, and this is what your user experience is for some people who do choose to have JavaScript turned off. So what can we do for these people? What can we do to give them a nice fallback, to give them a nice user experience? I'm not suggesting you go and throw out JavaScript and throw out React and go back to just basic HTML and CSS. What we can do is we can do some progressive enhancement. We can put some fallbacks in there and a few other bits and pieces.
So this is an oldie but still a classic.
I still use this one.
This is the noscript tag in HTML.
You just put it in your HTML, you style it up like an alert, just like your normal alerts, and it just lets the user know, hey, you've got JavaScript turned off, so some of the functionality might be a bit broken. So that just lets the person know that, okay, maybe for this website, I'll turn it back on. This is really, really simple to test.
There are lots of add-ons for different browsers. These are just a few that I found.
I use the Chrome quick JS switcher all the time to test my no JavaScript experience.
It's just a little button.
It lives at the top of your browser.
You turn it on and off.
Remember to turn it on before you go to any other website that you're testing, 'cause yeah, I've been caught out a few times, like, why isn't this working? Oh, yeah, gotta turn it back on.
But yeah, just really super easy to check.
Really recommended that you go home and you do this for any website that you're building. Just turn off the JavaScript and have a look and see what the user experience is like.
So there's a few things you can do.
One thing, I use JavaScript a lot in front end and for user interfaces, so I use it to hide things and show things. That's mostly what I use JavaScript for.
So you might have an accordion or a carousel where you've got lots of things hidden and you're kind of showing them as the user interacts with things.
So what I, one of the things that I do with, if I'm using JavaScript for this is I have everything shown by default.
That way if somebody has JavaScript turned on, off, they'll still see everything.
It'll look pretty silly, but they'll at least still see all your content that's there.
And then I use JavaScript to hide it again and to manage the toggle functionality there. That way you've still got content there.
You're not hiding anything from your no JS users. The other thing to do is to increase your JavaScript performance. If somebody's turning your JavaScript off because your site is really slow to load, then by really streamlining your JavaScript and getting tools and bits and pieces and really looking at how much JavaScript is being downloaded, then you can really, you can cull some libraries. If you've got a library that's there not doing anything and it's taking a lot to download, you can cull these out and make it run faster, and that will, it'll increase the usability for everybody. So the next part that I'm gonna talk about is progressive enhancement.
So this is seeing how much of the functionality that you can replace JavaScript with CSS.
CSS is a lot faster to use.
People can't turn it off, which is really good. It's really obvious when the CSS doesn't load and people will definitely refresh it before they try and do something else, where with JavaScript, it's kind of a bit less obvious.
And it will also mean that you need less JavaScript on your site, which will increase the performance, as well. So I'm gonna talk about some of my favourite CSS hacks for progressive enhancement.
So one is the pseudo-selector focus.
There's a new one, focus-within, that I'll touch on, as well.
So focus is keyboard focus.
As we're talking about before, keyboard accessibility is the focus one.
So this is when you're tabbing around your site, what happens when you tab to things? How does it look different? How does it interact? One of the main things I do this with is with drop-down navigation.
So when you're, there are so many websites I go to where they've done it really well for hover and for mouseover and everything and for clicks and jQuery and all those sorts of things, but then they've forgotten about the keyboard accessibility and the focus and tabbing to it, as well.
So you can do whole drop-down navigations even with nested ones and things poking out the corners and every other cool things with hovers, with focus, and with focus-within.
Focus-within is a really cool one.
It lets you to tab across and then down into your navigation, as well, so it increases your keyboard accessibility there. And these are, well, focus and hover have been around for a while. Focus-within is pretty new, so I just wanted to point that one out, 'cause I find it quite cool.
And this is my, if I can find my cursor.
So this is my CSS-only drop-down navigation. So I've got my, so I'll show you a bit of the code, but I've got some hovers, I've got some focus, I've got some focus-within then.
I do have a tiny bit of JavaScript for accessibility. I know, I'll get into the accessibility stuff a bit later. But the primary function of this is just CSS. So the pros is that this is then, if you're using the combination of hover and focus, it's accessible by keyboard and mouse users, which is really cool.
And then as you're hovering over things and focusing on things, you can add some cool transitions and some animations and stuff there, which is really cool.
The con is that this is one of the hardest ones that I have here.
I always have to have it written down and come back to it and copy and paste it from everywhere.
It's quite fiddly.
You kinda have to have a wrapper div for the hover and then you've got your button on the inside where you do focus and focus-within, and then you've got a couple of different child selectors. So this is probably the most challenging one that I get to work, but I think it is still quite good and I think it's worth a go.
Okay, on to target.
This one's a little bit easier and I absolutely love this one.
This is probably my favourite one.
I discovered this one when I was trying to do a website where it was really hard to add in any JavaScript. It was just pure HTML and raw CSS and it was, yeah, it was an interesting challenge.
And target can be used for CSS-only modals, which I think are absolutely fantastic, 'cause modals are really, really hard, and a lot of the times you have to download a whole library like jQuery UI or Bootstrap just for modals. So I really, really like that this target CSS selector is now official part of the spec.
2018 is when it became an official part of the spec. It's been around a bit longer bit things take a little while before they're unofficially accepted in.
So this is my CSS-only modal.
So this one actually only has CSS, so it's... And you just click the button and up comes the modal. This one also doesn't have any extra divs.
It doesn't have a backdrop div or anything. It's just using the target selector, as I'll show you.
So it just has the modal class around it, so that's got the backdrop of it.
It's got the opacity zero so you can't see it, z-index negative one so you can't get to it, and then when it has the target activated on it, it's then shown and it comes up.
So all the HTML is is it's an a with the href of the ID, and then the ID is on that modal, and that's how it all links up, which is really cool. I didn't, I've got it in my example, but I didn't put it here.
For accessibility, there is actually a new aria-modal tag which is really, really cool because it used to be really, really hard to put accessibility onto modals.
If you've seen my last talk at Web Directions, I talk about this quite a bit.
So it is starting to get a bit easier, which is good. So yeah, aria-modal equals true, fantastic. We can add this to modals now.
It doesn't work in all screen readers yet, but yeah, definitely going in the right direction, which is cool.
So the pros to this one.
It's supported in all browsers.
This one goes all the way back to IE9, which I think is really, really cool.
You don't need a whole JS library just for the one component.
You're just putting in a little bit of CSS. Not as much support in mobile browsers, and the main con I find here is that because you're working with hrefs and links, it does modify your browser history.
So if you look up in your URL, it's putting it there, and if you're like me and you're pressing back and forward a lot 'cause you're testing and you're looking around, you have your modal kind of pop up and down. If you want, though, you can add in a little bit of JavaScript to get rid of that.
People probably aren't doing that as much as I do that, though.
The future.
I'm not 100% sure if this is ever gonna become a thing, but there is actually a HTML dialogue element for modals. It doesn't really work all that well.
It's not really well-supported.
You still do need a bit of JavaScript for this one. But theoretically, if it does work and it does become mainstream, all we have to worry about is this one element, this one open element, and definitely in terms of accessibility and everything, if you can do it with base HTML attributes, do it with HTML attributes rather than using all these hacks.
So hopefully this becomes a thing one day and there's more support and we, yeah, don't have to worry about all this anymore. Checked.
These are probably the most popular ones are the checked hacks.
So these are the hacks where you use a radio button, a hidden radio button or a hidden checkbox to do really cool things.
If you were here for Sarah's talk, she was doing a very, basically the same hack, but she was doing it to hide the normal checkbox and put a pretty one there instead, which a lot of websites do, which is really great.
These, but you can also get them to do really, really cool other things instead.
So I use them a lot for accordion menus.
So if you've seen a menu like this where things are expanding and contracting. I've also used them for mobile navigation menus coming out. Anything that kinda opens and closed, you can use a checkbox hack.
So instead of using jQuery UI or Bootstrap, things like that again, you can now use the checked selector, which is recently, yeah, it's recently got, yeah, really good browser support. It's been officially added in.
And you can use it here, again, this is my CSS-only checkbox hack.
And you can also use this one if you like to put in a bit more animation and stuff, as well. I've got the JavaScript there again just for accessibility, and I'll get into that a bit later.
But this one just uses, yeah, inputs and labels and checkbox things to open and close divs, which is pretty cool.
So again, this has really good browser support. That one had a checkbox so you can open and close as many as you like. You can also use radio buttons if you have a scenario where you just want one open at a time.
It doesn't really work as well for nested inputs. So if you've got an input inside a label, it doesn't, it's really hard to get that one working, so that's why I've got the inputs next to the labels for that one.
So here I've got, yeah, the input next to the labels, and then you've just gotta make sure your ID matches up with your for attribute and you're, yeah, and you're good to go.
This input, I've got it in there.
So this is the CSS.
So this include input, this is just a mix in. You can check out my code pan, and this is just the way to hide the input so that screen readers still read it and read it out and you can put some extra aria attributes on there to let them know, hey, this isn't a real checkbox. This is a checkbox hack.
And then you use a checked attribute and just, yeah, open display block, open, close.
I've just got display none, display block.
You can do all sorts of cool things with heights and then you can use transitions and other bits and pieces. This is just a very basic example.
Future.
In the future, we might be using this one.
I'm not sure.
Nobody really uses this element, either.
It doesn't have much support.
But this is the details summary element.
So this essentially would do the same thing as I just showed you.
It's not really well-supported.
Haven't managed to successfully style it.
But it is a cool native HTML element that you can click on it and it does open and show, which is really cool. So hopefully it gets better in the future and we can start using this one a bit more. This is a bit of a bonus round.
This is one that I didn't make.
This was made a while ago.
An this is checkbox tic-tac-toe.
So you can play tic-tac-toe using only checkbox hacks, which I find pretty cool.
So I suggest checking it out.
That one's been around for a while.
I'm pretty sure it only works in Firefox, so I've had to have Firefox opened on this one, which I don't normally use, and I'm just hoping the rest of my demos will work, too. We'll see how we go.
(sighs) Columns. Okay, so recently, there's been a lot of talk about CSS grid.
Love CSS grid.
CSS grid is great.
Flexbox, also really great.
These are really great tools and really great CSS properties for laying out your page.
You know, get rid of all those floats and everything, which is really great.
There's one, though, that kinda goes under the radar. It doesn't have as many use cases as the other ones, but I still kind of like it and, you know, I kinda have a soft spot for it.
This is CSS columns.
What it does really well is it does masonary layout really well.
So masonary layout is like Pinterest where you have things and you have them in different height and you have these really nice white space rivers running through them.
If you try and do a masonary layout in something like Flexbox or grid, it tries to make everything the same height in the row or it makes it the native height and then you got really inconsistent rivers running through it.
I haven't managed to successfully do anything in the masonary layout in those ones, but then I found columns and I thought that was a really good way to do it as opposed to downloading a big masonary library. Masonary libraries are quite cool.
They do a bit more than what I'm gonna show you. But if you just want something, a bit more of a basic layout, I really suggest give columns a look 'cause it's super easy and super quick to set up.
So I've used this in real life.
I've used this, yeah, this one is broken on Firefox.
There we go.
I've used this one for things like testimonials. I've used this one for things like images.
If you just kinda wanna show something where the order doesn't really matter 'cause it doesn't really go through a normal order that we do normally where we're doing rows and we've got a top row and we've got a main content and our sidebars and things that are most important at the bottom and then least important, most important at the top and stuff.
This one goes one, and then up to the next one, two to three, four to five to six, kind of puts them around randomly.
But if you're just doing it for presentation and the order doesn't matter, I think this is quite a nice way to lay things out. As you can see, the code is super simple.
You just put column count and how many columns you want. You put what sorta gap you want.
You can specify the widths of the columns.
This one just did it three of equal width, but you can specify that.
You have to put a lotta prefixes in this and make sure your order prefix are set up. Mine isn't, so what its done is it hasn't broken inside and it's wrapped onto the next div.
But if the page break avoid was working, that would just be on this one and it would be kind of a complete div.
So it depends on your use case.
If you've got text, you might want it to wrap over to the next one. If you've got something like images, you probably want it to be separate and you'll just make sure that break-inside avoid has all the right prefixes for all the browsers so you don't get random things happening with your images. So, yeah, this is supported in all browsers, as well, as long as you put all your prefixes in there. I really like how easy this one is to make responsive because you just change how many columns it is per your breakpoints, so that's super simple.
As I said, though, the main drawback here is that there's no real flexibility. You can't go, "I want this element there and I want that element there "and I want that element there." You kinda gotta rearrange your DOM and it's a bit of trial and error to get it to look exactly how you want.
But I do recommend giving it a go if you've got a scenario like that.
All right, so the last one I wanna talk about is CSS transitions.
So these are CSS animations that you can do. So previously, there are a lotta JavaScript ones for this, like you've got your fadeins, your fadeouts. There are lots of animation libraries out there. But as of pretty recently, there's a lot, there's been a lot more in terms of animation options for CSS.
So lots of transitions, lots of keyframes, yeah, lots of different options for getting things to animate as you interact with them.
So this is probably the most basic example, but it's an example I use all the time and it's an example I see all the time, so I thought I'd put it up here.
So this is just as you hover over an element, it changes colour, and it changes colour with just, I've just put a transition there of .3 seconds. So it doesn't change transition too harshly. It's got a little bit of a buffer there.
And that's kind of what you want on elements that are doing things like changing colour or are things that are moving.
You don't want them to move too fast.
You don't want them to change too fast.
Otherwise your users are gonna be in a bit of shock. Another one I really like with buttons is I use it on active.
I do a transform of negative one pixels on the y-axis and then it kinda looks like you're actually pushing a button, and you can put a bit of transition on that, too, which is quite fun.
So yeah, very, very simple code here.
You put your transition.
You put your what thing you wanna transition there. In this case, background colour.
You put how long it's gonna last.
There are lots and lots of other options here. I won't go into them, basically because I don't know all of them. It can get quite complicated with kind of the graphs and how you transition things, but I find the defaults are pretty good.
I would avoid using transition-all.
You can get some really weird stuff happening if you use transition-all on a complicated element. They kinda move all over the place and things jump around and it's not good.
It's also not good for your performance in terms of CSS because it has to work out how to transition all the things. So it is supported in all browsers.
I will put a note here that if you have a background image and you're changing the background image using CSS animations, there is a bug in Safari.
Safari does not handle this at all.
Ugh. (laughs)
I've spend, yeah, many, many headaches trying to get these things working for Safari until I just give up and just turn off animations in Safari.
You just don't get nice things anymore with, you know. You can kinda get around this if you wanna transition an image and have it as an SVG, you can do an inline SVG and then animate that, and that's okay.
But if you're trying to swap out two different background images in Safari, it doesn't handle it.
I also quite like this one because it's in the same place as the styles. You have the styles there and you can kinda see where it's all happening as opposed to having some styles here and having the JavaScript somewhere else and you can't, and it's a bit harder to connect it.
The only con here is that it doesn't work on everything, and it definitely doesn't work on auto heights and auto widths.
So I always have a bit of a pain here when I'd really like a nice height transition, but it doesn't handle it if it doesn't know exactly what height you gotta give it. So you've kinda gotta start giving it fixed heights and fixed widths and transition nodes, and that does get a little bit fiddly.
That's where JavaScript has the advantage there because it can calculate exactly how tall an element is and then transition it accordingly.
But there's still a lot of other cool things you can transition.
Another bonus round.
This one isn't mine, but this is a...
This is another one of my favourite CSS hacks. So this is a CSS-only carousel.
So this uses nice transitions, as you can see. Oh, a bit janky there.
(laughs) To go between one to other.
This one uses some keyframes.
It uses some transforms.
It kinda hides things to the side and it brings it in. And then these little buttons here are just links. They're just a tags with little Unicode dots in them. So yeah, instead of a carousel library, really recommend Googling CSS-only carousels. There's a lot out there.
One favourite of mine uses radio buttons, and I really love those ones.
All right, so CSS can do all these great things, as we can see.
What can't it do? Well, CSS, like Batman, has no parents.
There is no parent element in CSS.
It's really, really sad.
So what that means is with CSS, you can look down. So if you've got a p inside a div, you can go div, look for the next p element and do something with it, but you can't go p element, look up and find a div element and do something with it. It's got no way to look up for parents, unlike JavaScript. So if you're doing a radio button hack or a CSS hack and you have your input inside your label, these ones, they just, yeah, they don't work. They're really, really hard to do, unless you're doing something that Sarah was doing, which I'm also gonna go try out, is if you have something else inside your label that you can then, yeah, do stuff with.
But yeah, in general, they don't work because you can't go up a level. The other point here is accessibility.
Because we're using HTML elements in a way that is not a native way that, you know, radio buttons aren't supposed to do carousels. That's not what they're supposed to do.
They're supposed to, you know, you're supposed to just use them to input data. It can make a screen reader get quite confused. It's like, what is this element? If you've hidden the element the wrong way using display none or visibility none, it has no idea what's going on.
And so this is where you do need to make sure that you have the right aria attributes in there, and if there's anything that is dynamically changing, so if something's opening and closing, then we've also gotta give that information to the screen reader, as well.
So aria-expanded's a good example of that.
So these are things like your accordion that's opening and closed.
You want it to be false when it's closed and true when it's open.
So in that case, you do need to put a little bit of JavaScript in there to just go, "Hey, the checkbox is checked.
"This is open.
"You can see it now." So just change it from false to true to false to true. So that was the JavaScript that was in those demos before. It was just updating these dynamic aria attributes to make it a bit more accessible.
So I hope that has given you some inspiration and some ideas to go off and try for yourself. It's all too easy to just go, "Okay, I've already got JavaScript enabled. "I may as well just make this JavaScript, too." Which is just a slippery slope.
The next thing you know you're an Imba developer or you're a React developer.
(laughs) Not that there's anything wrong with that.
But sometimes it is good to take a step back and go, do we actually need this whole library? Could we make this a bit nicer? Could we make it a bit easier? What does our non-JavaScript scenario look like? Can people still get a basic level of information from it and what can we do to improve it? All right, thank you.
(audience claps) (laid-back music)
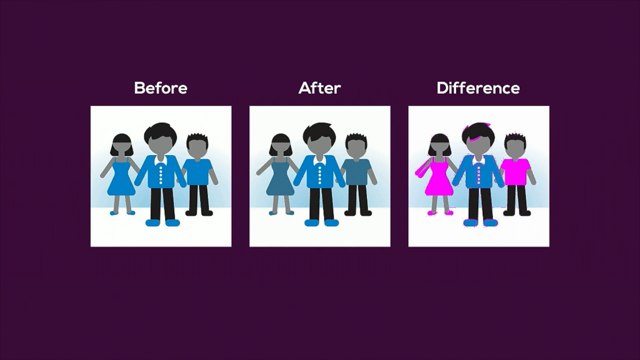
CSS has come a long way in recent years, bringing style and interaction to the web. For example just look at all the cool things you can do now with CSS animations!
However there are some common components that people are still reaching to JS to solve when they can achieve the same thing with CSS. Things like: Modals, tooltips, mobile menus, accordions and carousels.
What if I told you that each of these can now be done with CSS alone? That way the functionality renders at the same time as the design and makes it usable by more people.
Rhiana Heath – Things you can do with CSS that used to need JS
Getting a lesson in replacing JS with CSS from @RhianaHeath#wds19 pic.twitter.com/g0aFSUeqzL
— Simeon Johnson (@lostumbrellas) October 31, 2019
Why use CSS for functionality? We’ve already got HTML and JavaScript… why would we replace that with CSS when it’s just meant to be for styling?
One big reason is 2% of people have JavaScript disabled. That’s a big number across the web. They do this due to speed and bandwidth; usability and a11y; security; or simply by accident.
All of your users are non-JS users while they’re downloading your JS. – Jake Archibald
CSS makes great no-JS fallbacks… don’t forget the humble NOSCRIPT element. Disabling JS is very easy, there are extensions for most browsers to make it very easy to test. Just remember when you’ve turned them on, or you can get a bit of a surprise when you go and open the next website!
Some tips:
- Have everything show by default, then hide/toggle with JS not CSS.
- Increase JS performance by removing JS you don’t need.
- Progressive enhancement – use CSS for as much functionality as possible. If CSS doesn’t load people usually refresh to get it working.
Specific techniques
:focus-within is great for things like dropdown navigation. Focus within tracks keyboard focus, so you can do dropdown navigation with little or no JS (the JS is required for accessibility, to reveal the state of your dropdown using ARIA). The selector scheme can be a little complex so you’ll probably copy and paste this one.
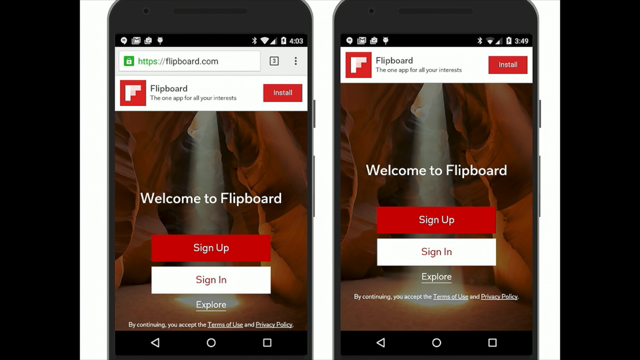
:target can create CSS-only modals, noting you will need to include aria-modal="true" for a11y. Pros are huge desktop support and no JS; main cons are that it modifies browser URL history, and isn’t supported so well on mobiles. Future – somewhere in the future this may be replaced by the DIALOG element, although that doesn’t seem to be gaining a lot of traction.
:checked has a lot of popular hacks associated with it, using the checked state of checkboxes to show and hide other content. You can build up things like expanders and accordions. Pros are wide browser support; cons are that it doesn’t support nested inputs, and mobile support. Future – DETAILS/SUMMARY. Currently support isn’t complete and it’s hard to style.
column-count and column-gap are great for masonry layout, where the order of content doesn’t really matter. Supported in all major browsers so long as you have all your prefixes in order; main con is the lack of control over content placement.
transition can replace a lot of expensive JS libraries used for animations. CSS is great for subtle UI animation. Avoid using transition on all as it tends to create really weird effects and performance problems. Browser support is generally great apart from background images in Safari which just don’t work. Cons are the possible performance issues and it only supports specific properties.
"CSS, like Batman, has no parents" – @RhianaHeath getting dark (knight).#wds19 pic.twitter.com/9IcmER7G6c
— Simeon Johnson (@lostumbrellas) October 31, 2019
So what can’t CSS do?
- Just like Batman, it has no parents. There is no :parent selector. This makes us all sad.
- Radio button hacks don’t work if you wrap the label around them.
- Accessibility can be impacted, eg. radio buttons aren’t meant to be used for carousels.
- Accessibility can also be an issue because CSS can’t transition dynamic properties like aria-hidden, be careful what you do and test in assistive tech
It’s good to take a step back and ask whether you really need a whole library, and look at what CSS can do.