Strike a pose – Gesture recognition in JavaScript with Machine Learning & Arduino
(energetic music) - Thank you.
Thanks so much for that.
And thanks, everybody for being here with me this afternoon. So I spoke at Web Directions last year as well, and it was also about machine learning.
But last year, what I focused on was machine learning in the browser.
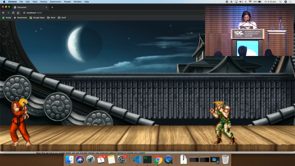
So building web experiments with TensorFlow JS, and this year, it's also gonna be with machine learning. But this time, the data we're gonna use is from hardware. So the goal of this presentation is to build a gesture recognition system with machine learning Arduino and JavaScript. So I'm gonna talk to you about one project that I built, where the goal of this is to build a Street Fighter game that you play with your body movements.
So you don't use your keyboard at all.
We're gonna use a piece of hardware that is gonna look at our live you know, motion that is gonna then be able to play a game of Street Fighter.
And this whole presentation is not gonna be about why? Why is not the real question.
The real question is how? So how are we actually gonna do this? So the material that we're gonna need is, as I mentioned a bit of hardware, because we're not using camera data from the webcam. We're actually, we should be able to be anywhere in this space and play the game.
So we're gonna have to be holding a piece of hardware. We're gonna use TensorFlow to interpret the data and find patterns in live data of our movements. And all of this absolutely all of it in JavaScript. So for the hardware side, the Arduino side, we're gonna use 25, which is a JavaScript framework for hardware for Arduino, and you know all the boards, but it's gonna be Arduino for this one.
And for TensorFlow, we're gonna use TensorFlow JS. So let's go step by step.
Step one is gathering the data.
So at the moment, the only thing that we have is an idea. We want to be able to play Street Fighter with our body movements.
But we got nothing else.
So we got to gather the data.
And for this, as I mentioned, we're gonna use an Arduino. You could use something else.
But for this particular project, I used an Arduino. And this model is an Arduino Maker 1000.
And the reason why I use that one is because it has built in WiFi.
So you could use an Arduino Uno as well, but you will have to be tethered to a computer. And to be able to play a game where you have to punch, it's not really great to be tethered to a computer. So you want to be anywhere in space.
So I use that one.
But the Arduino itself doesn't actually have any sensors in it.
So what I added to that is an MPU6050 which is... It's a module that has accelerometer and gyroscope in it. So it allows you to have six points of data because you get the XYZ data of the Accelerometer so how much or how fast you're moving in space, and then also the XYZ of the gyroscope, so orientation data as well.
So using all of this data, you can actually if you think about how you're punching, you are going forward in space and you're also rotating. So having a module that allows you to have both senses in one is actually kind of exactly what we need. But there is a third component that I did to this system. It's a button.
And the reason why I did that is because when I do a punch, I want to be able to press a button, do the punch, and then release it and only record and save the data when I'm doing the gesture.
If I'm just chilling and just moving my head around, and my hands around, I'm actually performing the gestures that I want to apply to the game.
So I don't want to record this data.
You don't have to use a button.
You can use algorithms later on that allow you to record it all the time.
But for this particular project, I only want it to record when I'm doing the gestures.
So when you put all these hardware together, let's look quickly about the code.
So as I said, it's gonna be all in JavaScript. So in the Node JS part in the server, you we require the modules that we're gonna need and what we're gonna need here is to instantiate a board. And then so this is using Johnny-Five Framework. We're using the Etherport-client module to be able to establish the connection with the host and the port to connect to the Arduino.
The IP, you can change that in the Arduino code itself. But you know, we don't care about that right now. And the third module that we require is a file system one because we we're gonna want to record data and write it to files.
So once our board is instantiated, when it's ready, so when you're actually connected, and you can communicate to your laptop, we also have a button that is connected to an analogue pin A0 but it could be really any pin.
And then we create a stream and we pass it, the path to the file where we want to save our gesture data.
We instantiate an IMU sensor, which is our accelerometer and gyroscope.
And when the data changes, so as soon as you're actually moving a little bit, we actually get all these Accelerometer XYZ and Gyroscope XYZ inside a variable and only when we hold the button, we're writing to that stream.
And as soon as we release the button, we're stopping writing to that stream.
So we only save the data that is related to a gesture. So in the end, you would expect files of data that look like this.
If you look at each line, it has six points of data for our XYZ of both accelerometer and gyroscope. And the number of lines depends on how long you're doing the gesture for. So this is for step one, where we just recording our data. But like at the moment, it doesn't do anything. So step two, is data our processing.
And what this means is that at the moment, we just have files in our folder, but we don't have any machine learning or anything. But before being able to feed that to TensorFlow to make predictions, we have to transform that data into a way that a TensorFlow is gonna be able to use. So as I said, the first thing that we have is a file. So we're gonna have to start by reading the data from a file, but we have to transform it into different forms.
And the first step to do that is we're gonna transform it into an object of features and label.
So this is terms that we have in machine learning where features is gonna be the characteristics of a gesture in our case.
So all the data that we have for one punch is gonna be in an array of features.
And the label is gonna be a number because TensorFlow doesn't really work with strings. So if you have three gestures, punch, uppercut, and hadouken, index one would be the uppercut, so you give that as label.
So this is cool, but this is for one sample for one gesture. So with machine learning, you have to record data quite a lot of times, so I can't just do one punch, and then hope that it will just understand what it is. So you have to do it quite a lot of times.
So this is for one particular sample for a gesture. But in the end, what you're gonna end up with, with all of your data is this massive array of a lot of objects that represent your gestures with a label and features, or the characteristics. So now we've transformed the data that we have into our files in objects.
But it's still not ready for TensorFlow to use because TensorFlow doesn't work with objects, it works more with something that looks like arrays of arrays, so we need to transform it again. And there at this step, we're gonna split the labels and the features into their own multi dimensional arrays. And I'm just gonna go in steps indeed because I can understand that it can be confusing if you haven't worked on this before.
But as I said, zero, one and two is the index of our gestures.
So zero can be a punch, one an uppercut two a hadouken. And the first layer of our labels array is gonna be all of our punches.
And is gonna be mapped to the first layer of our features array.
But then if we go a bit deeper, the first punch that are recorded is gonna be mapped to all of the features.
So the first array in the first layer of our features multi dimensional array.
(laughing) So every time is that if I'm losing people here, don't worry, it's more about understanding the steps and how you need to transform the data.
Don't think about how you will transform it, you can, you know, do that later.
It's not even TensorFlow specific code at the moment, it's just probably loops of reading files and transforming into different data structures. But then if you look at your second punch that you recorded, it is gonna be mapped to the second array of features in the first layer.
And then again, if all of a sudden we move on to the uppercuts it is gonna be also mapped to the features in the first layer.
So if you look at the multi dimensional arrays, we're just going in the same order.
So they mapped to each other.
So again, you know if the first uppercut it's gonna be the first uppercut of the second layer. So now we started to get into a format that looks a little bit more like something that TensorFlow can use except that again, TensorFlow works with its own data structures, that's called tensors.
So to be able to transform that into tensors, you have to start with your raw files and transform it into multi dimensional arrays. And now we're gonna move on to actual TensorFlow code. In might be a bit too small for people at the back but again, it's not really about how to write the code because this is just a sample.
Everything is on GitHub if you want to look later. It's more about the steps to go through it. The first step is we're gonna have to shuffle our data. If you look at the data, or the structure that I showed you before, we had all of the punches at the same layer, all of the uppercuts at the same layer.
And if you give your data that way to an algorithm it's gonna be too used to the way you give it the data. If you give it a fifth sample it's gonna be like, well, if the four first ones were punches, I'm just gonna think it's a punch.
And you don't want that.
You want the algorithm to actually, you want to force it to find patterns in data.
So you're gonna shuffle the way you give it to it. You store that into your variables.
And then we actually have our tensor 2D functions. So we actually use properly the TensorFlow JS framework. For the features, we use a tensor 2D because it's a two-dimensional piece of data. We have our six points of data for accelerometer and gyroscope, but then we also have a number of lines depending on how long you've recorded the data for. So it's two dimensional.
For labels, it's one dimensional, because the only thing you can be is either a punch, an uppercut or a hadouken, there's no dimension. It's only one thing.
One gesture is just one thing.
The next step is gonna be to split our data between a training set and a test set.
And so you just calculate, usually it's like 80%. So you just calculate what 80% of your data set is. And the reason why we do that is because at the moment, all of the data that we have is already labelled. We did it all manually.
We knew exactly what our gestures are.
And you're gonna use 80% of your data to give it to your algorithm to create a model. And you're gonna keep the rest of the 20% to test it against that prediction.
Because you already know that the 20% is already labelled you did it yourself.
So you're gonna see if it matches the prediction that we do later on with the model.
And the only thing that you have to do is to slice your tenses between 80 and 20%. Alright, so now we actually we've prepared our data, but we still don't have the model.
So the step three is to create the actual model. This is the step where it becomes a bit more of an art than science, you kind of use what works for you. So in this one, I use the sequential model, I don't think I've ever used any other at that point. All of these are just experiments.
And it's worked well for me.
But there are different types of models that you can create. I did two layers, but again, you can have four, six, 10. The more you add, the longer your training process is gonna take. But what matters is if at the end, you get a prediction that is pretty good, then you don't have to modify that much.
But there's a lot of parameters that actually even couldn't really explain.
There's an activation function, I don't know the difference between Sigmoid and Softmax but it works for me, so I don't change it.
And to me, at that point, it's fine, because the purpose of my experiments is more to understand frameworks and if I was not building anything at all, I wouldn't understand anything at all.
So I understand purpose of adding more layers, you can have more precisions if you add more layers, but if two layers gives you an accuracy that is fine for you, you don't have to add more.
But once you kind of added layers to your model, you use all of the training features and training labels that you created, and you fit it to the model.
So this step is actually gonna give all of your data that you formatted to the model.
And in the end, it's gonna save it in a file. So it's gonna find patterns in the data you gave it, it's gonna save a file in your file system. And then it's gonna get to the more exciting step where you're gonna do the predictions.
That's what you want, right? You don't want to go through all of these steps and then just oh, I have a file in my folder. Like that's it, just that's not really fun. What you want is to give it new data and see if it actually works.
So in this step, we require TensorFlow again. And then we do have our gesture array where we have a hadouken, punch and uppercut as the strings this time because we want that as our output. The first step is we have to load our model in our file to be able to use it.
And then we have the same code as before, when we were recording pieces of data, this time we actually want it to be live.
So again, we're waiting for data to come from our sensor. And when we hold a bit and we do a new gesture, we take all that data as well put it in a variable. Don't worry about the live data length, I can explain that later.
But it's just it has to be in a certain shape. And when we release the button, we can call our predict function with the model that we loaded and our live data it's never seen before.
And before being able to run the predictions, we again, quickly have to transform it into a tensor 2D, because when we're doing the prediction live, again, it's just a number.
It's just a lot of numbers that you store into a variable, but it's not a format that TensorFlow understands. So you quickly have to transform it into a tensor 2D, run the predict method with that input data, and then it's gonna give you back an index because just as a reminder, the labels that we gave it were a number zero, one or two depending on the number of classes that you have.
So it's gonna give you back a number that you're gonna check into your gesture array. And it's gonna give you back a string, either punch, hadouken or uppercut.
So in terms of steps, these are all the steps. Of course, the code was not all of it, but you can have a look later.
It's more understanding how you have to transform the data to create the model to then do the predictions. So, of course well, of course I have to show you that hopefully it works. So before I go on and show you what it actually does, this was the hardware that I put together, so just a little sketch of the Arduino, the button and the accelerometer and gyroscope. But for these particular like to do it live, I've had to change my sensor, because the accuracy with that particular sensor wasn't really good.
So I switched to a daydream controller that I have here. So that little controller is something that you usually get when you buy a Google Daydream VR headset.
It comes with a controller.
Usually you can, you know you have a daydream app on the Google Pixel. It's probably on more phones now.
But at the time, it was only on the Pixel where it's like a controller that has the same kind of hardware that I was playing with, with the Arduino.
So I picked that one because it also has a gyroscope and accelerometer. So it can, it gets the same data in terms of movement. And it has a button as well.
So I can record only when I'm doing a gesture. The only difference is that it connects via Bluetooth and not via WiFi.
So the code that I showed you, it would be pretty much the same except that instead of using 25, I would use a node framework that gets data from the Daydream.
So the end goal is supposed to be something like this. Well, it's a bit dark, but hopefully I'll just show you live.
So I'm supposed to be able to do a punch, a hadouken, an uppercut and hadouken, and it should happen. So I've tried it live before where I've had a few issues because depending on how many people in the room connected to WiFi, it interferes with Bluetooth. So yeah, there's a lot of times where it didn't work. But I tried at the back of the room, and it did work. So if it worked at the back and it doesn't work here is the proof that the demo gods are real.
So it should be fine.
It should be fine.
I'm just telling myself that it should be fine, should be fine.
Alright, so I have to do this.
And I'm gonna do that.
That there's errors.
That's totally fine, I knew it.
Okay, did it, it didn't crash yet.
That's good.
Am I listening to.
Okay, the only thing I'm looking for is I'm not sure it's listening to.
It is listening.
Oh, it crashed.
I haven't even done anything yet.
Okay, so if I go away, and I do a little.
Oh, no I fucking knew it! All right, so it is on.
Maybe I need to refresh.
It is on, it's on, it's on, it's on! Quick, quick, quick.
But I don't have the sound! (audience clapping) Okay, I was supposed to have the sound.
Maybe I can do this on myself, but, okay.
So it is yeah, it is crushing because Bluetooth is just weird.
If I do the uppercut No (grunts) Okay, it worked once.
I will not give up.
Hello, okay, I should be listening.
Okay, it's on, it's on, it's on it's on! Okay, I'll just do a hadouken maybe.
- Hadouken! - Yes! (laughing) (audience clapping) I'm gonna stop here because it's not gonna work many times.
So I'm gonna stop here.
This was proof that it worked.
So of course I didn't implement, you know, the other player. But you could imagine that you could have another friend in the rest of the room and you would be actually playing. But yes, and the thing is now, so there was I don't know if I'm gonna show that one because if the first one failed, then this one is gonna fail too.
But the thing is as you are recording gestures, you can apply it to a lot of different things. And in Harry Potter, sometimes the way you do certain spells you can use trigger some stuff.
I'm not gonna take any luck with this.
I'm just not gonna show it.
But, aah fuck it, I am gonna show it.
So, yeah well, okay.
So I have my prediction, yes, and I am just gonna boop boop boop boo, okay. It needs to load maybe that would be.
Okay, so at least, this is so weird.
Because oh, might be crushed, so that's not weird. Okay, I'm gonna start, I don't think that matters. Yeah okay, and it's listening.
And I think if I have like an experience or something. Nope, I got nothing.
(laughing) What! Okay, I'll try one more and then I go because it's always very embarrassing.
That was a prototype, you can see my design skills. Okay, I think I have an expelliarmus.
No, I do not.
So you just have to believe me.
And but yeah, so it works.
But if you really want to try it, it's on GitHub. But I'm not gonna try it's too many times.
But the concept is the same.
So the code, the only difference here is that you will change the labels of what you're recording. Instead of recording a punch, uppercut and hadouken, you will just change the name and do the gestures, and the code will stay the exact same.
So it's pretty cool.
But then what else? So what I really liked usually, with my experiments is to try and find a way to make complicated things easy for other people to try.
So with the Arduino and with the Daydream controller, the thing that they had in common is that they had an accelerometer and gyroscope. And you know what else has an accelerometer and a gyroscope, your phone! So if you watched Mandy's talk, he talked about the device orientation and the way that you can have access to accelerometer and JavaScript data is also with a generic sensor API. So you can play, you can build the exact same type of experiments with something that you probably have in your pocket.
And the code that you would use for this, you would essentially a gyroscope and accelerometer in JavaScript, on the web.
There's an event listener called the Reading, and it would, as soon as you start, it would give you that data as well of XYZ as you're moving your phone around.
So I built also a version with that one that I will not have the time to actually show but it works. So you can actually have your phone.
So the only difference here is that you will have to go through web sockets to send the data from your phone to the actual laptop instead of Bluetooth, because it doesn't work with my Bluetooth just yet. So you will be able to actually record it at the same way. Instead of using a button you could just use a press on the screen.
So as soon as you press on the screen, you start recording data, you do the movement, you save everything to a file, and and then you'd be able to play Street Fighter or the Harry Potter games and stuff with your phone.
So that's what I really, really liked.
So I have reboot with the three different versions depending on the devices that you have.
But what is really interesting is that I talked about these three devices, but you might actually have another one that uses the same kind of hardware that you can actually hook up to that as well. Just a little recap.
So I know that I probably spoke really fast. Because usually, like I have a longer version of this talk and I had cut, but then I wanted to say all the things and it was just like, okay.
And just as a recap, so I know that if you've never done that before, it can be a little bit confusing about how to transform the data.
But that's not really what matters right now. What matters is that you understand the steps to go through. It's that you have to record the data, that has nothing to do with TensorFlow JS at all. It's more of a normal JavaScript of how to loop through file and createsobjects and arrays and manipulate data that way.
Then, when you do have your data processing that I just explained, you have the splitting, where you don't give the entirety of your data to an algorithm, you have to split it.
So you only use the training set and not the test set, the test set is for later.
Then you do your training, and you run your predictions. And depending on the accuracy, you actually repeat these steps.
So you retrain and you re-predict and things like that until you actually get to a point where you're happy. Because as soon as the accuracy is always between zero and one.
You will never get one if you get one, you get to what we call overfeeding where the algorithm or the model got too used to the data sample that you gave it.
What you want is something that's 0.9 or 0.99. So as close to one as possible.
And that can be done in different ways.
I actually kind of like I thought it was 20 minutes. I don't, I'm very confused about time.
But anyway, so this was basically it.
I know that this is not something that you're gonna go back to work and say let's build a street fighter with just a recognition. But that's not really the point.
For me, the point is that there's a lot of things to learn. If you are actually getting into that kind of space, not only you learn about hardware, but you learn about hardware in JavaScript, you can learn about TensorFlow JS, you can learn about how to use the generic sensor API with your phone and just build interactive experiences that might not be what we build now, like day to day, I work on JIRA that has nothing to do with that.
But you never know.
Maybe you'll close tickets with your arm or whatever. You don't know, I don't know.
But that's the whole point.
It's like if we only focus, I think Mandy said that if we only focus on what we know now then we're never gonna build anything more exciting. So that was basically, that was it.
If you have any question, I'll be around for a little bit or my DMs are open on Twitter.
But yeah, that was basically it.
Thank you so much for being with me.
(audience clapping) (ecstatic music)
Most of our interactions with technology aren’t really intuitive. We’ve had to adapt to it by learning to type, swipe, execute specific voice commands, etc… but what if we could train technology to adapt to us?
Programming for hardware in JavaScript has already been made accessible with frameworks like Johnny-five, but, combining it with machine learning, we have the opportunity to create new and smarter interactions.
In this presentation, I will talk about how to build a simple gesture recognition system using JavaScript, Arduino and Machine learning.
Showing us some instructional code @devdevcharlie talks about how you want your algorithm to find patterns in the data. #wds19 #webdirections pic.twitter.com/0G9TMZ5sSW
— Web Directions (@webdirections) November 1, 2019
The goal is to play Street Fighter using nothing but body movements. Why? Why is not the point!
Materials:
- arduino with wifi
- IMU hardware sensor linked up to the arduino, providing accelerometer and gyro
- button to differentiate gameplay from other movement (there are other ways to do this but this was simple)
- JavaScript: tensorflow.js, johnny five js library, nodejs server
Step 1: collect the data. What you get back is raw data, six numbers on every line.
Step 2: process the data with tensorflow and train it with lots of samples. We label the events with numbers, to suit tensorflow – 0, 1, 2 are the punch, uppercut and hadoken. The data is mapped into ‘features’ in tensorflow terms. Then you map them into Tensors. You divide up your data into test and training data.
Step 3: create a machine learning model. This step is still more art than science, you try different models and see what works for you. The literal output is a data file (JSON).
Step 4: predict. This is where you start feeding in new data and see if it gets the answers right. For the game, this means we take in new data and predict which move was made.
For the demo Charlie has switched hardware to use a Google Daydream remote, as it produces the same data. But that just changes the data source, not the rest of the code.
Live demo! It did work despite tempting the demo gods!
"Uppercut!" @devdevcharlie shows a working demo of gesture recognition using Street Fighter. #wds19 #webdirections pic.twitter.com/AhsgED7rcY
— Web Directions (@webdirections) November 1, 2019
Once you know how to record and detect gestures, you can record anything.
Next demo: a Harry Potter spell casting app. (lots of wireless interference in the room so it didn’t work). The point is that the code is the same, you just feed it different gestures.
What else can you do with this? Well the inputs are the same as your phone! So whatever you can do with these sensors you will be able to do with phones when those APIs become mainstream. Or you might have any one of a range of other hardware with gyro and accelerometer.
The key steps to understand:
- record data – literally getting the data from a source
- process the data – preparing it so it can be used
- splitting – cut the data down to what your algorithm needs
- training – to improve accuracy of predictions
- predicting – able to use live data for new predictions
Also it doesn’t matter that this isn’t a practical example, the point is to learn how to use hardware and machine learning. If we don’t learn fun new things we’ll never be able to do cool new stuff!
